Manager Workflow
As a manager, you’re the orchestrator of your shop’s operations. You balance customer expectations, dispatch work fairly, oversee quality, and monitor performance. This guide walks you through your daily responsibilities — from triaging tickets to analyzing KPIs.
Your Key Responsibilities
Section titled “Your Key Responsibilities”- Triage & Dispatch: Review new tickets, assign to technicians, set priority
- Kanban Management: Monitor work in progress, move tickets through workflow
- Quote Approvals: Review estimates, approve discounts, manage customer expectations
- QC Oversight: Verify repairs meet quality standards, authorize rework
- Staff Management: Track attendance, clock monitoring, performance review
- KPI Monitoring: Track turnaround time, revenue, alerts, and bottlenecks
Triage: Receiving and Assigning Tickets
Section titled “Triage: Receiving and Assigning Tickets”Every ticket starts with triage. You review new intakes, assign technicians, and set priority.
Step 1: Access the Triage Queue
Section titled “Step 1: Access the Triage Queue”- Go to Dashboard
- Click “Triage Queue” or “New Intakes” (depending on setup)
- You’ll see all tickets in INTAKE status, waiting for assignment
Understanding Ticket Details
Section titled “Understanding Ticket Details”Each ticket shows:
| Field | What to Look For |
|---|---|
| Ticket # | Unique ID (e.g., #REP-101) |
| Customer | Name, phone, email |
| Device | Type (iPhone 14, MacBook Pro, etc.) |
| Issue | Customer’s description |
| Check-in Time | When intake wizard was completed |
| Priority Flag | High/Normal (customer may have requested rush) |
| Photos | Attached evidence of the device |
| Special Notes | Anything front desk flagged (e.g., “VIP customer”, “Liquid damage risk”) |
Step 2: Review and Triage
Section titled “Step 2: Review and Triage”- Click a ticket to open details
- Review photos — See damage, assess complexity
- Read the description — Understand the issue
- Check notes — Any special handling needed?
Assess:
- Complexity: Simple (1-2 hours), Medium (half day), Complex (full day+)
- Priority: Routine, High (customer needs urgently), Urgent (deadline today)
- Specialization: Which tech is best suited? (e.g., liquid damage expert, fast-turnaround specialist)
Step 3: Assign to a Technician
Section titled “Step 3: Assign to a Technician”- Click “Assign Technician”
- Select from your available team:
- Show tech’s current workload (# of tickets in progress)
- Show their specialty (if configured)
- Show availability (logged in, clocked in, etc.)
Criteria for assignment:
- Workload: Don’t overload one person. Spread tickets fairly.
- Specialization: Complex liquid damage → your water damage expert
- Speed: Routine phone screens → your fastest technician
- Learning: Junior tech + mentor tech = good pairing for skill-building
Examples:
- Simple screen replace → Your fast technician (learn to delegate)
- Complex liquid damage → Your water damage specialist
- Routine battery → Junior tech with mentor checking in mid-day
- Same-day rush → Your most experienced person
Step 4: Set Priority
Section titled “Step 4: Set Priority”- Click “Set Priority”
- Choose:
- Normal — Standard turnaround (usually 3-5 days)
- High — Customer needs it urgently (next day or same day)
- Urgent — Deadline today or critical business need
High/Urgent = faster parts sourcing, tech priority, possible rush fee
Tip: Don’t mark everything urgent. Save it for real deadlines. It damages credibility when customers see “rush fees” applied to normal work.
Step 5: Confirm and Move to TRIAGE Status
Section titled “Step 5: Confirm and Move to TRIAGE Status”Click “Confirm Assignment”.
- Ticket moves to TRIAGE status
- Technician sees it in their My Queue
- Technician gets a notification: “You’ve been assigned ticket #REP-101”
- You’ve completed triage. Now it’s the tech’s job.
The Kanban Board: Your Daily Workspace
Section titled “The Kanban Board: Your Daily Workspace”The Kanban board is your visual command center. It shows all tickets by status and who they’re assigned to.
Accessing the Kanban Board
Section titled “Accessing the Kanban Board”- Go to Dashboard
- Click “Kanban Board” (main navigation)
- Or use keyboard shortcut (if enabled):
K
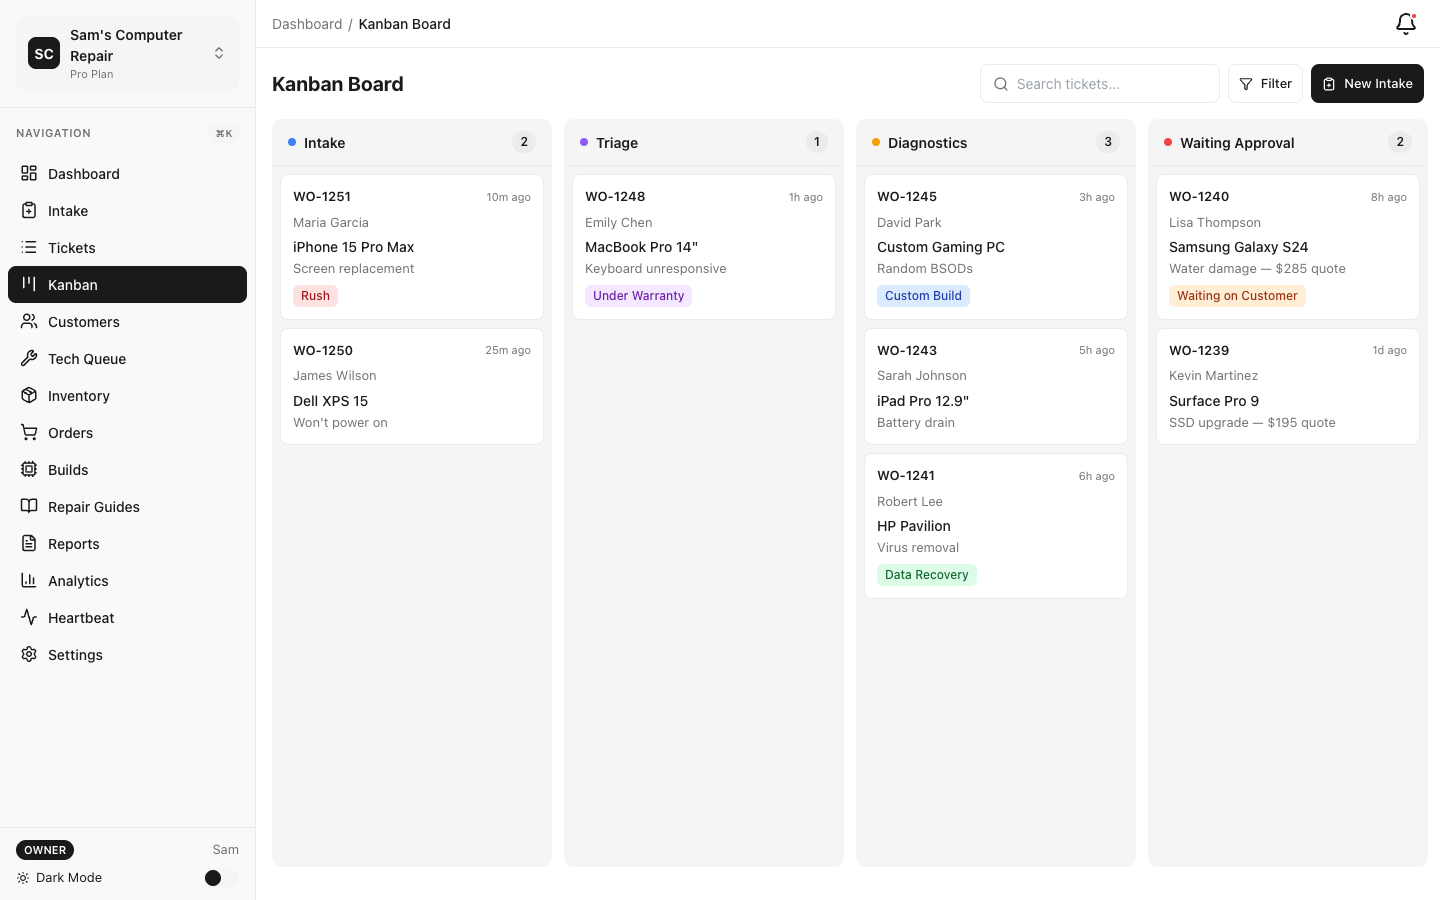
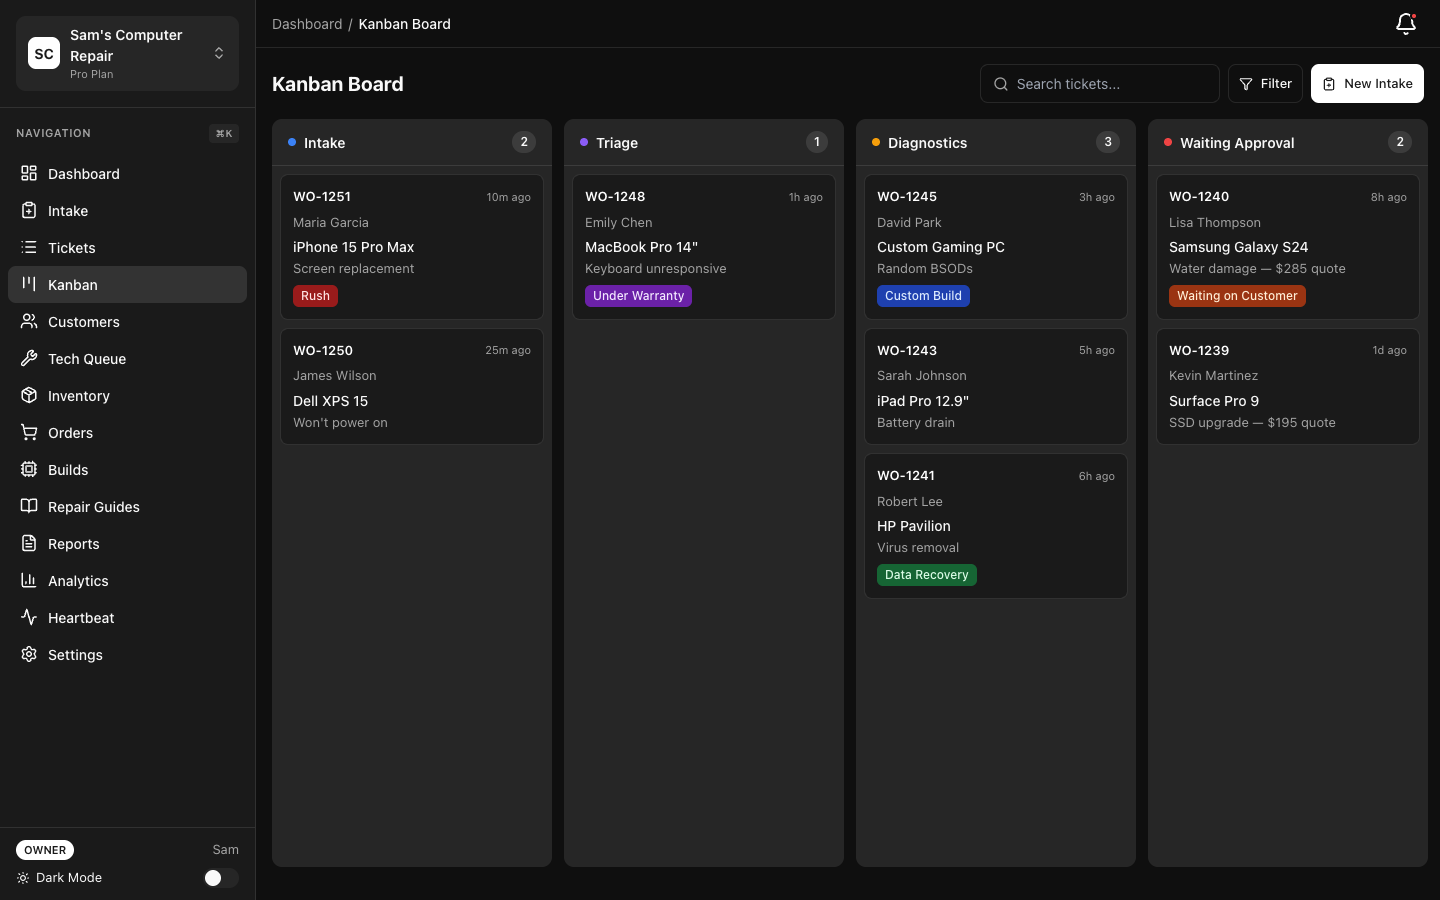
Understanding the Board Layout
Section titled “Understanding the Board Layout”Columns represent workflow stages:
INTAKE | TRIAGE | DIAGNOSTICS | WAITING | APPROVED | IN_REPAIR | QC | READY | PICKED | CLOSED APPROVAL FOR UP PICKUPEach column contains ticket cards showing:
- Ticket # and customer name
- Device type
- Assigned tech (colored badge)
- Days in this status (red if overdue)
- Priority indicator
Real-Time Drag-and-Drop
Section titled “Real-Time Drag-and-Drop”Moving a Ticket:
- Click and hold a ticket card
- Drag left (toward completion) or right (backstep)
- Drop in the new column
- System validates the transition:
- Is this tech allowed to move it?
- Are all exit requirements met (photos, checklist, etc.)?
- If valid: move succeeds, ticket updates, team is notified
- If invalid: error message shows why (e.g., “Missing diagnostics summary”)
Example:
- Drag ticket from DIAGNOSTICS → WAITING_APPROVAL (requires diagnosis summary)
- System checks: “Is summary complete?” Yes → Move succeeds
- Front desk gets a notification: “Quote ready for #REP-101”
Filtering the Board
Section titled “Filtering the Board”Too many tickets? Filter by:
- Status — Show only QC_REVIEW (focus on quality items)
- Technician — Show only your water damage specialist’s tickets
- Priority — Show only High/Urgent (keep tabs on expedited work)
- Days in Status — Show tickets older than 2 days (spot bottlenecks)
- Shop/Location — If managing multiple shops
Example Workflow:
- Morning: Filter by “High + Urgent” → See what’s critical today
- Mid-day: Filter by “QC_REVIEW” → Check quality throughput
- End of day: Filter by “>2 days in status” → Spot stuck tickets
Alerts & Indicators
Section titled “Alerts & Indicators”The board color-codes tickets for quick scanning:
| Color | Meaning |
|---|---|
| Red | Overdue (exceeds expected turnaround) |
| Yellow | Approaching deadline |
| Green | On track |
| Blue | High priority / rush |
Oversight Tasks: Quotes, Approvals, QC
Section titled “Oversight Tasks: Quotes, Approvals, QC”Quote Review and Discount Approval
Section titled “Quote Review and Discount Approval”Technicians and front desk build quotes. You approve them (especially discounts):
-
See a ticket stuck in WAITING_APPROVAL with no quote yet?
- Click the ticket → “Add Quote”
- Enter parts, labor, and services
- Send to customer
-
Customer requested a discount?
- Review the quote first
- Decide: Can we lower the price? Is this a loyal customer? Margin acceptable?
- Click “Apply Discount” and approve
- Document: “10% loyalty discount approved”
-
Parts are expensive and need authorization?
- Review the quote parts list
- Confirm they’re necessary and priced fairly
- Approve or ask tech for alternative
QC Review: The Quality Gate
Section titled “QC Review: The Quality Gate”QC is where you (or a dedicated QC person) verify repairs meet standards.
Understanding QC_REVIEW Status
Section titled “Understanding QC_REVIEW Status”Tickets in QC_REVIEW have been repaired and are waiting for verification. You’ll see:
- Repair notes from the tech
- Parts used and labor logged
- Photos taken during repair
- Work summary
Your QC Checklist
Section titled “Your QC Checklist”-
Visual Inspection:
- Device clean and reassembled properly?
- No missing screws or loose parts?
- Cables routed correctly?
- Adhesive seals tight?
-
Functional Testing:
- Does it power on and off?
- All buttons responding?
- Screen/display working?
- Speakers, mic, charging working?
- Apps launching and responding?
- Battery life reasonable?
-
Validation Against Repair:
- Parts replaced match the quote?
- Work was appropriate for the issue?
- Tech’s notes make sense (no red flags)?
-
Photo Review:
- Before/after photos show the issue and resolution?
- Evidence supports the work?
Passing QC
Section titled “Passing QC”Click “QC Pass” if everything checks out:
- Ticket moves to READY_FOR_PICKUP
- Customer is notified: “Your device is ready!”
- Front desk schedules pickup
- Device moves to pickup queue
Failing QC
Section titled “Failing QC”Click “QC Fail” if you find issues:
-
Select the issue:
- “Screen not fully responsive in corners”
- “Cracked back case”
- “Missing screws”
- “Other” (describe)
-
Severity:
- Critical → Customer will notice immediately
- Major → Will degrade over time
- Minor → Cosmetic only
-
Notes to Tech:
- “Screen right edge unresponsive. Reseat the cable or try gentle pressure on the corner. Test all corners before sending back.”
- “Back case has new crack near camera. Order replacement case and reassemble.”
-
Ticket returns to IN_REPAIR — Tech reworks it and sends back to QC
Pro Tip: Take photos during QC too. If a customer disputes, you have evidence you tested it.
Handling High Rework Rates
Section titled “Handling High Rework Rates”If a tech has multiple QC failures:
-
One-on-one conversation — Ask what’s happening
- Rushing? Distracted? Using bad parts?
- Need more training? Tools need replacing?
-
Pair with a mentor — Have a senior tech co-sign their work for a week
-
Slow them down — If speed is the issue, reduce ticket volume; quality over speed
-
Retrain — Go back to basics; maybe they skipped a step
Staff Management: Presence, Time, and Performance
Section titled “Staff Management: Presence, Time, and Performance”Who’s Online and Working?
Section titled “Who’s Online and Working?”Go to Dashboard → Staff Presence (or “Who’s Online”):
You see:
- Clocked-in staff (green dot = online, red = offline)
- Location (on-site, remote, etc.)
- Current ticket (what are they working on?)
- Hours worked today (vs. scheduled hours)
- Last activity (when did they last interact with the system?)
Use this to:
- Spot idle staff (haven’t done work in 30 min? Check in)
- Coordinate cross-shop help (if one location is slammed)
- Track no-shows (staff didn’t clock in as expected)
Time Clock Oversight
Section titled “Time Clock Oversight”Go to Staff → Time & Attendance:
| View | What to Check |
|---|---|
| This Week | Hours logged vs. scheduled |
| This Month | Overtime hours (may need approval) |
| By Person | Any attendance issues? |
| Pending Approvals | Manual time entries from staff (approve/deny) |
Approve time entries:
- See a tech logged “12 hours” (unusual?)
- Click to review: “Started 8 AM, ended 8 PM, no break logged”
- Approve (ok, they worked hard) or Deny (ask tech to correct)
Track PTO:
- See how much vacation/sick time each person has left
- When approving time off, update their remaining balance
- Alert if someone is about to lose unused days
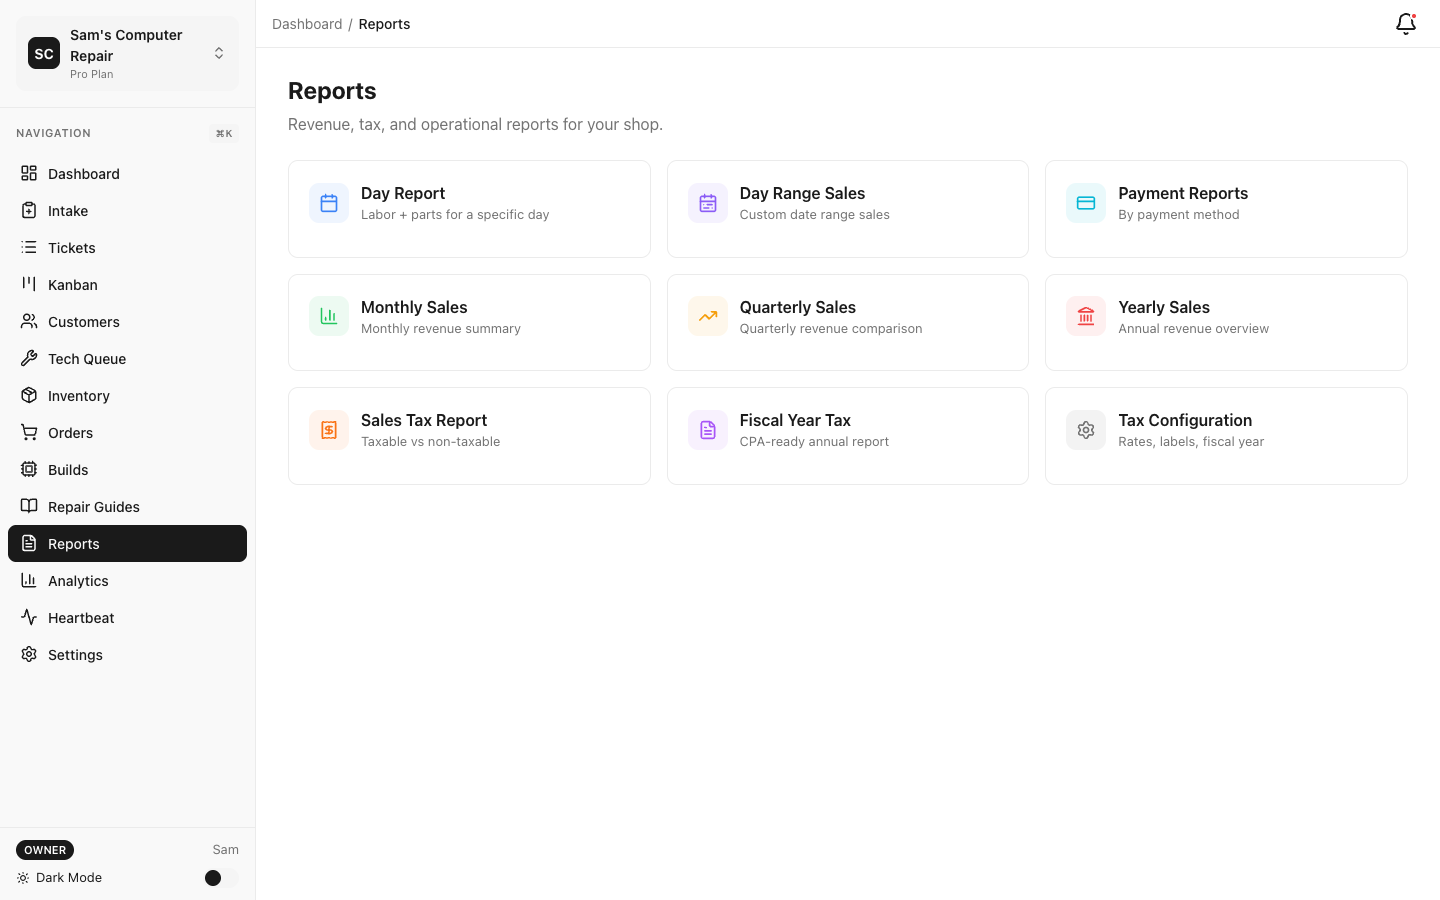
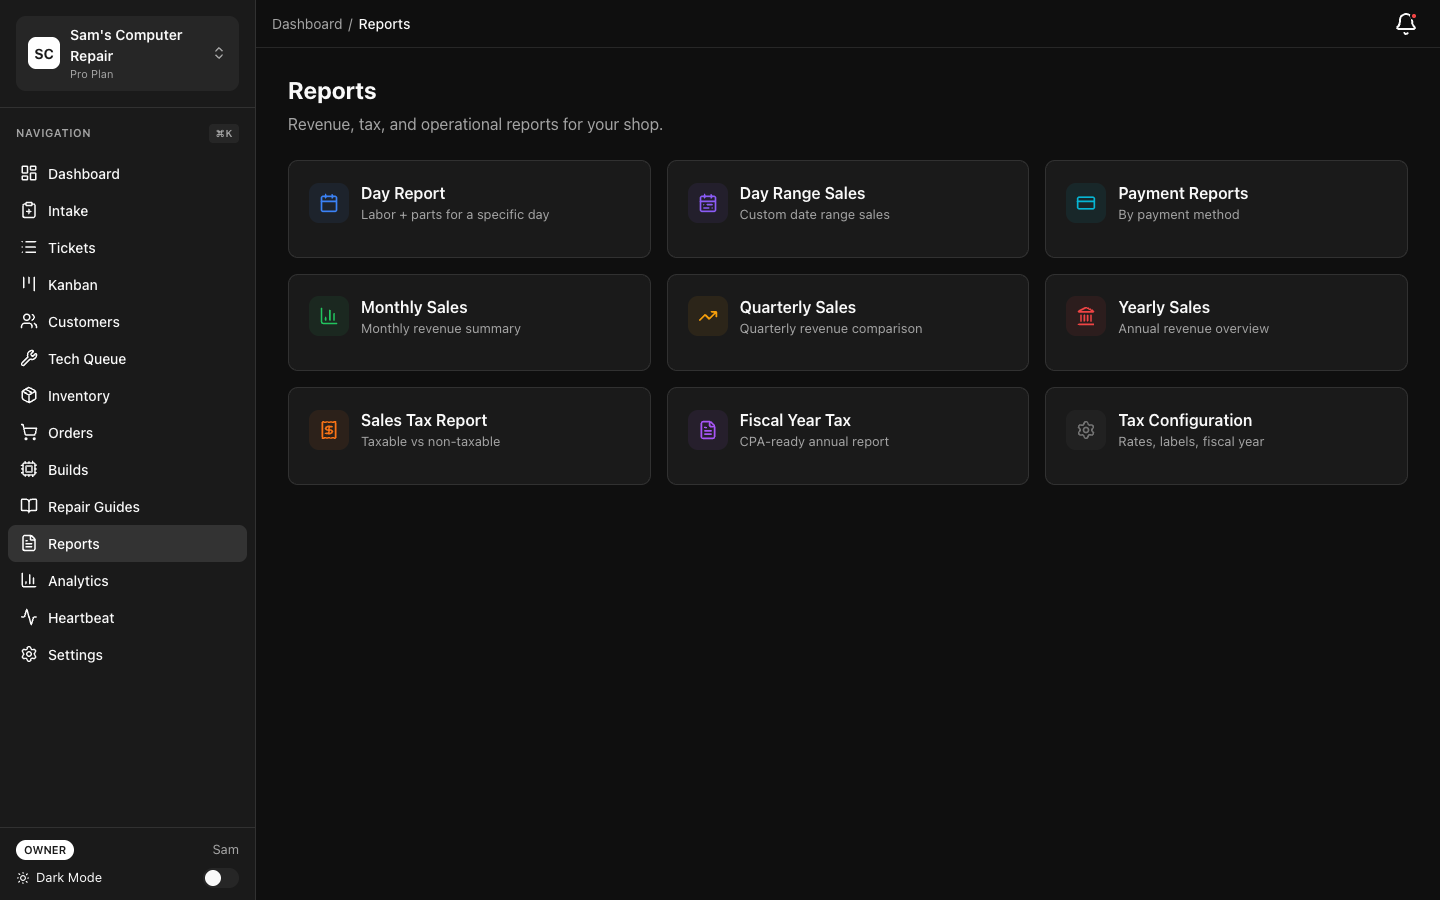
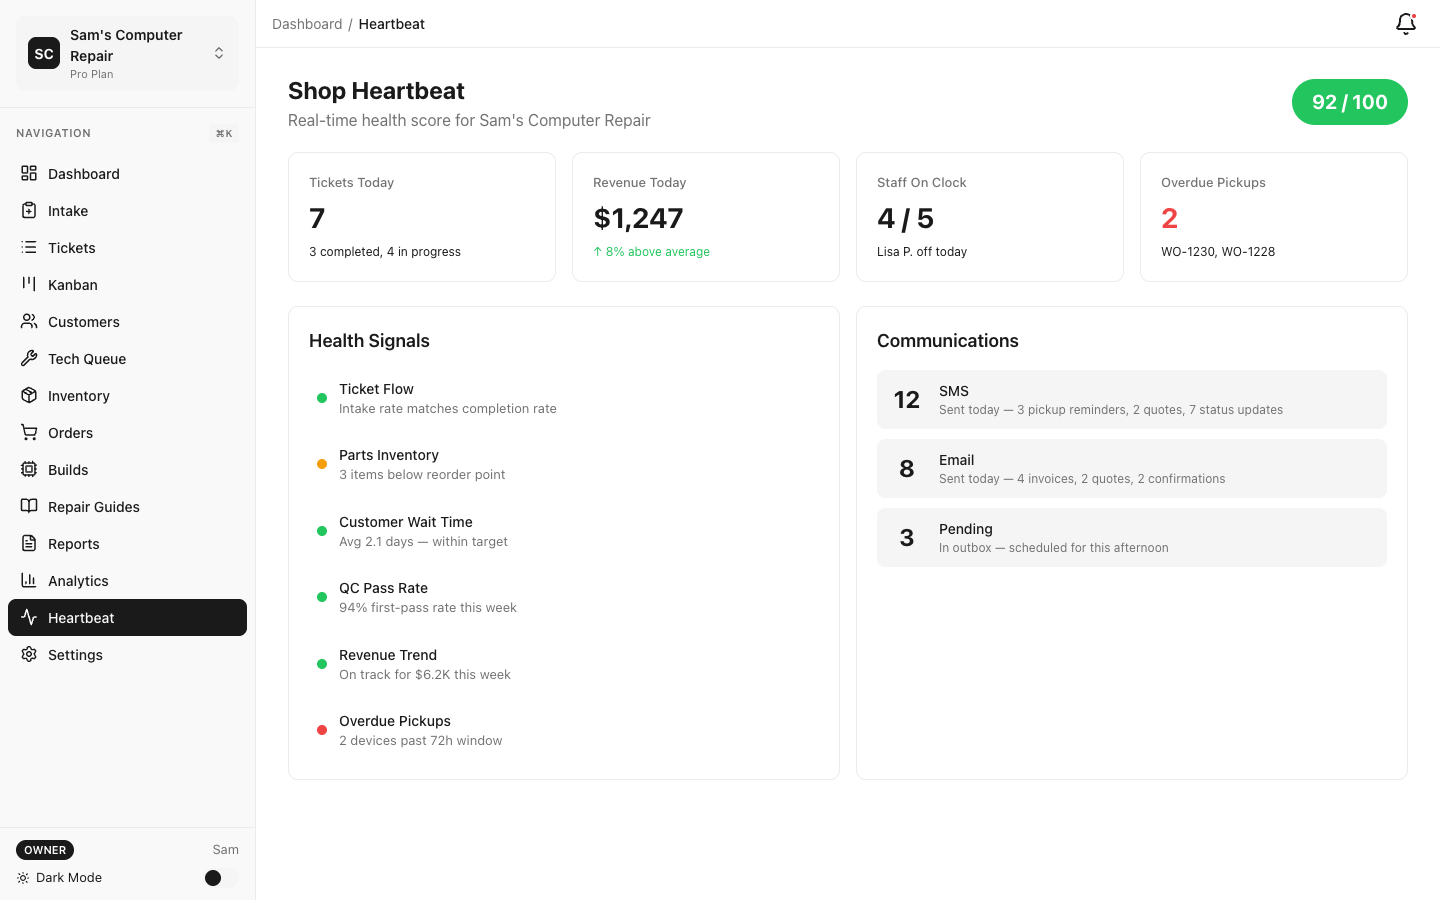
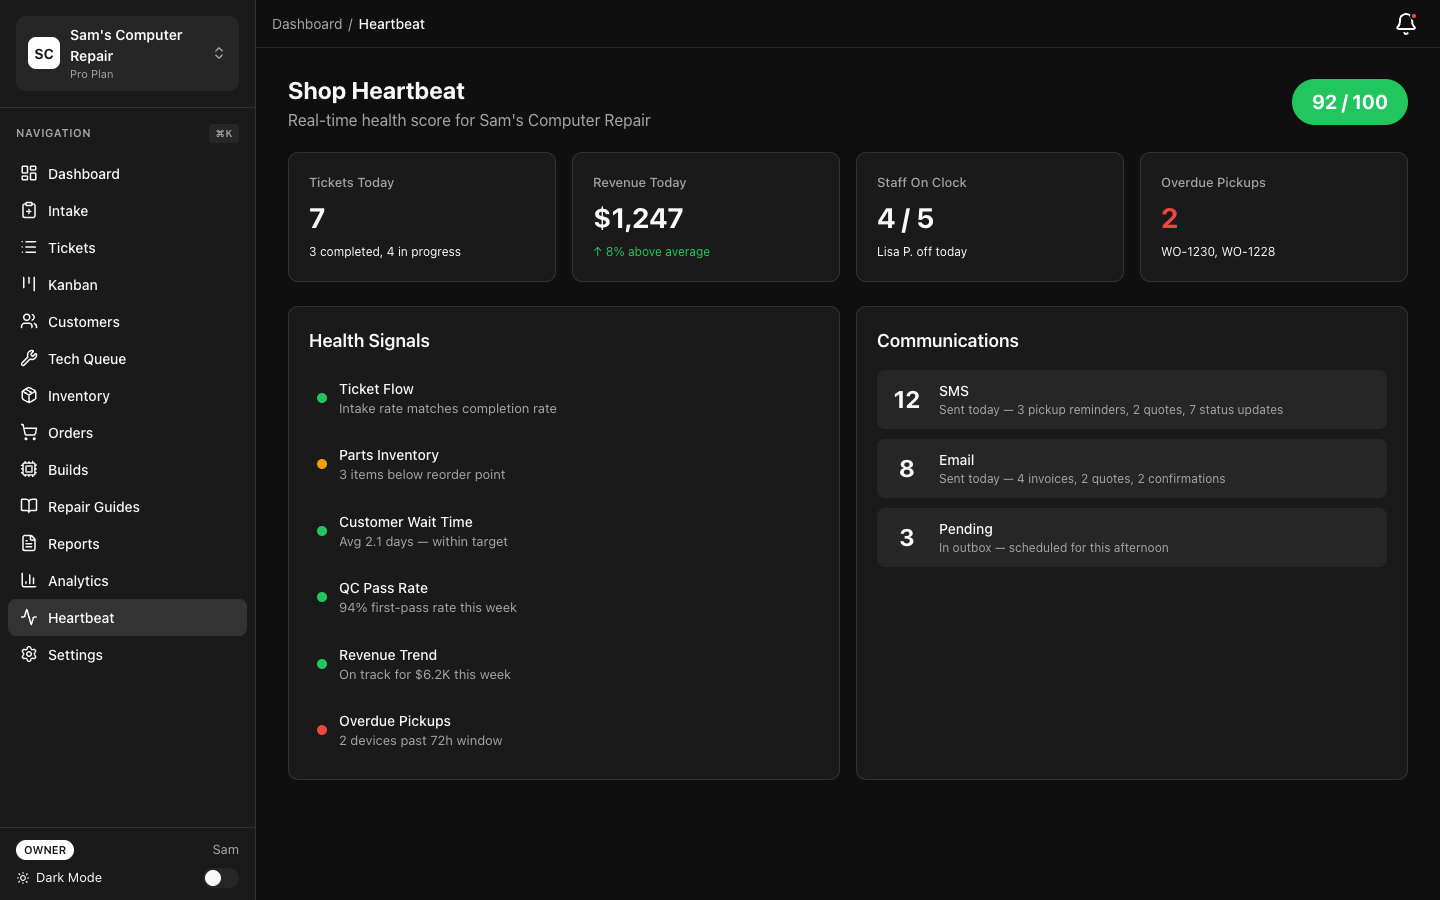
KPI Dashboards and Analytics
Section titled “KPI Dashboards and Analytics”Your shop’s heartbeat is captured in KPIs. Check them daily.
Key Performance Indicators
Section titled “Key Performance Indicators”Go to Dashboard → KPIs or Analytics:
Shop-Level Metrics
Section titled “Shop-Level Metrics”| Metric | Target | How to Improve |
|---|---|---|
| Avg Turnaround Time | 3-5 days | Reduce bottlenecks in QC or parts |
| On-Time Completion % | 95%+ | Alert on overdue tickets early |
| Revenue This Month | Budget target | Check quote approvals, avoid discounts |
| Ticket Volume | Projected | Hire if backlog growing |
| Customer Satisfaction | 4.5+ stars | Fix QC issues, improve communication |
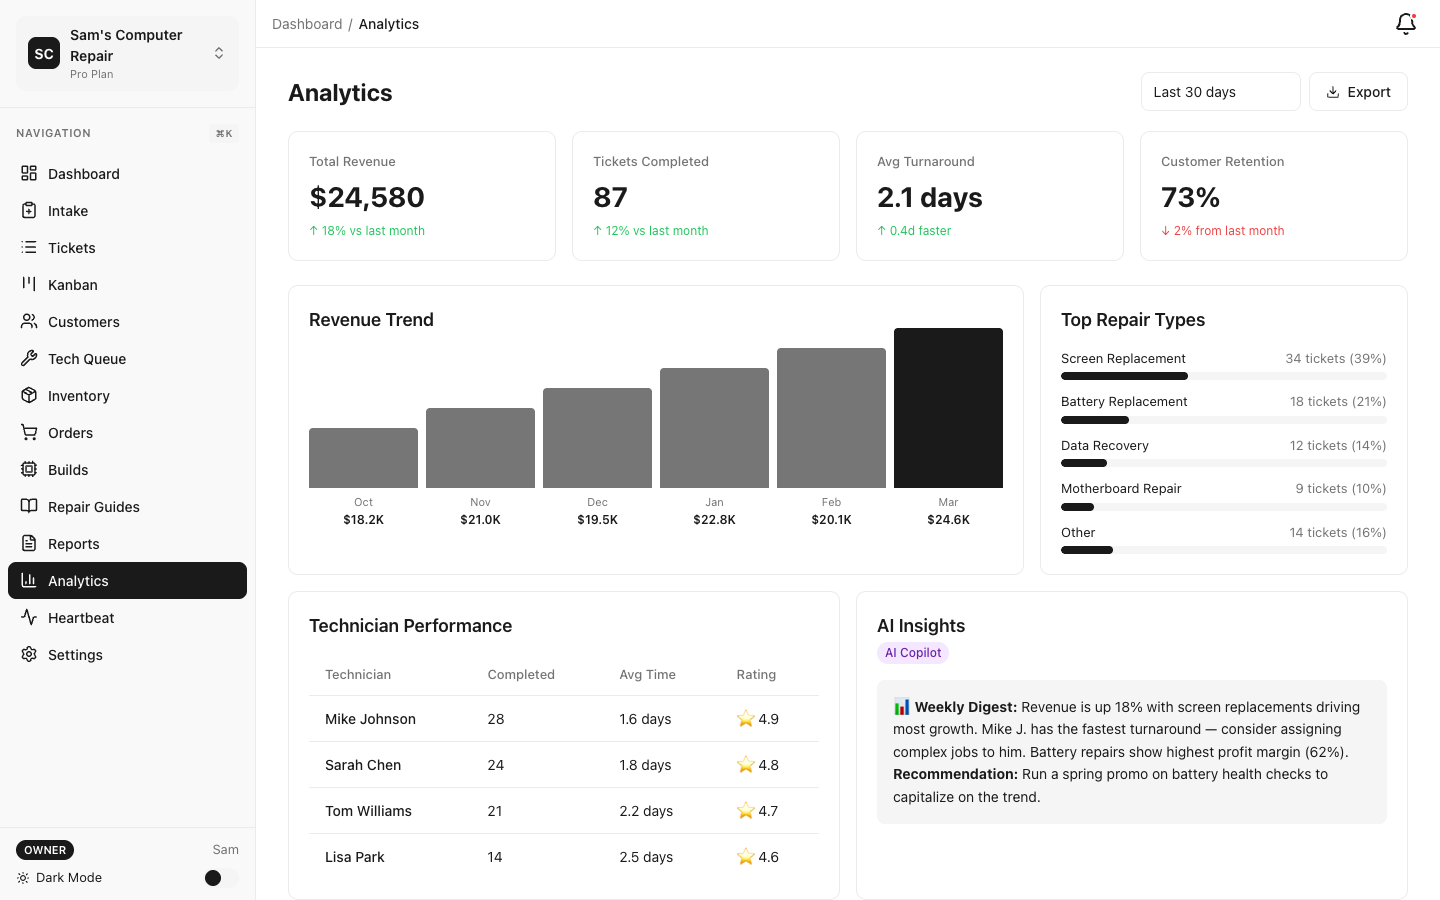
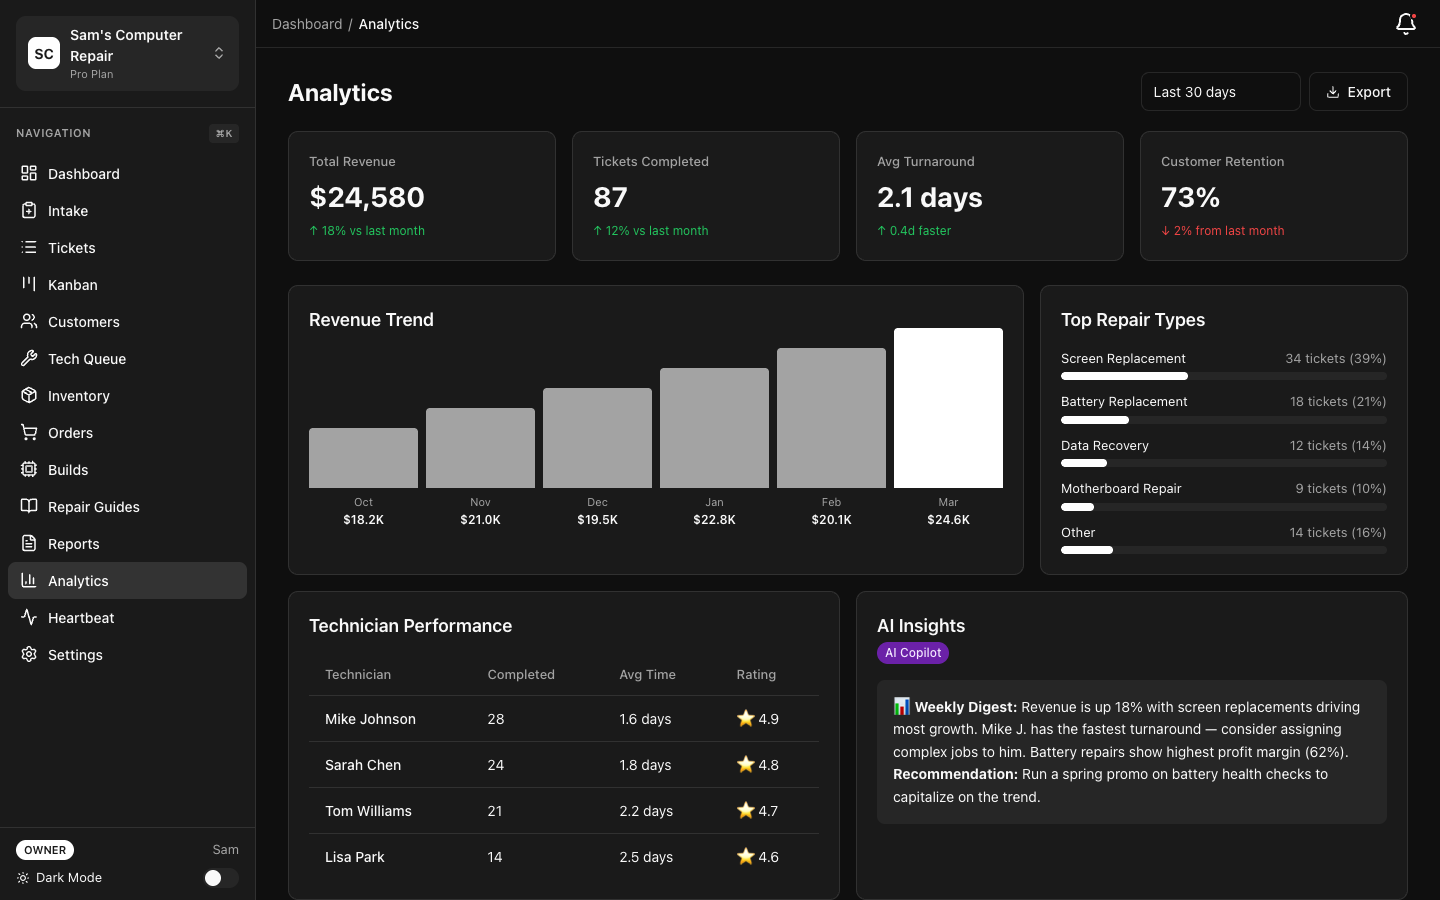
Technician-Level Metrics
Section titled “Technician-Level Metrics”Each tech’s stats (no shame, just transparency):
| Metric | What It Means |
|---|---|
| Tickets Completed | Volume (make sure it’s quality too) |
| Avg Repair Time | Efficiency (faster = higher margin) |
| Rework Rate | Quality (lower is better) |
| On-Time Rate | Reliability (are they meeting deadlines?) |
| Parts Waste | Accountability (broken parts = cost) |
Important: Don’t create a toxic leaderboard. Use metrics to support, not to shame. “Sarah’s avg time is 4 hours — let’s figure out how to help others be as efficient” (good) vs. “Sarah is fastest, everyone else is slow” (bad).
Spotting Problems Early
Section titled “Spotting Problems Early”-
Turnaround creeping up?
- Check QC column — are quality issues backing up repairs?
- Check parts column — are orders delayed?
- Check diagnostics — are techs taking too long to diagnose?
-
Rework rate spiking?
- Meet with the tech — is there an issue?
- Check parts quality — bad screen supplier?
- Check guides — is process documentation clear?
-
Customer complaints increasing?
- Sample recent QC passes — did you approve something shaky?
- Check communication — are customers being updated?
- Check time tracking — are quotes accurate?
Alerts and Escalations
Section titled “Alerts and Escalations”Set up alerts for things you care about. These pop up on your dashboard:
Common Alerts to Enable
Section titled “Common Alerts to Enable”- Overdue Tickets — Ticket exceeds turnaround by 1+ day
- Parts on Backorder — Parts delayed; customer needs update
- High Priority No Update — Urgent ticket hasn’t moved in 4+ hours
- QC Fail Rate — Tech’s rework rate exceeds 10%
- No Assignments — Technician has no work in queue
- Customer No Response — Quote sent 24+ hours ago, no approval yet
- Low Inventory — Stock below reorder threshold
When an alert fires:
- Don’t panic (usually not emergency)
- Click to see the ticket/issue
- Take action (move ticket, order parts, follow up with customer)
- Document what you did
Inventory and Parts Management
Section titled “Inventory and Parts Management”You oversee parts ordering and stock levels.
Checking Inventory Levels
Section titled “Checking Inventory Levels”-
Go to Supplies → Inventory
-
See all parts with:
- Quantity in stock
- Reorder level (when to order more)
- Lead time (how long to ship)
- Unit cost and supplier
-
Red flags:
- Stock is below reorder level
- Lead time is long (supply risk)
- Cost is rising (renegotiate with supplier?)
Approving Part Orders
Section titled “Approving Part Orders”- See a tech request a part you don’t stock
- Evaluate:
- Can we source it in time?
- Is the cost reasonable?
- Should we stock it going forward?
- Click “Approve Order” → Goes to your vendor
- Track delivery → Add to inventory when it arrives
Vendor Relationships
Section titled “Vendor Relationships”Maintain relationships with key suppliers:
- Monthly review of costs and lead times
- Order volume discounts
- Returns/RMA for defective parts
- Rush shipping options (for high-priority repairs)
Expediting and Priority Management
Section titled “Expediting and Priority Management”Inevitably, a customer will need their device faster than normal.
When a Customer Requests Rush Service
Section titled “When a Customer Requests Rush Service”-
Front desk alerts you: “Customer wants same-day turnaround”
-
Review the ticket:
- Is the tech assigned? Are they free?
- Are parts in stock?
- Is the repair actually simple enough?
-
Decide:
- Yes: Approve rush, add rush fee to quote, prioritize on Kanban
- No: Explain to customer what’s realistic
-
Notify the tech: “This is high priority. Move it to front of queue.”
-
Track progress: Check Kanban board throughout day
Moving a Ticket to High Priority
Section titled “Moving a Ticket to High Priority”- Click the ticket on Kanban board
- Click “Change Priority” → Select “Urgent”
- Ticket moves to top of the respective column
- Team sees the blue flag
End-of-Day Closeout
Section titled “End-of-Day Closeout”Spend 15 minutes at end of day reviewing:
-
Open Tickets:
- Any stuck in same status for 2+ days?
- Any waiting for customer approval (contact them?)
- Any missing QC pass after 24 hours?
-
Completed Tickets:
- Acknowledge: “Great work finishing 8 tickets today, team!”
- Check quality (spot-check a few QC passes)
- Ensure invoices/receipts were sent
-
Tomorrow’s Plan:
- Check inbound appointments/intakes
- Pre-assign tickets to available techs
- Flag any resource needs (parts, coverage, etc.)
-
Alerts:
- Resolve any outstanding alerts
- Schedule follow-ups if needed
Best Practices
Section titled “Best Practices”-
Fair workload distribution. Don’t overload one person. Spread equitably.
-
Clear assignment notes. “This customer is fussy — take extra care and photos” helps.
-
Celebrate wins. “Great QC work this week, team! No reworks.” Culture matters.
-
Support, don’t shame. High rework rate? Help. Don’t punish.
-
Be visible. Walk around the shop, see what techs are working on. You’ll catch issues early.
-
Communicate with customers. Proactive updates prevent complaints.
-
Review metrics weekly. Not just daily. Spot trends.
-
Escalate early. Part delayed? Tell customer now, not after they ask.
-
Invest in training. New tech? New part? Invest in learning. Pays off long-term.
-
Automate what you can. Don’t manually track things. Let RepairOps do it.
Quick Reference: Your Daily Checklist
Section titled “Quick Reference: Your Daily Checklist”- Morning: Filter Kanban by High/Urgent — what’s critical today?
- Check Alerts — any overdue tickets? Low inventory? No-response quotes?
- Check Triage Queue — any new intakes waiting for assignment?
- Assign new tickets to appropriate techs
- Mid-day: Check QC queue — anything failing repeatedly?
- Check staff presence — anyone idle? Help or redirect?
- End of day: Review KPIs — trends? Problems?
- Tomorrow: Plan assignments, review forecast
Support
Section titled “Support”- How do I move a ticket that won’t validate? See the error message — it tells you what’s missing (e.g., “diagnostics summary required”)
- What if a tech disputes their rework rate? Meet 1-on-1, review tickets together, understand the issue
- How do I forecast staffing? Use ticket volume trend + lead time. Hire before you’re overwhelmed.
- Questions about KPIs? See Analytics or ask support@repairops.app
Version: 1.0.0 Last Updated: March 2026 Role: Managers, Shift Supervisors, Shop Owners