Front Desk Workflow
As the front-facing voice of your shop, you’re the first person customers meet and the last they see. Your role is critical to managing expectations, building quotes, and ensuring smooth customer experiences from intake through pickup.
Your Key Responsibilities
Section titled “Your Key Responsibilities”- Intake: Collect customer info, device details, and issue description
- Quotes: Build line-item estimates and send approval links
- Payments: Process payments (cash, card, online)
- Pickup: Verify customer identity, collect signatures, generate receipts
- Communication: Answer status questions, update customers on progress
Intake: Creating a New Ticket
Section titled “Intake: Creating a New Ticket”The intake wizard is your main tool for starting repairs. It captures all the data needed to route and fix the device.
Step 1: Open the Intake Wizard
Section titled “Step 1: Open the Intake Wizard”- Click “New Ticket” (blue button, top-right corner)
- Or go to Dashboard → Intake → “Start New Repair”
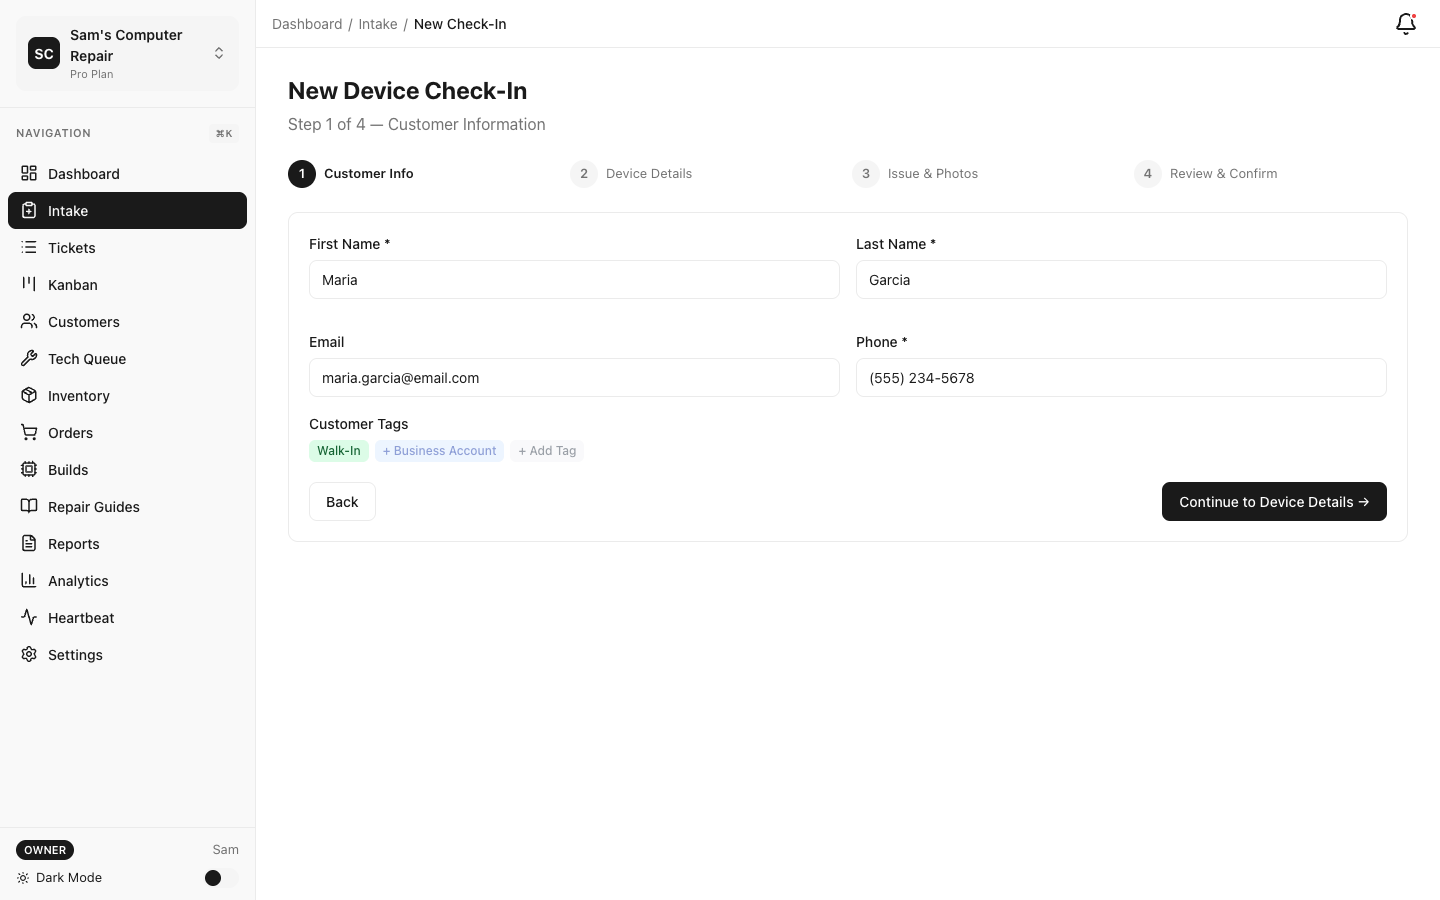

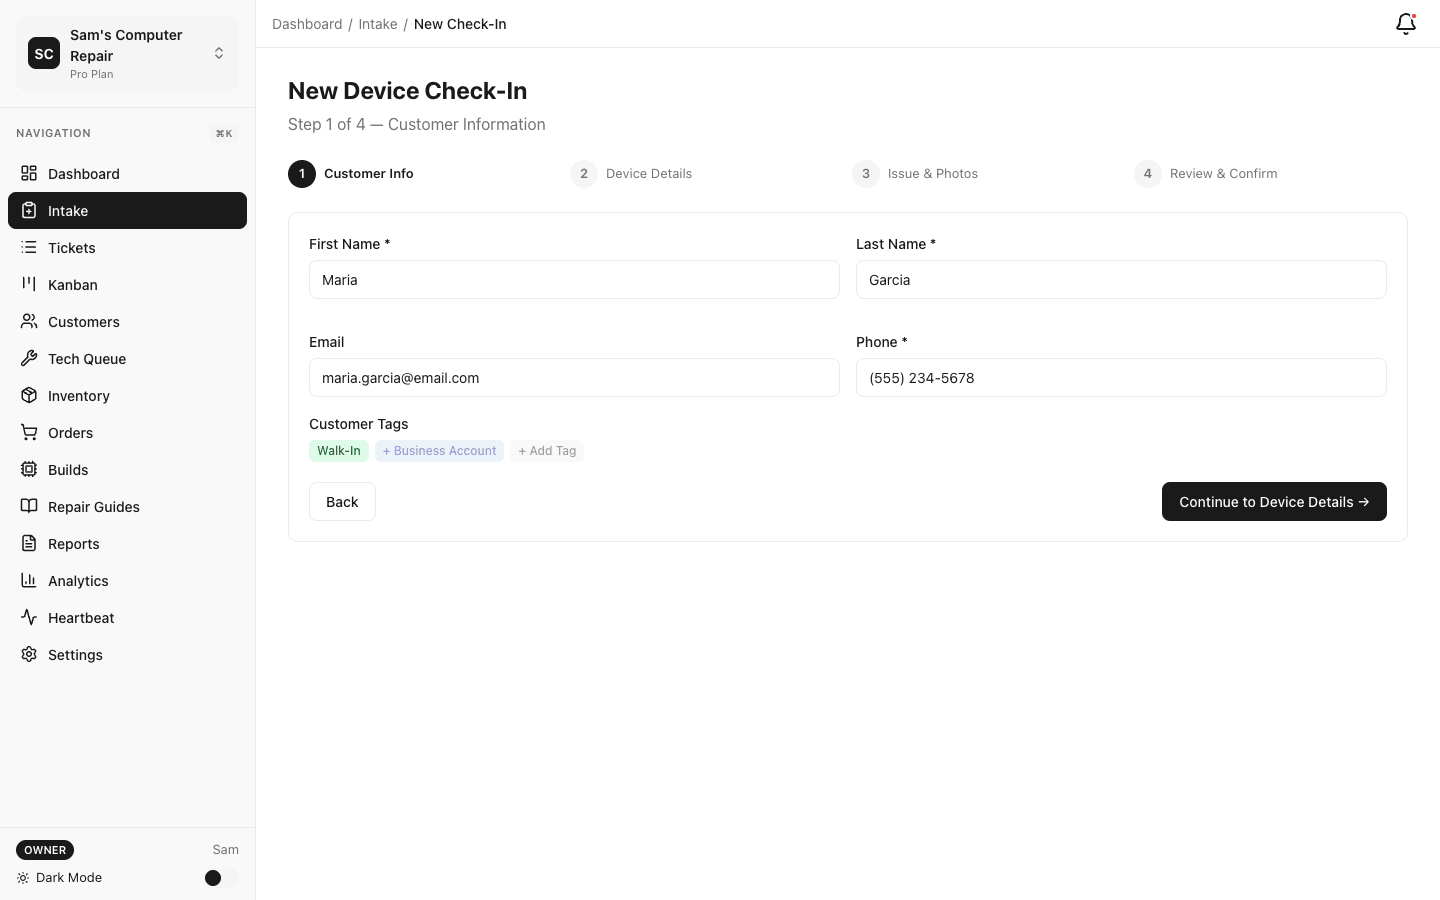
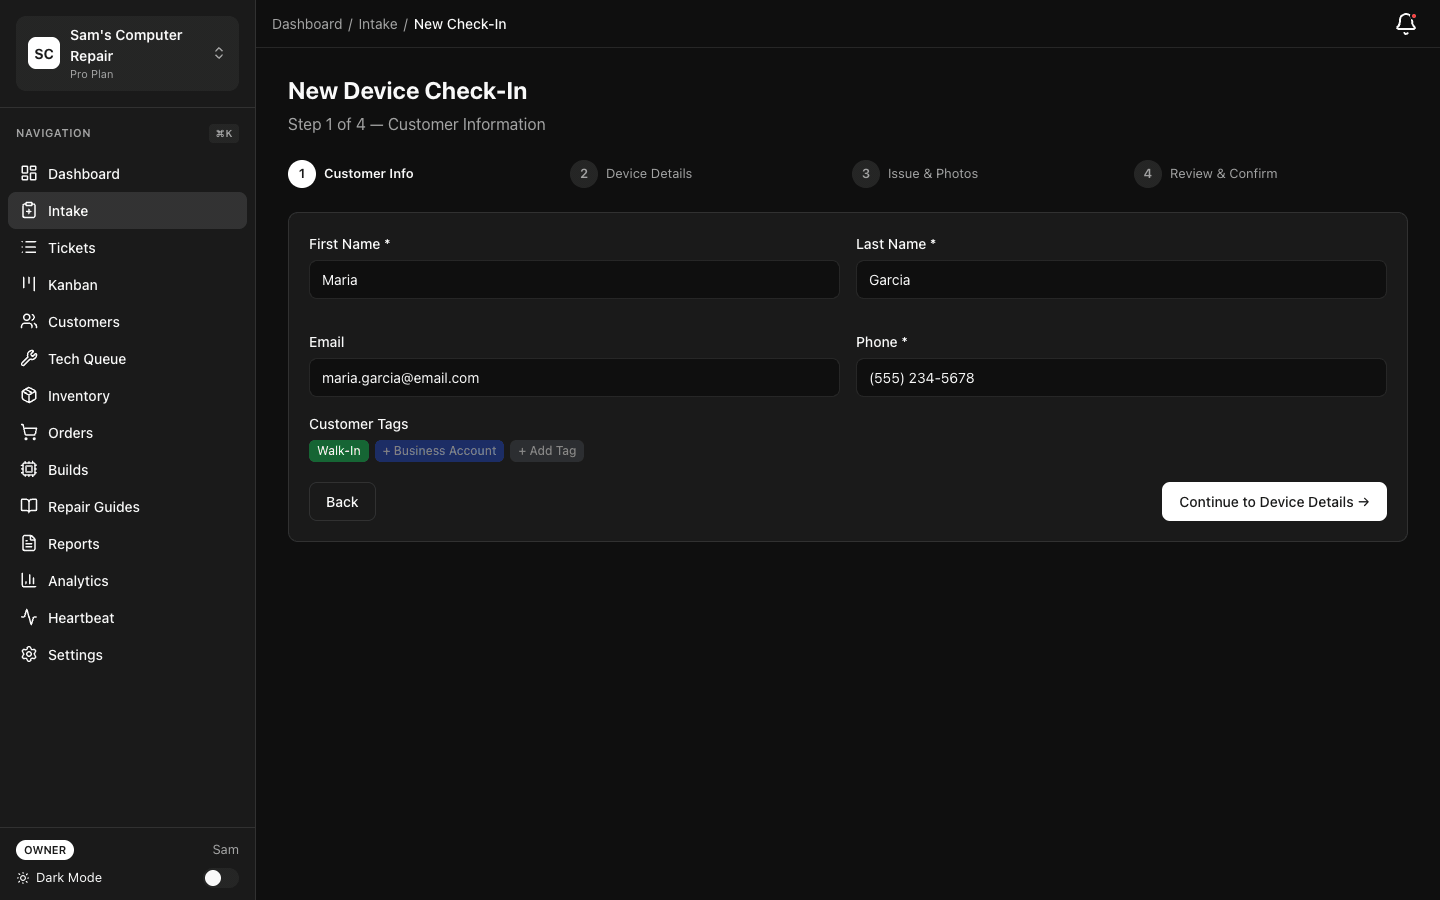
Step 2: Customer Information
Section titled “Step 2: Customer Information”Fill in the customer details (or search if they’re a returning customer):
- Name — Full name as you’ll use it in messages
- Phone — Primary contact number
- Email — For approval links and receipt delivery
- Address — Optional; helpful for delivery or follow-up
Tip: If the customer is in your system, search by name or phone. This skips the form and pre-fills their info. New customers? The system creates a record automatically.
Step 3: Device Information
Section titled “Step 3: Device Information”Describe what’s being repaired:
- Device Type — e.g., “iPhone 14 Pro”, “Dell XPS 13 Laptop”, “Nintendo Switch”
- Serial/IMEI — Optional but helpful for tracking. You can take a photo of it later.
- Issue Category — Select from your shop’s categories (Phone Screen, Water Damage, Battery, etc.)
- Description — What brought them in? “Cracked screen”, “Won’t turn on”, “Dropped in water”
Step 4: Attach Photos
Section titled “Step 4: Attach Photos”Photos are evidence. Customers see them later; technicians use them to prepare.
- Take a photo — Use your phone/tablet camera (if on-site)
- Upload a photo — Click “Choose File” to upload from your device
- Requirement: Minimum 2 photos. One should show the damage clearly.
Why? Photos protect you in disputes, help technicians diagnose faster, and let customers know you documented their concern.
Step 5: Consent & Agreement
Section titled “Step 5: Consent & Agreement”- Check “I have obtained customer consent” — Confirms the customer agreed to the repair terms
- Optional: Add notes — “Customer in a rush, prefers call over email”, “High-value device, handle with care”
Step 6: Review & Create
Section titled “Step 6: Review & Create”Review the ticket summary and click “Create Ticket”.
The system will:
- Assign a unique ticket number (e.g., #REP-001)
- Generate a barcode/QR code (printed or displayed on a label)
- Move the ticket to INTAKE status
- Send the manager a notification (if configured)
Success! Your ticket is created. Hand the barcode sticker to the customer. When they pick up the device, they’ll use this code.
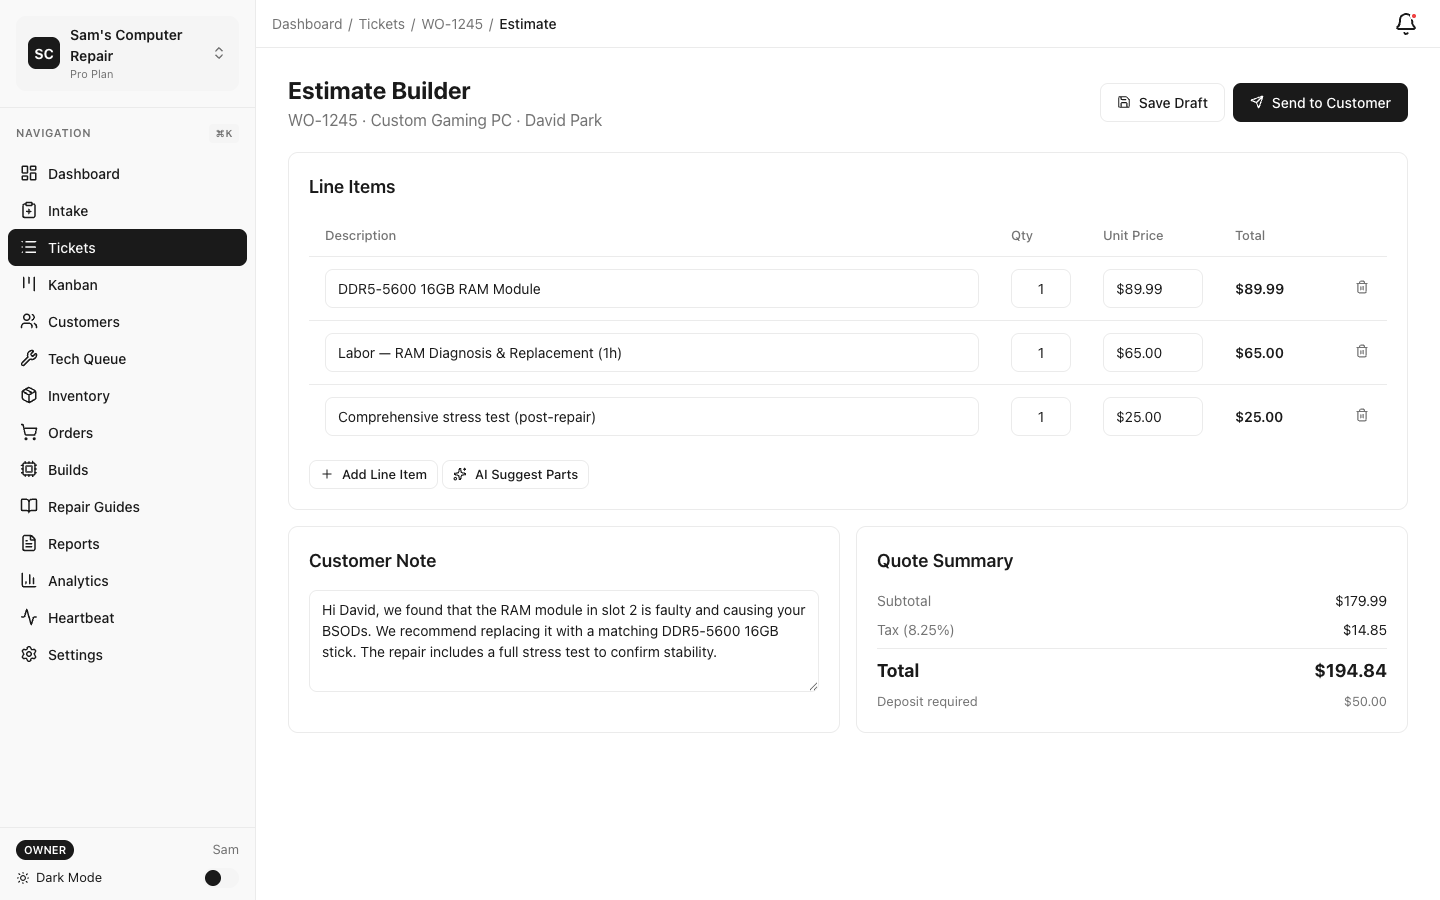
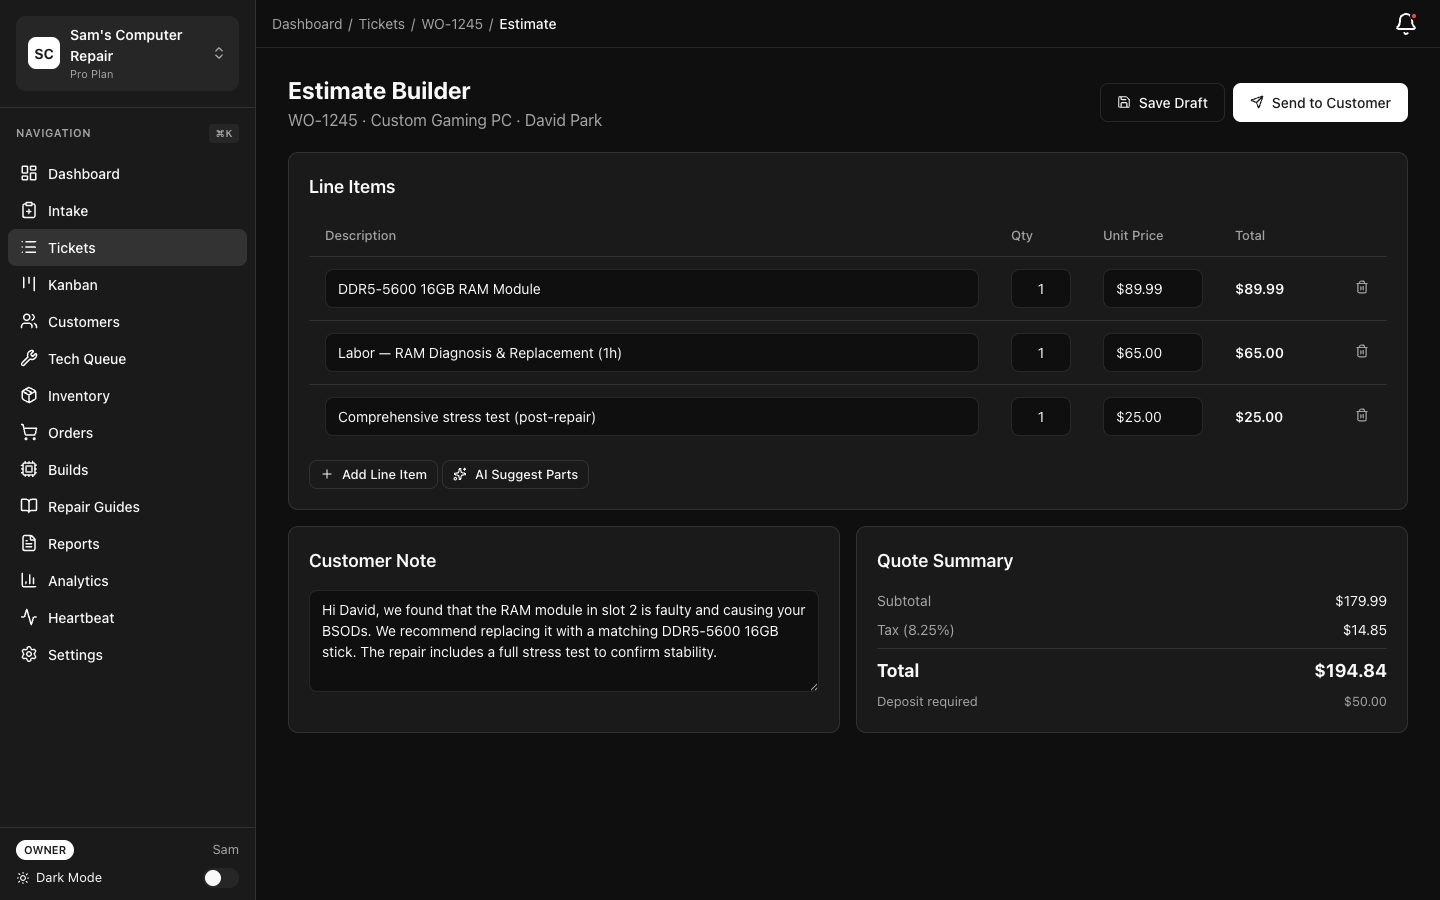
Building Quotes and Estimates
Section titled “Building Quotes and Estimates”Once the technician has diagnosed the device, they’ll notify you (or a manager) to build the quote. This is where you collect payment authorization.
The Quote Contains:
Section titled “The Quote Contains:”- Parts: Replacement parts needed (e.g., “iPhone 14 Screen - $80”)
- Labor: Technician hours (e.g., “2 hours @ $50/hr = $100”)
- Services: Add-ons like rush fees, diagnostics, or insurance
Step 1: Open the Ticket
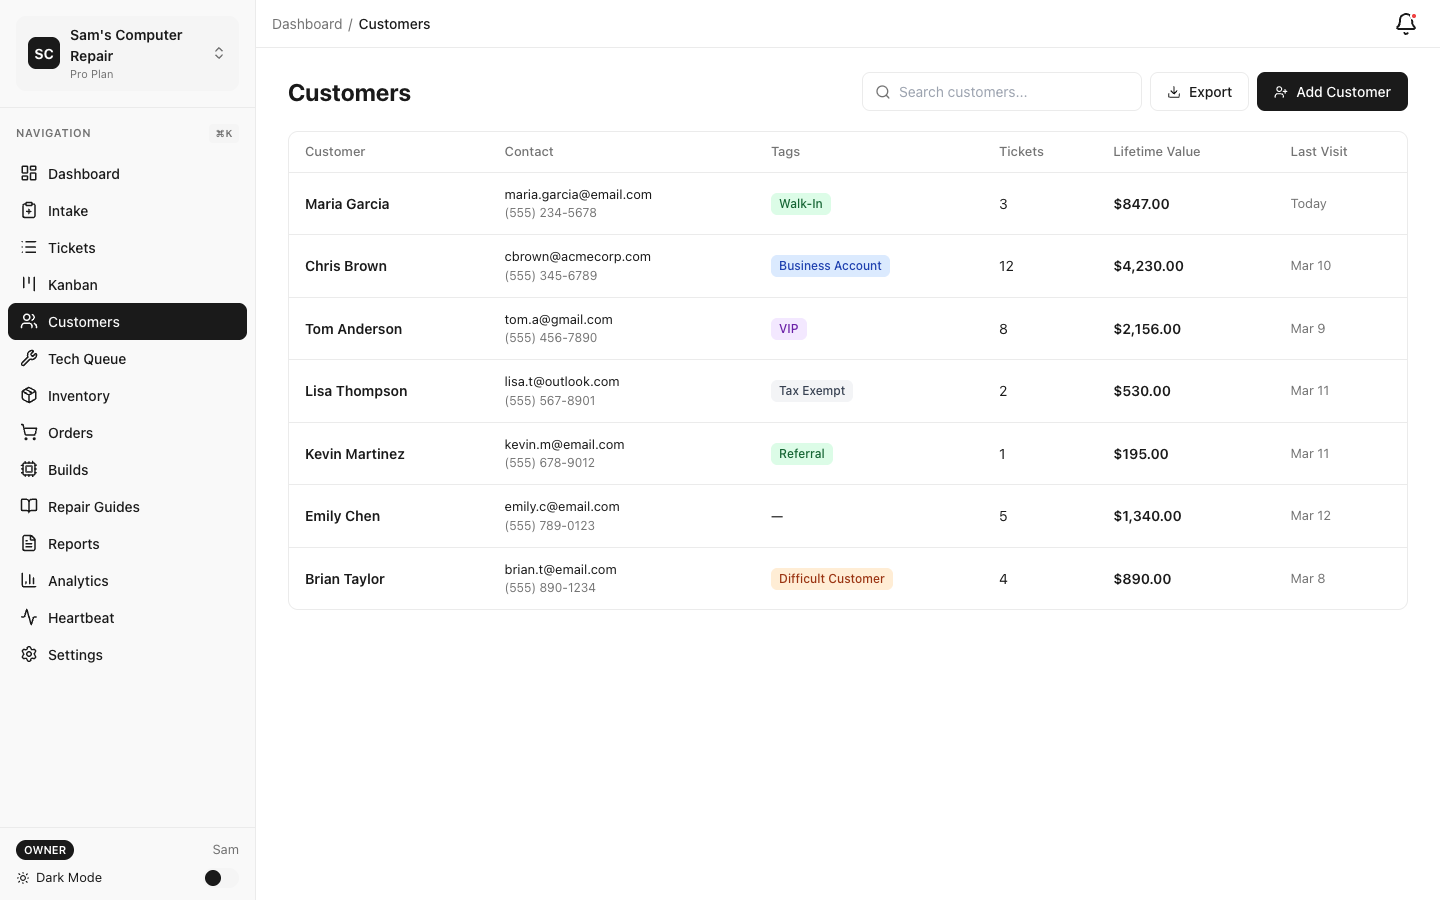
Section titled “Step 1: Open the Ticket”- Go to Dashboard → Kanban or Search
- Find the ticket (search by name, phone, or ticket #)
- Click to open the ticket detail view
Step 2: Add Line Items
Section titled “Step 2: Add Line Items”Click “Add Quote Line Item” and fill in:
- Item Type — Select “Part”, “Labor”, or “Service”
- Description — “iPhone 14 Screen”, “Diagnostics”, “2-hour labor”
- Unit Price — Cost per unit
- Quantity — How many? (1 screen, 2 hours of labor, etc.)
- Total — Auto-calculated
Examples:
| Item | Type | Description | Unit Price | Qty | Total |
|---|---|---|---|---|---|
| Part | iPhone 14 Screen | $80.00 | 1 | $80.00 | |
| Labor | Technician labor (2 hrs) | $50.00 | 2 | $100.00 | |
| Service | Rush fee (same-day) | $25.00 | 1 | $25.00 | |
| Total: | $205.00 |
Tip: Your shop likely has a service catalog in Settings. Use those templates for speed. You can always customize pricing per ticket.
Step 3: Apply Discounts (Optional)
Section titled “Step 3: Apply Discounts (Optional)”If the manager or owner approved a discount:
- Click “Add Discount”
- Enter amount or percentage (e.g., “$10 off” or “10% off”)
- Add a note (for audit trail): “Manager approved for loyal customer”
Step 4: Send to Customer
Section titled “Step 4: Send to Customer”Click “Send Quote to Customer”.
The system will:
- Generate a unique approval link
- Email the customer with a link to the customer portal
- Show the quote summary and approve/decline buttons
- Move the ticket to WAITING_APPROVAL status
You can see when the customer opened the email and when they approved (or declined).
Important: The customer has 3 options:
- Approve — Ticket moves to APPROVED; repair begins
- Request Changes — They can ask for lower price or different parts
- Decline — If declined, you may void the ticket or renegotiate
Step 5: Follow Up
Section titled “Step 5: Follow Up”If the customer doesn’t respond within 24 hours:
- Go to the ticket and click “Message Customer”
- Send a friendly reminder: “Hi Jane, just checking in on your iPhone quote. Let me know if you have questions!”
- Monitor the ticket status — it’ll show “Customer Response Pending”
Processing Pickup and Payment
Section titled “Processing Pickup and Payment”When the customer arrives to pick up, you’ll complete the repair and collect payment.
Step 1: Verify the Ticket is Ready
Section titled “Step 1: Verify the Ticket is Ready”The ticket should be in READY_FOR_PICKUP status (meaning QC approved the device). If not, check with the manager — the device may still be in repair or QC.
Step 2: Verify Customer Identity
Section titled “Step 2: Verify Customer Identity”- Ask for ID (driver’s license, ID card, etc.)
- Scan or enter ID details (for audit purposes)
- Confirm their phone number matches the ticket
Step 3: Collect Payment
Section titled “Step 3: Collect Payment”The customer can pay via:
Cash
- Count cash, confirm amount
- Enter in payment form: “Cash - $205.00”
Card (Debit/Credit)
- Use your shop’s card reader (Square, Stripe, etc.)
- Swipe or insert card
- Enter amount approved on quote
- Tip option (optional)
Online Payment (from Portal)
- Customer already paid via the portal when they approved the quote
- Your system shows it as paid
- Just confirm receipt
Invoice (Net-30)
- For repeat customers or commercial work
- Ticket shows “Unpaid” but allows pickup
- Invoice is emailed and due in 30 days
Pro Tip: Offer online payment during the quote phase. Many customers prefer to pay electronically, and it removes a step at pickup.
Step 4: Signature Capture
Section titled “Step 4: Signature Capture”This is protection for you and the customer.
- Tablet: If you have a tablet, the customer signs on-screen
- Paper: Print the receipt, customer signs, store with ticket
- Digital: Some shops use a stylus or fingerprint
The signature confirms:
- They received the device in working condition
- They authorize the charges
- Any damage post-repair is their responsibility
Step 5: Generate and Deliver Receipt
Section titled “Step 5: Generate and Deliver Receipt”Click “Complete Pickup”. The system will:
-
Generate PDF invoice with:
- Line items (parts, labor, services)
- Total, payment method, date/time
- Your shop logo and contact info
- Your shop’s return/warranty policy
-
Email receipt to the customer
-
Print receipt (optional) — Hand to customer
-
Move ticket to PICKED_UP status
-
Generate a QR code linking to a survey or review (optional)
The customer gets:
- A copy in their email (saved for records)
- A paper copy in hand
- A link to rate your shop (if enabled)
Important: Keep receipts on file for at least 1 year. They’re proof of service and protect you in disputes.
Customer Communication
Section titled “Customer Communication”Customers want to know their device is safe and progressing. You’re their main point of contact.
Status Updates
Section titled “Status Updates”In the Ticket:
- Click “Message Customer”
- Type your update: “Your iPhone is in diagnostics now. We’ll have a quote for you by 2 PM.”
- Message appears in their customer portal and via email
Use These Moments:
- When intake is complete: “Thanks for choosing us!”
- When quote is ready: “Here’s your estimate. Click the link to approve.”
- When repair is starting: “Work begins today. We’ll send you an update tomorrow.”
- When device is done: “Great news — your phone is ready for pickup!”
Answering Status Questions
Section titled “Answering Status Questions”Customers often call/email asking “Is it done yet?” Here’s how to help:
- Search the ticket — Find by name, phone, or ticket #
- Check the status — See where it is in the workflow
- Share honestly — “It’s in diagnostics, should move to approval by end of day”
- Offer a timeline — “Turnaround is usually 3-5 days; you’re on track”
- Use the portal link — “You can also check anytime via the link we sent”
Tip: Train customers to check the portal first. It reduces support emails and empowers them.
Managing Appointments and Walkins
Section titled “Managing Appointments and Walkins”If your shop uses the appointment booking feature:
Viewing the Calendar
Section titled “Viewing the Calendar”- Go to Dashboard → Calendar
- See all scheduled appointments for this week
- Time slots show which technicians are available
- Color coding: Green = available, Red = booked
Scheduling an Appointment
Section titled “Scheduling an Appointment”- Customer calls or books online
- Click “New Appointment”
- Select date and time
- Choose service (Phone Screen, Diagnostics, etc.)
- Technician (or assign to available tech)
- Send confirmation email to customer
Handling Walkins
Section titled “Handling Walkins”- Create an intake ticket as normal
- Click “Mark as Walkin” (vs. scheduled appointment)
- Walkins don’t block a technician’s calendar but appear as “In-Queue”
- Manager will triage and assign based on workload
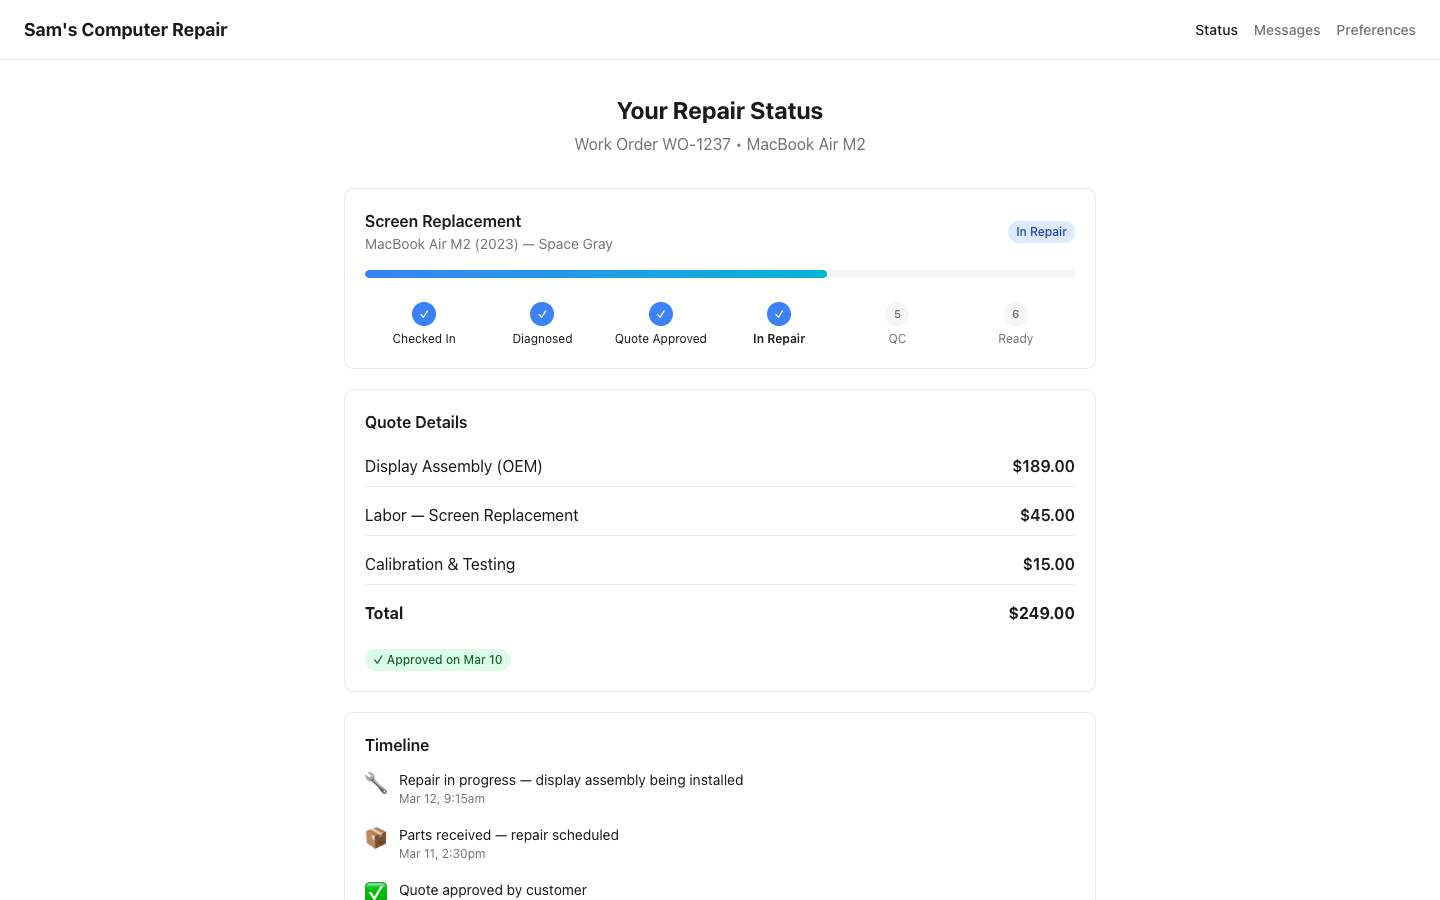
The Status Check Widget
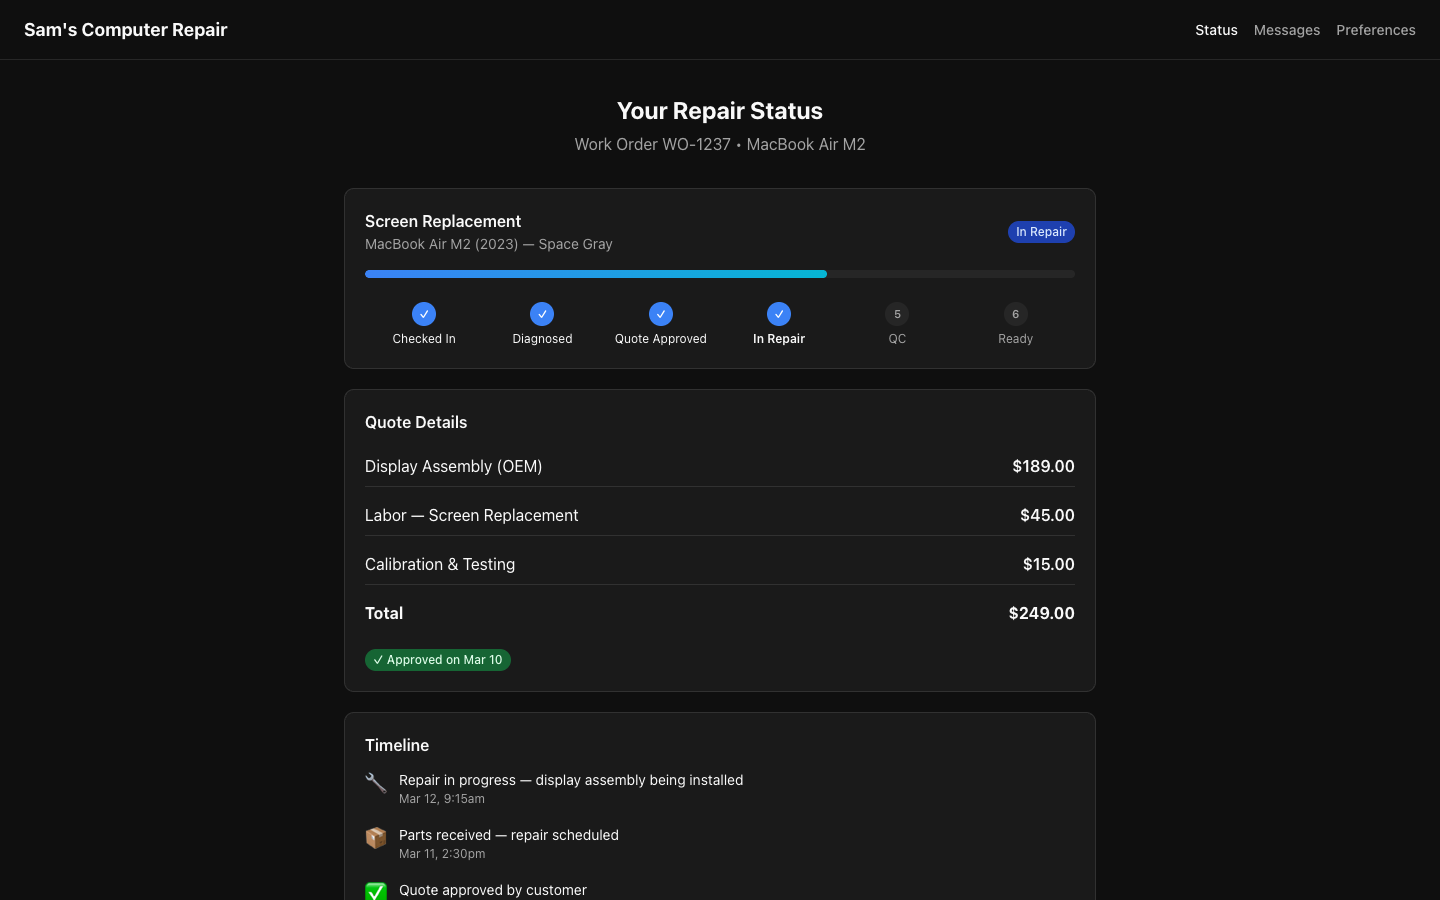
Section titled “The Status Check Widget”If your shop offers a public status widget, customers can check repairs without logging into the portal.
How It Works
Section titled “How It Works”- You hand them a receipt card with a QR code
- They scan it on their phone (anytime, anywhere)
- They see: device name, current status, estimated completion, last update
- No login needed — it’s token-based and 90-day expiring
Your Role:
- Print receipt cards with the QR code (do this at pickup or via email)
- Tell customers: “Scan this QR code anytime to check progress”
- Ensure status updates are timely (manager’s job, but remind them)
Troubleshooting & Tips
Section titled “Troubleshooting & Tips””Customer doesn’t remember their phone number”
Section titled “”Customer doesn’t remember their phone number””- Ask an alternative: “What’s the phone number on their driver’s license?”
- Use email instead (search by email)
- Create a new record — you can link it to an existing customer later
”Technician said parts didn’t arrive yet”
Section titled “”Technician said parts didn’t arrive yet””- Ask when they’ll arrive: “When do you expect the screen?”
- Update the customer: “Parts are on backorder, arriving Friday. New timeline is Monday pickup.”
- Move ticket status if needed (e.g., WAITING_ON_PARTS → IN_REPAIR once parts arrive)
“Customer declined the quote; what now?”
Section titled ““Customer declined the quote; what now?””- Option 1: Negotiate. Call the customer, ask if price is the issue, offer a discount (manager approval)
- Option 2: Suggest alternatives. “Can we do a refurbished screen instead for $60?”
- Option 3: Void and return device. Click “Void Ticket”, return the device, no charge
”I made a typo in the quote. Can I fix it?”
Section titled “”I made a typo in the quote. Can I fix it?””- If not yet approved: Click “Edit Quote”, correct the line item, re-send
- If already approved: Ask the customer to decline, you re-send corrected quote
- Never edit an approved quote directly — always resend for re-approval
”Customer left without paying; they said they’d pay later”
Section titled “”Customer left without paying; they said they’d pay later””- Create an invoice (ticket remains PICKED_UP)
- Check the “Due Date” field (default 30 days)
- Email invoice to customer
- Track on your aging report (billing dashboard)
- Follow up in 14 days if unpaid
Best Practices
Section titled “Best Practices”-
Collect all contact info upfront. No guessing emails or phone numbers later.
-
Take photos of damage. Two minimum. Angle the device to show the issue clearly.
-
Be specific in descriptions. “Cracked screen” is good. “Shattered screen, bottom-right corner, hairline to edge” is better.
-
Send quotes quickly. Approve quotes same-day if possible. Delays kill momentum.
-
Update customers proactively. Don’t wait for them to ask. Regular updates build trust.
-
Keep notes clear. “Customer in a rush, prefers evening pickup” helps the tech and manager.
-
Use the message feature, not personal texts. It’s logged, searchable, and professional.
-
Confirm payment methods ahead of time. Ask at quote stage: “We take cash, card, or online payment. Which works for you?”
-
Print receipts; don’t just email. Physical receipts feel real and professional.
-
Offer a survey link at pickup. Reviews help your shop and take 30 seconds from the customer.
Quick Reference: Ticket Statuses from Your Perspective
Section titled “Quick Reference: Ticket Statuses from Your Perspective”| Status | What It Means | What You Do |
|---|---|---|
| INTAKE | Customer just checked in | Send to manager for triage |
| TRIAGE | Manager is assigning tech | Wait for tech to start diagnostics |
| DIAGNOSTICS | Tech is investigating | Prepare to build quote when tech is done |
| WAITING_APPROVAL | Quote sent to customer | Follow up if no response in 24h |
| APPROVED | Customer said yes | Notify tech; repair begins |
| WAITING_ON_PARTS | Tech is waiting for parts | Update customer with new ETA |
| IN_REPAIR | Tech is fixing it | No action needed yet |
| QC_REVIEW | Manager is verifying | No action needed yet |
| QC_FAILED | Quality issue found; rework needed | Update customer with new timeline |
| READY_FOR_PICKUP | Device is done and approved | Customer comes in; you process pickup |
| PICKED_UP | Customer left with device | Ticket is closed; archive if desired |
| CLOSED | Repair is complete | Done! Leave a review request |
| VOIDED | Ticket was cancelled | No action (archived) |
Support
Section titled “Support”- Questions about quotes? Ask your manager
- Unsure about a status? See Ticket State Machine
- How do I do X? Check Glossary or email support@repairops.app
- Keyboard shortcuts to work faster? See Shortcuts
Version: 1.0.0 Last Updated: March 2026 Role: Front Desk, Receptionists, Intake Coordinators