User Guide
RepairOps is designed around your team’s roles. Whether you’re managing the front desk, diagnosing devices, running quality checks, or overseeing the shop, this guide will walk you through your daily responsibilities.

Choose Your Role
Section titled “Choose Your Role”Select your role below to learn the specific workflows tailored to your position:
Handle customer intake, check-in, appointments, and pickups. Manage customer relationships, build quotes, and process payments.
Key Tasks:
- Create new tickets via the intake wizard
- Build line-item estimates (parts + labor + services)
- Process payments and generate receipts
- Send quotes to customers for approval
- Manage customer contact and status inquiries
Best For: Customer-facing staff, intake coordinators, receptionists
Investigate devices, log repairs, manage parts, and track time. Focus on diagnostics, repair execution, and work documentation.
Key Tasks:
- Receive assigned repairs from the queue
- Complete diagnostic checklists and upload evidence
- Request parts and manage inventory
- Log repair work, time tracking, and parts usage
- Prepare devices for QC review
Best For: Repair technicians, diagnostics specialists, field service reps
Oversee shop operations, dispatch work, conduct quality reviews, and track team performance. Balance workload and maintain service standards.
Key Tasks:
- Review new tickets and assign to technicians
- Manage Kanban board and work assignments
- Approve quotes and manage customer approvals
- Conduct QC reviews and rework authorization
- Monitor staff performance and presence
- Review KPI dashboards and alert on delays
Best For: Shop owners, shift supervisors, operations managers
Access your repair status, approve estimates, make payments, and download invoices — all via a secure token-based link.
Key Tasks:
- Check ticket status and repair timeline
- Review and approve/decline quotes
- Authorize payments online
- Download invoices and track history
- Send messages to the shop team
- Review system build recommendations (if available)
Best For: Customers of repair shops using RepairOps
Quick Reference
Section titled “Quick Reference”The Ticket Lifecycle
Section titled “The Ticket Lifecycle”Every repair follows this flow:
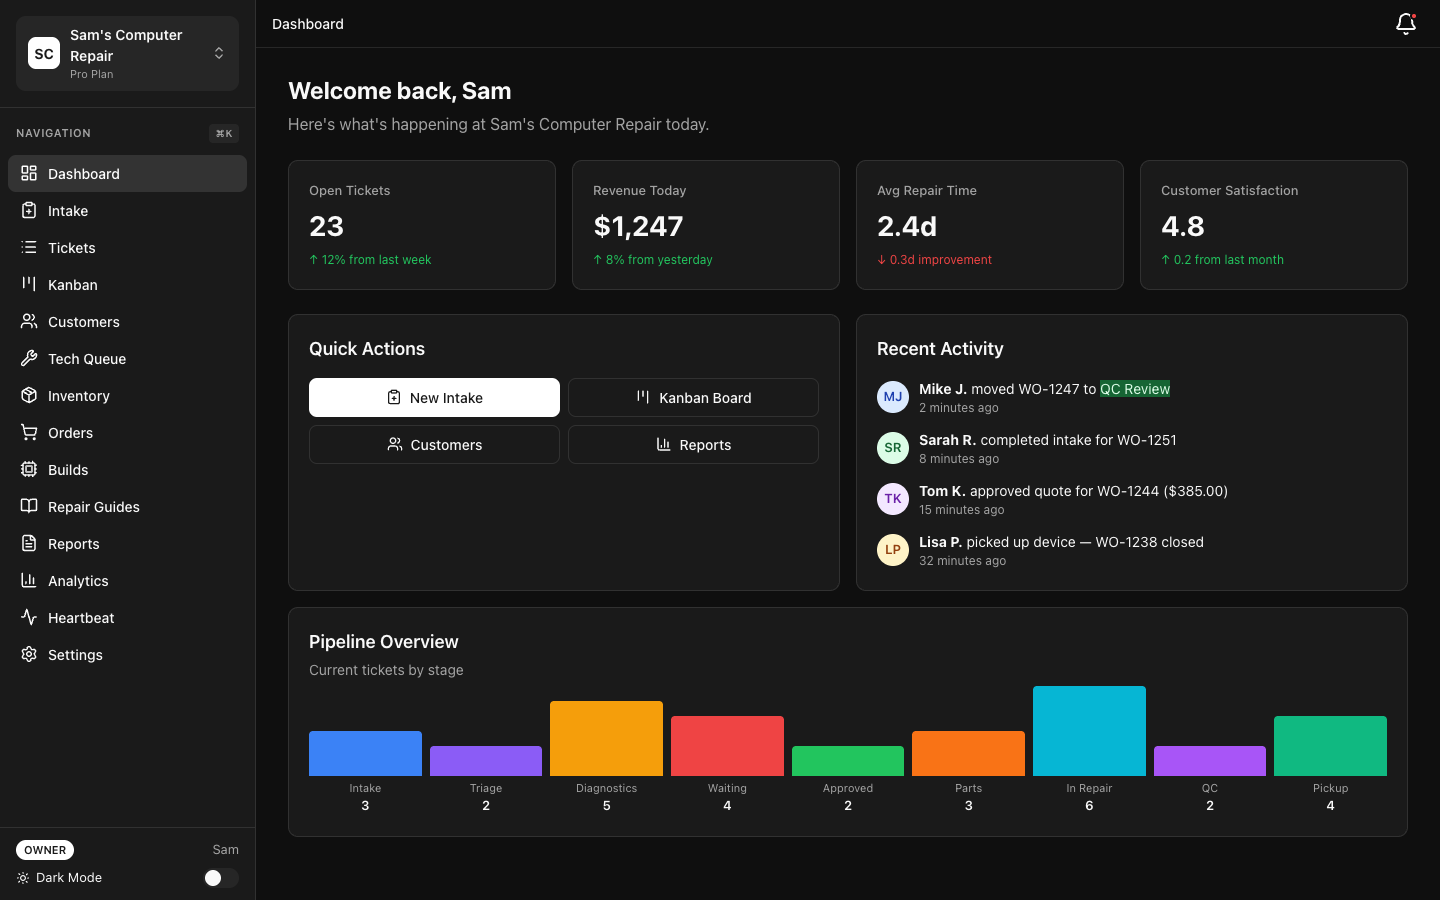
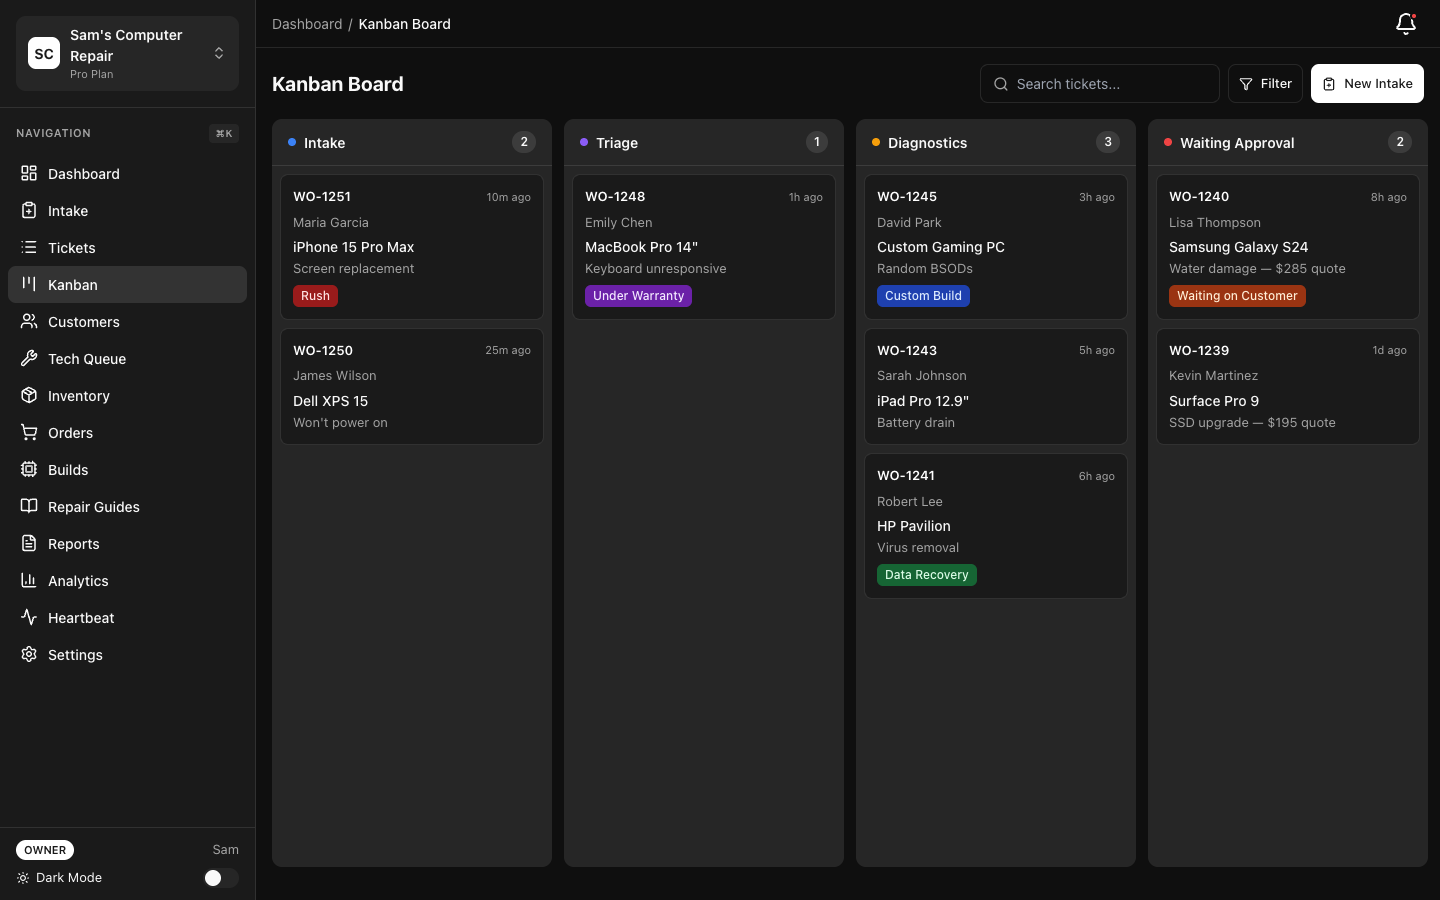
INTAKE (Front Desk) ↓ (Manager triages)TRIAGE ↓ (Tech investigates)DIAGNOSTICS ↓ (Manager/Tech creates quote)WAITING_APPROVAL (Customer approves) ↓APPROVED → WAITING_ON_PARTS → IN_REPAIR ↓QC_REVIEW (Manager/QC verifies) ├─ QC Pass → READY_FOR_PICKUP ├─ QC Fail → IN_REPAIR (rework) ↓PICKED_UP (Front Desk collects) ↓CLOSED (Complete!)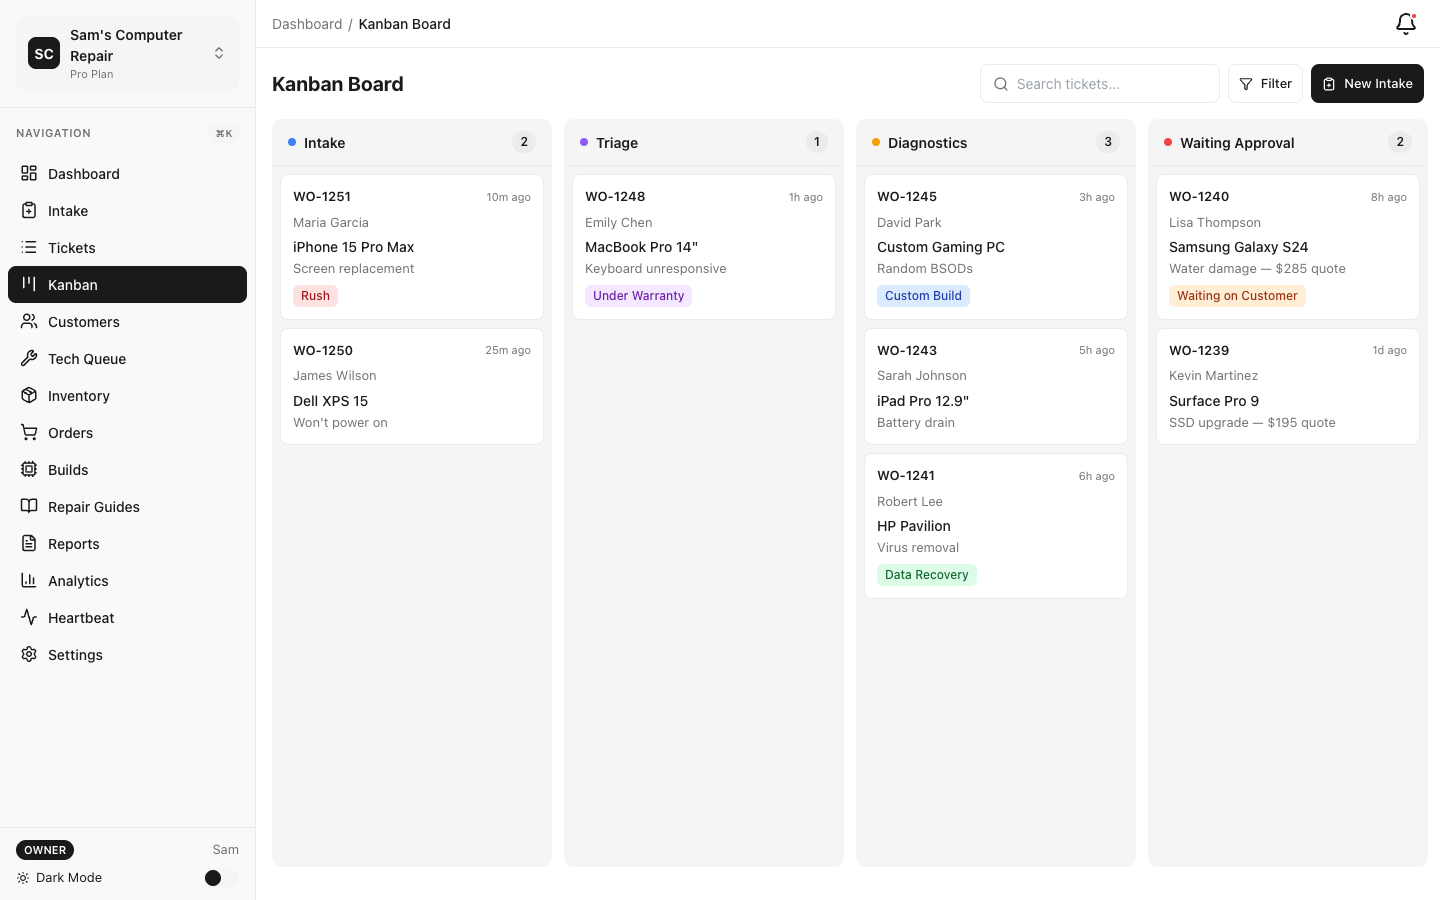
Role Permissions Matrix
Section titled “Role Permissions Matrix”| Task | Front Desk | Technician | Manager | Customer |
|---|---|---|---|---|
| Create intake tickets | ✓ | ✓ | ||
| Triage & assign work | ✓ | |||
| Run diagnostics | ✓ | |||
| Build quotes | ✓ | ✓ | ✓ | |
| Approve quotes | ✓ | |||
| Log repair work | ✓ | ✓ | ||
| Conduct QC reviews | ✓ | |||
| Process pickup & payment | ✓ | ✓ | ||
| Check ticket status | ✓ |
Tips for Success
Section titled “Tips for Success”-
Follow the workflow. Each status exists for a reason. Don’t skip steps — they capture data that powers reports, audits, and decisions.
-
Upload evidence. Photos, checklists, and notes are worth their weight in gold. They protect you in disputes and help technicians learn.
-
Use the queue. Your assigned work appears in “My Queue” — start there each morning. Priority and turnaround time are tracked automatically.
-
Communicate early. If a device will take longer than expected, notify the customer via the portal or message. Surprises breed frustration.
-
Leverage the Kanban board. Managers: the board shows work in progress. Drag tickets left to right as work flows. Real-time updates keep everyone in sync.
-
Check your notifications. You control these in Settings → Notifications. Turn on alerts for items that matter to you (assignments, approvals, overdue flags).
-
Use the Knowledge Base. If your shop has set up a KB, search it before guessing. Repair tips, parts numbers, and troubleshooting steps are there for speed.
Common Questions
Section titled “Common Questions”Q: What if I’m not sure what status a ticket should be in?
- See the Ticket State Machine reference page. It lists all statuses, transitions, and role permissions.
Q: Can I undo a status change?
- Not directly, but your shop manager can revert a ticket if needed. Talk to them before submitting a transition if you’re unsure.
Q: How do I send messages to customers?
- Use the “Message Customer” button in the ticket view. Messages appear in their customer portal and are logged in the ticket timeline.
Q: What if a customer disputes a charge?
- Document everything during repair: photos, findings, parts used, hours worked. All of this is in the ticket and visible to you and the customer.
Q: Can I work on multiple tickets at once?
- Yes, you’ll see all your assigned work in “My Queue” and can switch between them. The system tracks hours per device, not per person-day.
Navigate by Scenario
Section titled “Navigate by Scenario”You’re a new technician on your first day
Section titled “You’re a new technician on your first day”- Read Technician for the full workflow
- Check your “My Queue” and open your first assigned ticket
- Follow the diagnostics section step-by-step
- Ask your manager if anything is unclear
You’re a manager handling a rushed customer
Section titled “You’re a manager handling a rushed customer”- Check the ticket status on the Kanban board
- See Manager under “Alerts & Expediting”
- If the device needs priority, drag it to the front of the queue
- Message the customer with a realistic timeline
You’re a customer checking your repair status
Section titled “You’re a customer checking your repair status”- Click the link in the receipt or email (sent when intake was created)
- Read Customer Portal for step-by-step navigation
- You can approve the quote, ask questions, or check progress anytime
Support & Feedback
Section titled “Support & Feedback”Can’t find what you need?
- Detailed role guides: Choose your role above
- Ticket workflows: See Ticket State Machine
- Keyboard shortcuts: See Shortcuts
- Glossary: See Terms
- Email support: support@repairops.app
- Community: community.repairops.app
Version: 1.0.0 Last Updated: March 2026