Your First Ticket
This guide walks you through every stage of a repair ticket in RepairOps, from check-in to completion.
Overview: The Repair Flow
Section titled “Overview: The Repair Flow”Every ticket follows this path:
INTAKE → TRIAGE → DIAGNOSTICS → WAITING_APPROVAL→ APPROVED → (WAITING_ON_PARTS) → IN_REPAIR → QC_REVIEW→ READY_FOR_PICKUP → PICKED_UP → CLOSEDSome tickets skip steps (e.g., no parts needed = skip WAITING_ON_PARTS). All paths can be voided at any time.
Stage 1: INTAKE (Front Desk / Technician)
Section titled “Stage 1: INTAKE (Front Desk / Technician)”Purpose: Collect basic information about the customer and device.
Starting the Intake
Section titled “Starting the Intake”- Click “New Ticket” (or “Check In” on the dashboard)
- You’ll see the Intake Form
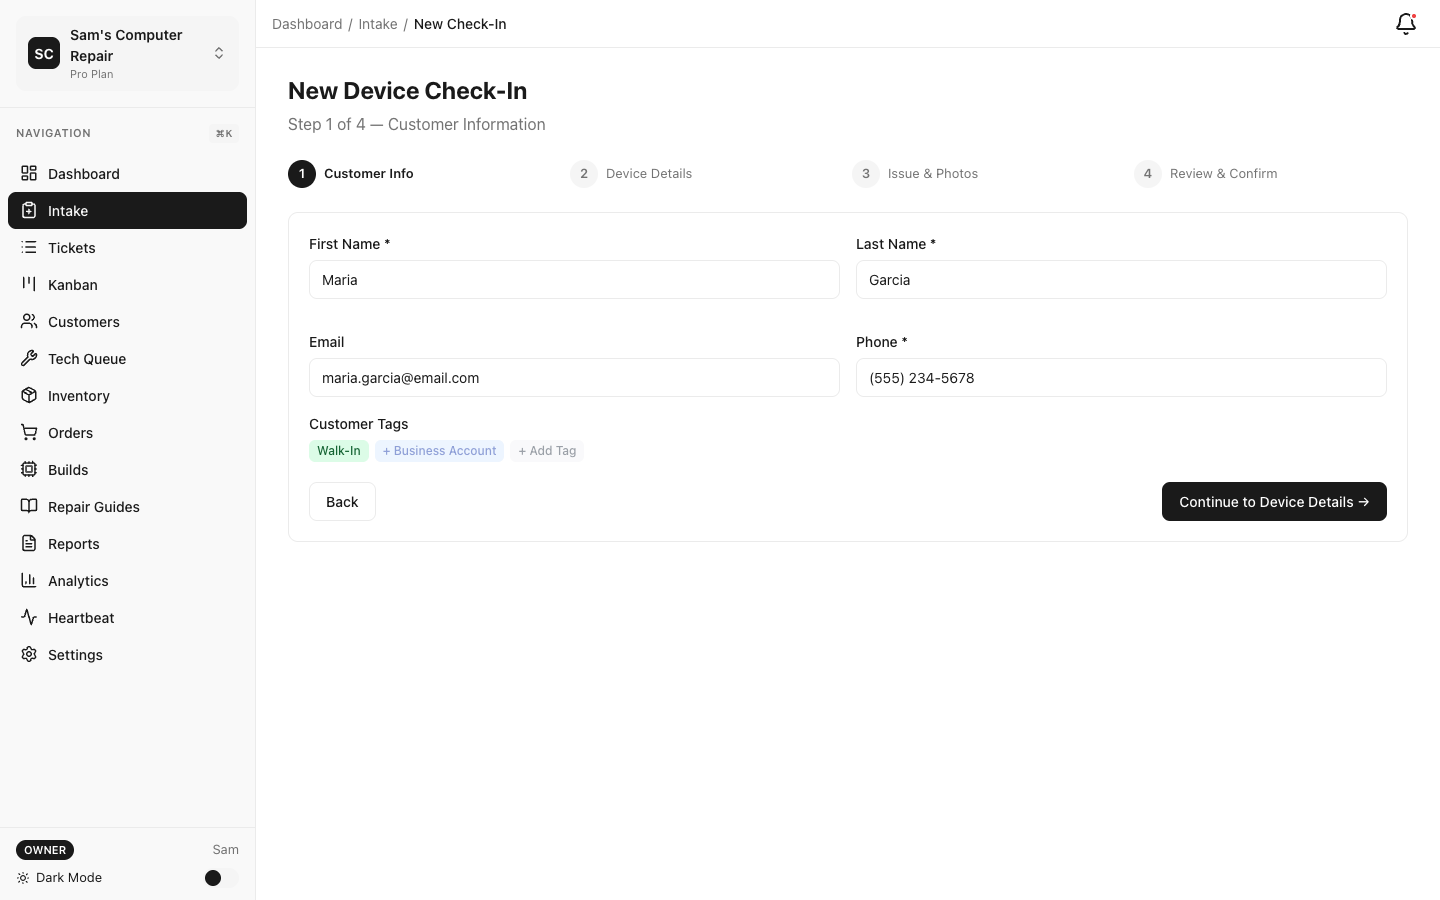

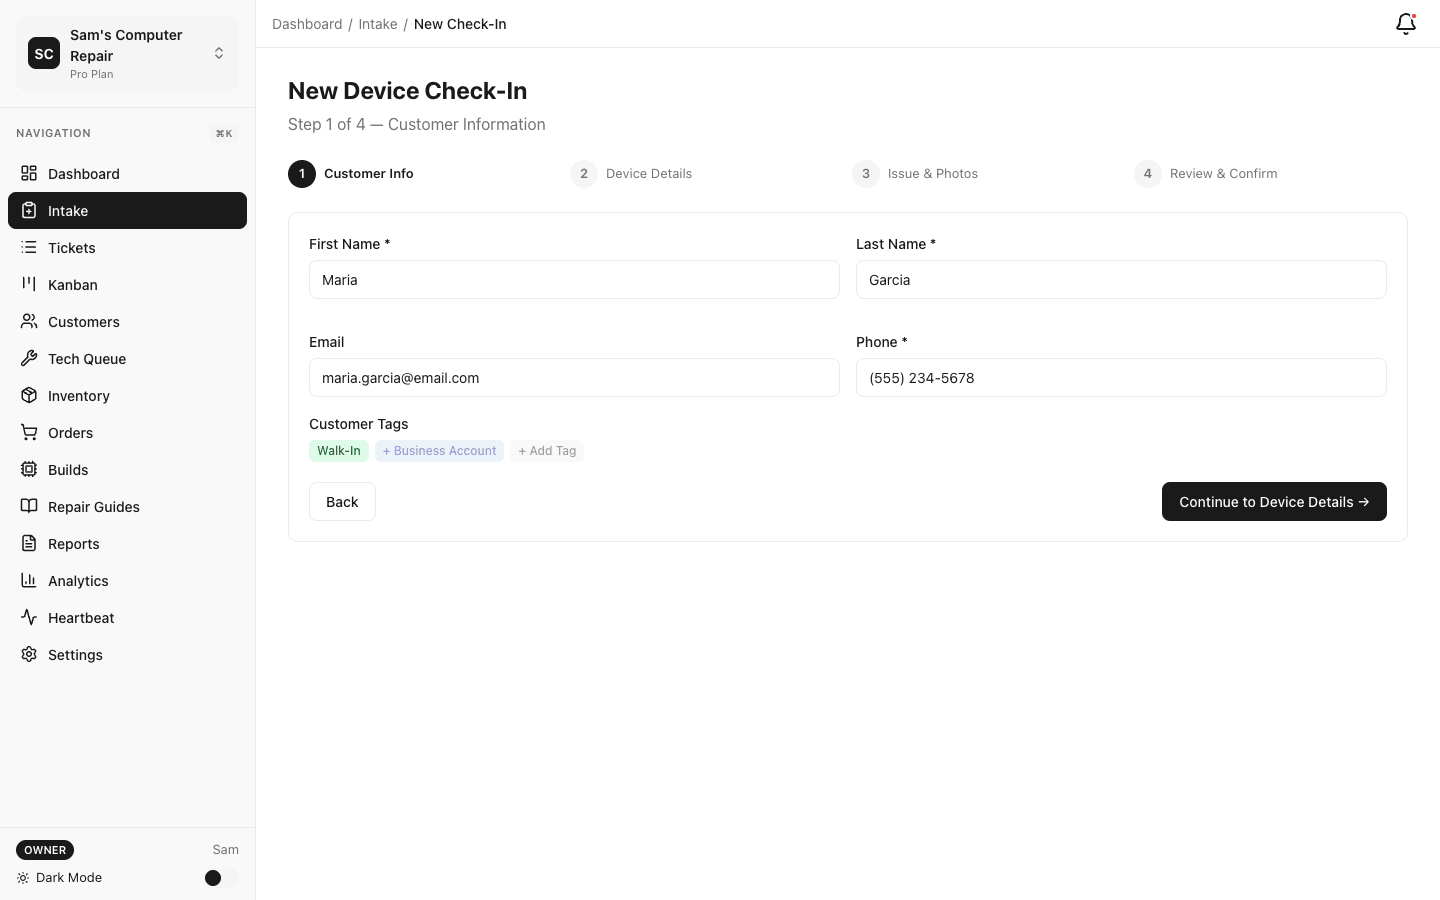
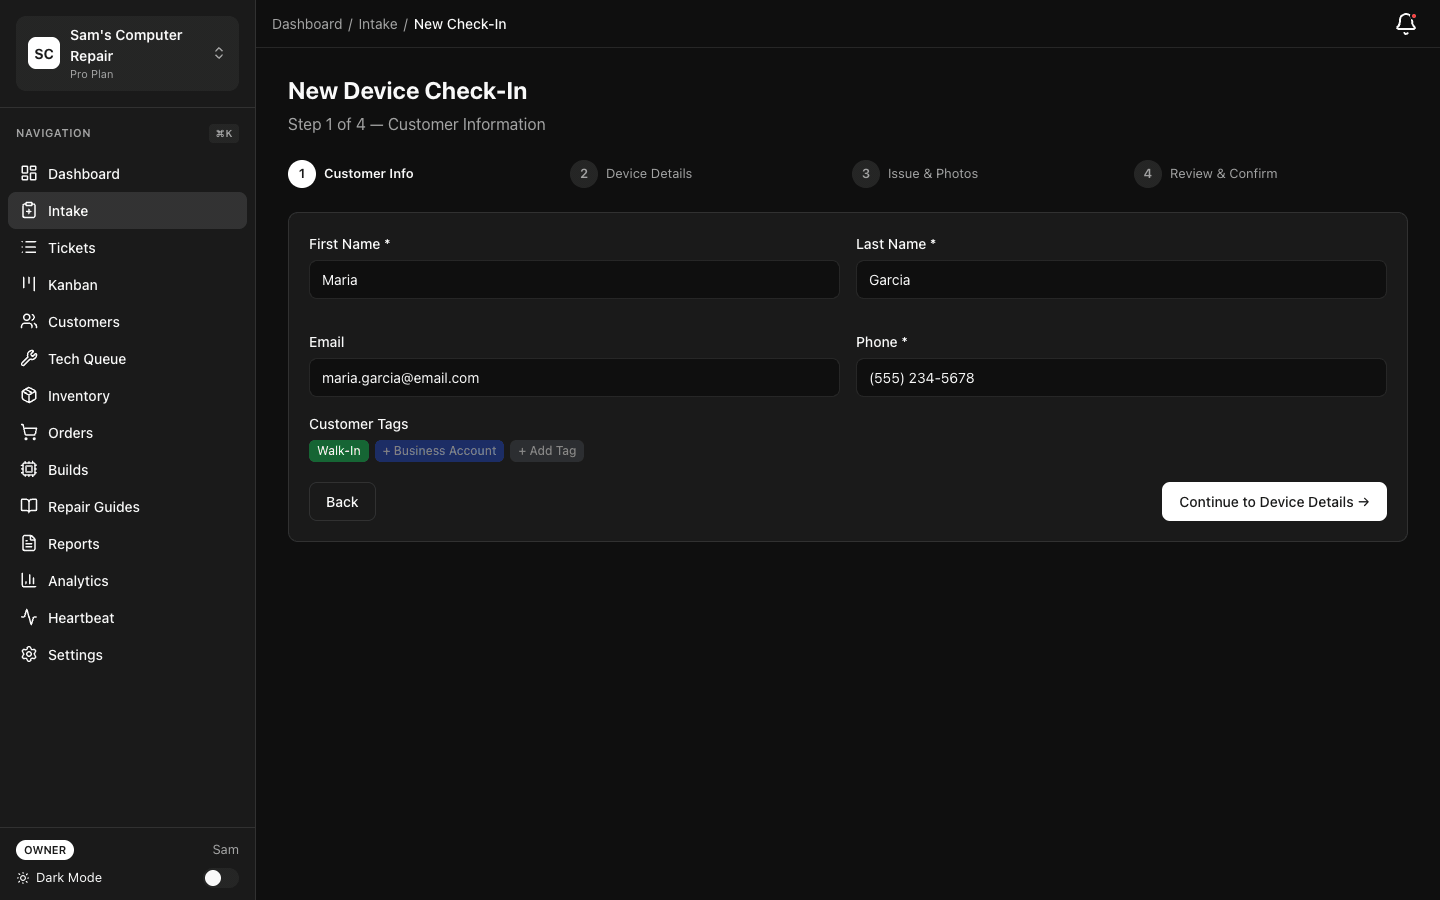
Fill in Customer Info
Section titled “Fill in Customer Info”- Customer Name — Full name (required)
- Phone Number — Best contact number (required)
- Email — For quotes and updates
- Address — Optional; useful for delivery services
Pro tip: RepairOps stores returning customers. If the name matches someone you’ve seen before, you’ll get a “returning customer” badge.
Collect Device Details
Section titled “Collect Device Details”- Device Type — Select from dropdown: iPhone, MacBook, Samsung, Gaming Console, Laptop, Tablet, etc.
- Brand & Model — e.g., “iPhone 14 Pro Max”, “Dell XPS 15”
- Serial Number / IMEI — If available; helpful for insurance claims
- Password / PIN — Does the customer know it? (Impacts diagnostics)
Document the Issue
Section titled “Document the Issue”- Problem Description — What’s broken? Be specific. E.g., “Screen unresponsive in lower left corner”, not just “broken”
- When Did It Break? — This week? This month? Helps diagnose patterns
- Has It Been Dropped? — Relevant for physical damage assessment
Take Photos
Section titled “Take Photos”- Click “Add Photos”
- Take 2+ photos (this is a gate requirement):
- Show the full device
- Show the damage/issue clearly
- Show any water damage, dents, or cracks
- Photos are stored in RepairOps and tied to the ticket permanently
Customer Consent
Section titled “Customer Consent”- Check the consent box — Confirms customer agrees to:
- Your repair terms
- Service charges
- Data handling
- Quote requirement before repair
Note: This is legally required. Some shops add custom consent text (e.g., “Device left for 45 days is considered abandoned”). Configure this in Settings → Legal.
Complete Intake
Section titled “Complete Intake”Click “Create Ticket”.
- Ticket is created with a unique ID: #REP-001, #REP-002, etc.
- Status: INTAKE
- A receipt is generated and can be emailed to the customer
- You’re now on the ticket detail page
Stage 2: TRIAGE (Manager)
Section titled “Stage 2: TRIAGE (Manager)”Purpose: Assign the ticket to a technician and prioritize it.
Who Does Triage?
Section titled “Who Does Triage?”Usually a Manager, but the Owner can do it too. This prevents every customer from going to your best technician.
Start Triaging
Section titled “Start Triaging”- Find the ticket on the Kanban board (left sidebar, click “Kanban”)
- The ticket appears in the INTAKE column
- Click the ticket card
- Ticket detail panel opens
Assign a Technician
Section titled “Assign a Technician”- Click “Assign to Technician” (or drag the card to assign)
- Select a technician from the dropdown (filters to users with TECH role)
- Optional: Leave a note for the tech: e.g., “Customer has no password, may need data recovery”
- Click “Confirm”
Set Priority (Optional)
Section titled “Set Priority (Optional)”- Urgent — Customer needs it ASAP (shows red indicator)
- Normal — Standard turnaround (default)
- Low — Can wait; batch with similar repairs
Move to Triage
Section titled “Move to Triage”- Click “Move to Triage” button
- Confirm the technician assignment
- Status changes to TRIAGE
- Technician is notified (push notification, email, or Slack depending on settings)
Stage 3: DIAGNOSTICS (Technician)
Section titled “Stage 3: DIAGNOSTICS (Technician)”Purpose: Investigate the device, identify the problem, and document findings.
Technician’s Perspective
Section titled “Technician’s Perspective”- My Work dashboard shows “New assignment: iPhone Screen Repair”
- Click the ticket or click “Start Work”
- Ticket opens; status shows TRIAGE (awaiting your input)
Run Diagnostic Checklist
Section titled “Run Diagnostic Checklist”- Click “Start Diagnostics”
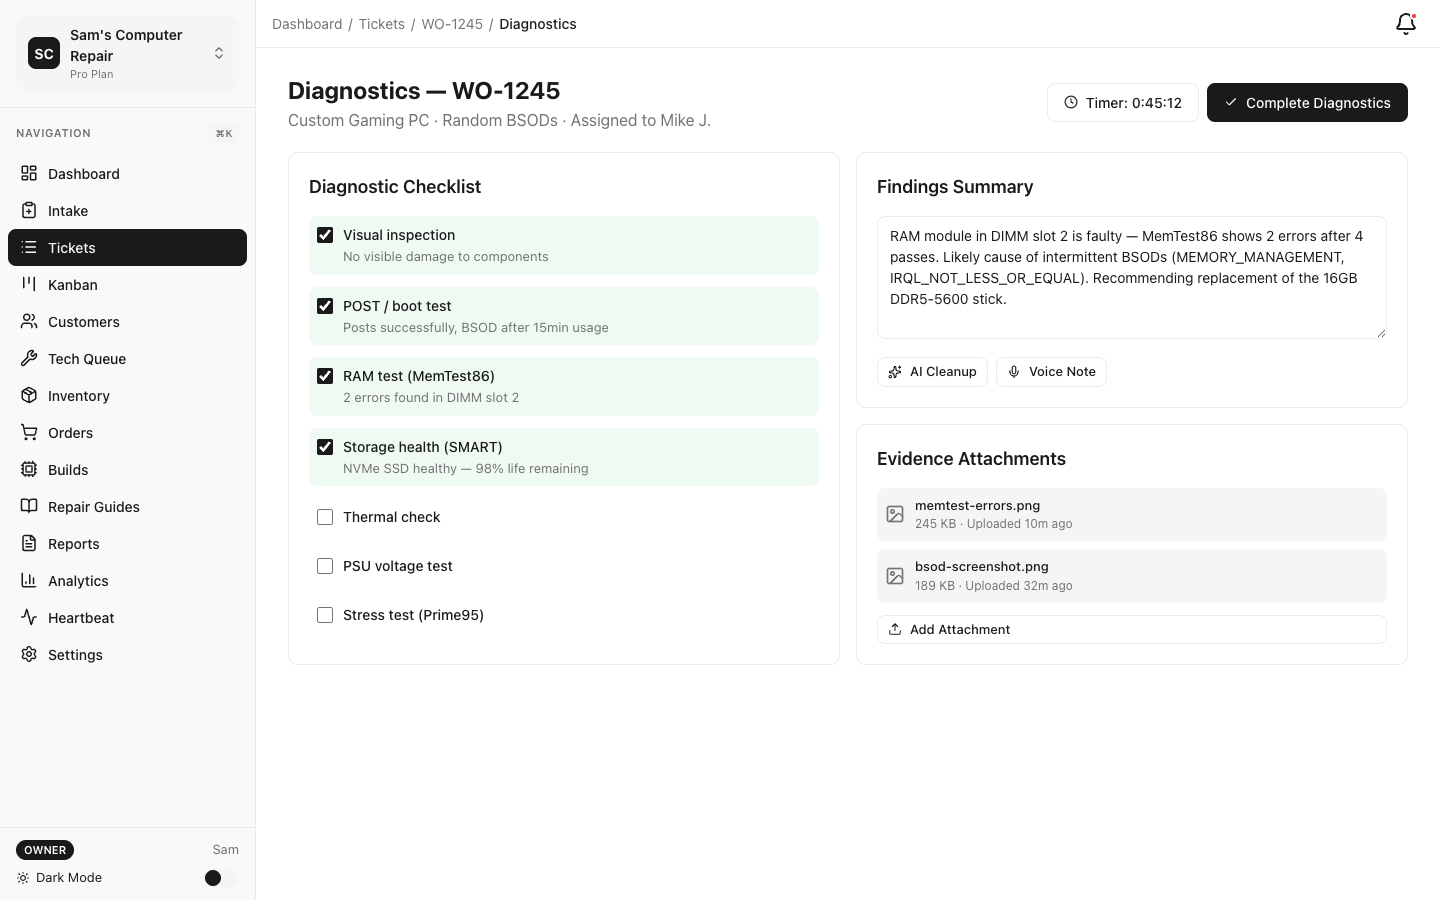
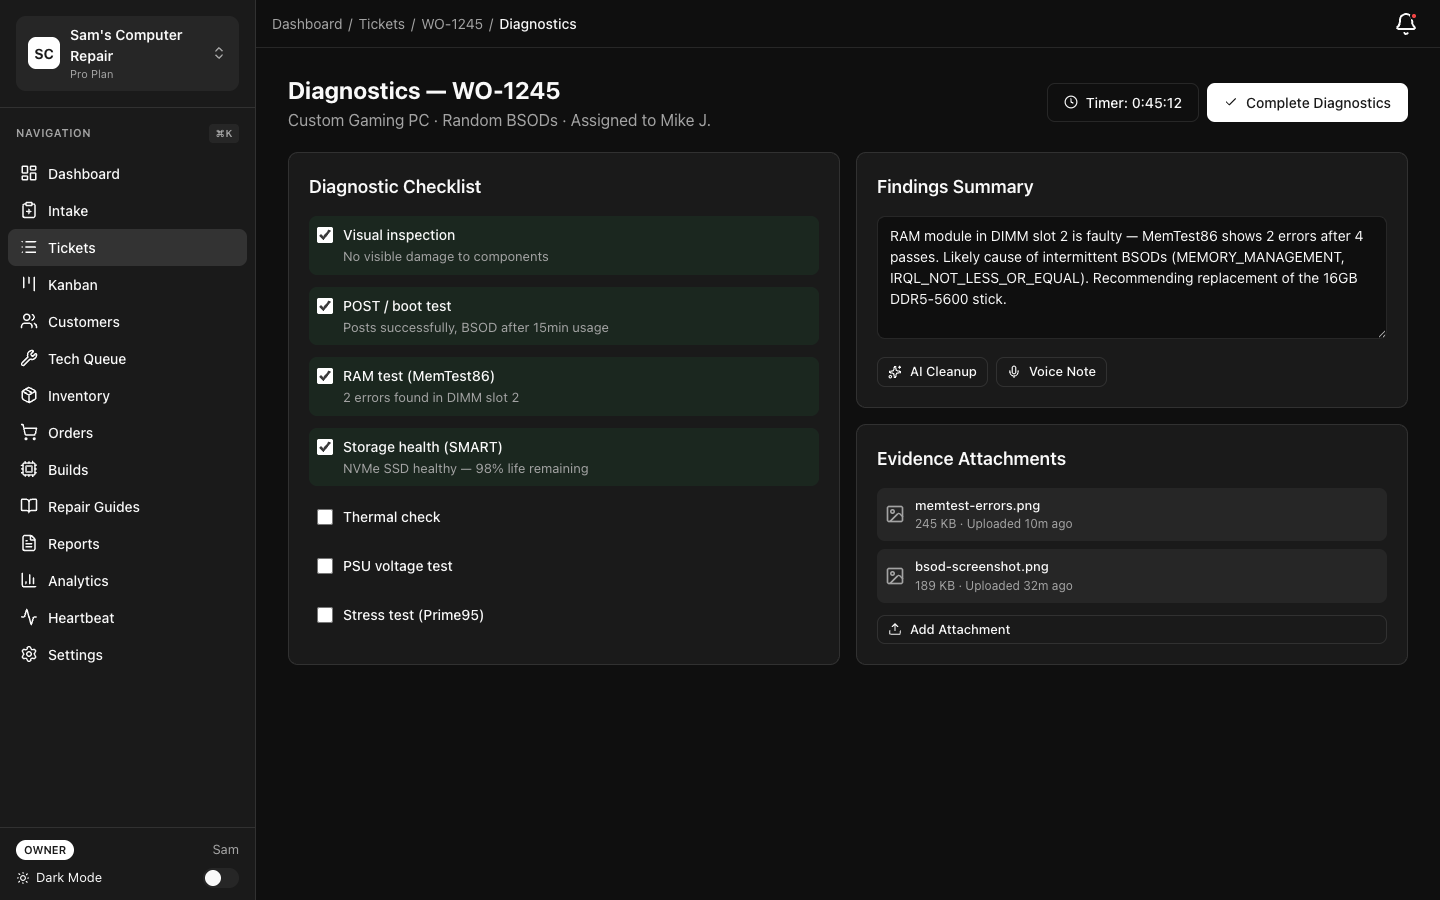 2. RepairOps presents a role-specific checklist:
- **Power Test** — Does it turn on?
- **Screen Test** — Does it display correctly?
- **Touch Test** — Does it respond to touch?
- **Audio Test** — Speakers and mic working?
- **Connectivity** — WiFi, Bluetooth, cellular?
- **Physical Inspection** — Water damage, cracks, dents?
2. RepairOps presents a role-specific checklist:
- **Power Test** — Does it turn on?
- **Screen Test** — Does it display correctly?
- **Touch Test** — Does it respond to touch?
- **Audio Test** — Speakers and mic working?
- **Connectivity** — WiFi, Bluetooth, cellular?
- **Physical Inspection** — Water damage, cracks, dents?
- Check off items as you test them
- For each failed item, add notes: e.g., “Screen cracked along right edge. Pressure doesn’t help. Likely LCD failure.”
Upload Evidence
Section titled “Upload Evidence”Evidence photos strengthen your quote and prove the work needed.
- Click “Add Evidence Photos”
- Take close-ups of:
- The broken component (screen, speaker, etc.)
- Any water stains or corrosion
- Opened internals if relevant
- Comparison to a working device if helpful
- Tag each photo: e.g., “Cracked LCD” or “Corrosion on logic board”
Document Findings
Section titled “Document Findings”- Click “Summary” section
- Write a brief finding: e.g., “iPhone 14 display LCD is cracked. Digitizer unresponsive. Water stains on logic board suggest prior water exposure. Recommend screen replacement + inspection for corrosion damage.”
- Estimate repair type:
- Simple — Straightforward part replacement (30–60 min)
- Standard — Moderate repair, some disassembly (1–3 hours)
- Complex — Extensive work or unknowns (3+ hours)
Complete Diagnostics
Section titled “Complete Diagnostics”- Click “Complete Diagnostics” button
- Confirm all required fields are filled (checklist + findings + photos)
- Status changes to WAITING_APPROVAL
- Next step: Create a quote
Gate requirement: Diagnostics cannot be completed without a diagnostic checklist, findings summary, and at least 1 evidence photo. This ensures thorough documentation.
Stage 4: WAITING_APPROVAL (Tech or Manager)
Section titled “Stage 4: WAITING_APPROVAL (Tech or Manager)”Purpose: Create a detailed quote and send it to the customer for approval.
Build the Quote
Section titled “Build the Quote”- On the ticket, click “Build Quote”
- The quote builder opens showing:
- Labor Line Items — Hours × rate
- Parts Line Items — What’s needed
- Diagnostics — If charged (some shops include free diagnostics)
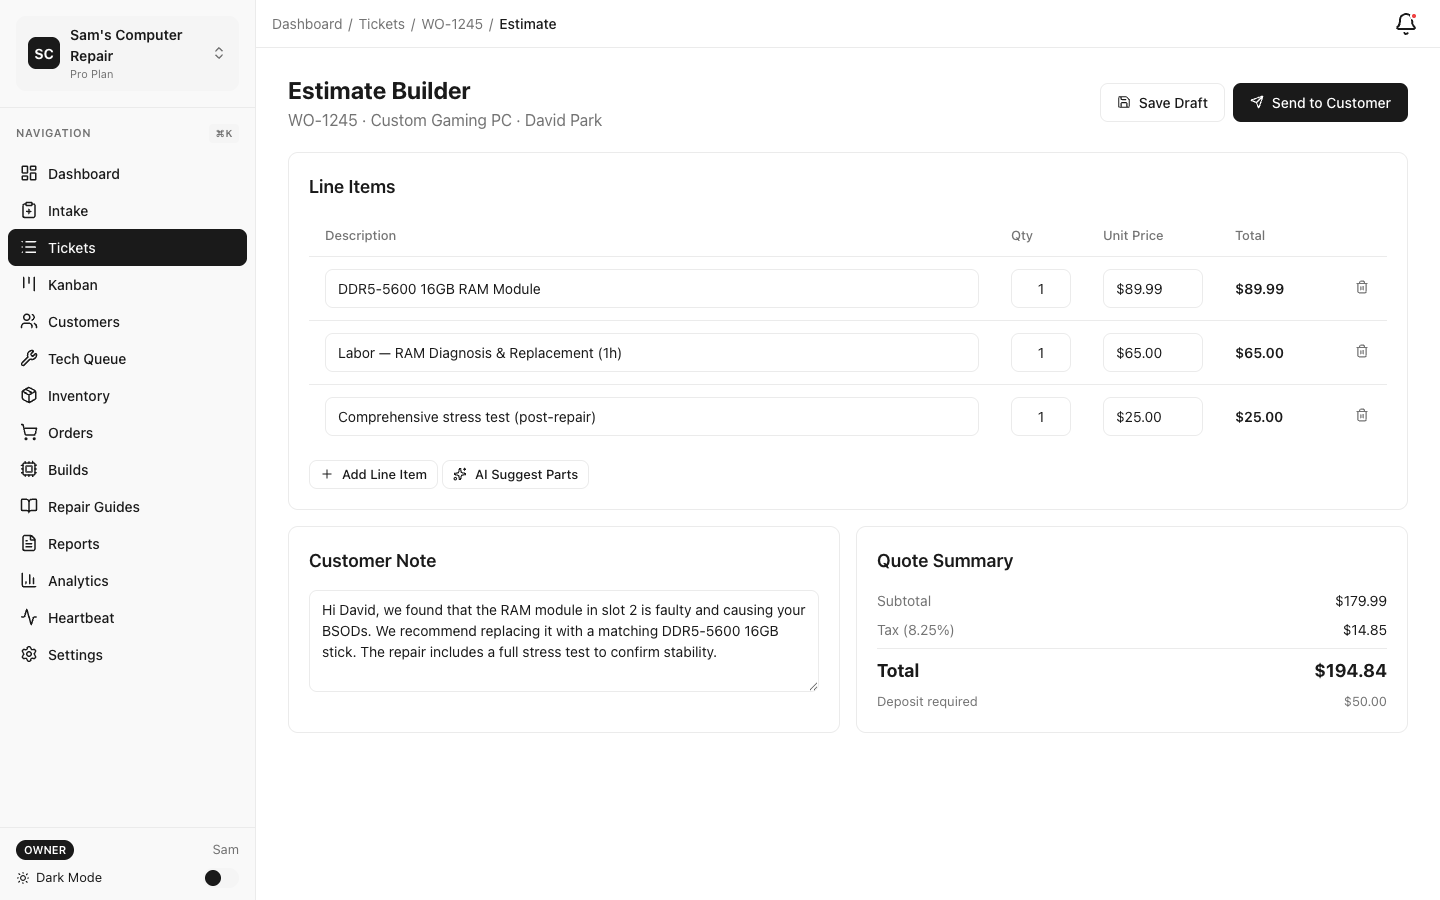
Add Parts
Section titled “Add Parts”- Click “Add Part”
- Enter or search for the part:
- Part Name — “iPhone 14 Display Assembly”
- Cost to Shop — What you paid or wholesale cost (not shown to customer)
- Price to Customer — What you charge them
- Quantity — Usually 1
- Click “Add”
Repeat for each part (screen, battery, adhesive, etc.).
Tip: Use your service catalog (created in setup) for pre-configured parts to speed this up.
Add Labor
Section titled “Add Labor”- Click “Add Labor”
- Enter:
- Description — “Screen replacement labor”
- Hours — e.g., “1.5 hours”
- Rate/Hour — Your standard labor rate (e.g., $60/hr)
- Total is calculated automatically
- Click “Add”
Repeat for each labor component (diagnostics, repair, testing, etc.).
Review Total
Section titled “Review Total”- Subtotal — Sum of parts + labor
- Tax — Calculated if you enabled sales tax in settings
- Total — What customer pays
Send Quote to Customer
Section titled “Send Quote to Customer”- Click “Send Quote”
- RepairOps generates a quote PDF and sends an email to the customer with:
- A secure link to view the quote
- A big “I Approve” button
- A link to message you with questions
- Status changes to WAITING_APPROVAL
Customer Portal: Approve or Negotiate
Section titled “Customer Portal: Approve or Negotiate”The customer receives the quote email. They can:
-
Click “I Approve” — Authorizes you to repair
- Status changes to APPROVED
- Your team is notified
- You can order parts or start repair
-
Request Changes — Customer clicks “Message” and asks questions (e.g., “Can you replace just the screen, not the battery?”)
- You adjust the quote and send a revised version
- Customer approves the revised quote
-
Decline — Customer chooses not to repair
- Ticket can be voided or marked declined
Tip: Quotes expire after 7 days. If a customer doesn’t respond, you can resend the quote or call them.
Stage 5: APPROVED (Customer Approved)
Section titled “Stage 5: APPROVED (Customer Approved)”Purpose: Prepare for repair. Order parts if needed, or start immediately.
Automatic After Approval
Section titled “Automatic After Approval”- Status changes to APPROVED
- Ticket moves to the APPROVED column on the Kanban board
- Your team sees it’s green-lit for repair
Two Paths
Section titled “Two Paths”Path A: Parts in Stock → Go directly to IN_REPAIR
- Click “Start Repair”
- Proceed to Stage 7
Path B: Waiting for Parts → Go to WAITING_ON_PARTS first
- Click “Order Parts”
- Add supplier, cost, ETA
- Status changes to WAITING_ON_PARTS
- When parts arrive, click “Parts Received” → IN_REPAIR
Stage 6: IN_REPAIR (Technician)
Section titled “Stage 6: IN_REPAIR (Technician)”Purpose: Perform the repair and log all work.
Start the Repair
Section titled “Start the Repair”- Technician clicks “Start Repair”
- RepairOps starts a timer (optional; tracks labor)
- Ticket is now in IN_REPAIR status
Log Work
Section titled “Log Work”As you work, log what you’re doing:
-
Click “Add Work Log Entry”
-
Timestamp is automatic
-
Enter:
- What you did — e.g., “Removed screen, cleaned adhesive, installed new LCD”
- Parts used — Select from inventory:
- “iPhone 14 Display Assembly” (qty 1) — consumed from stock
- Any adhesive, screws, tools you’re tracking
- Time spent — e.g., “1.5 hours”
- Notes — Any observations: e.g., “Found water stains on battery. Recommended customer for expanded inspection.”
-
Click “Log”
Repeat as you work through different stages of the repair.
Mark Parts Used
Section titled “Mark Parts Used”RepairOps tracks inventory. As you use parts:
- Search for or select the part
- Specify quantity
- Part is marked as used and deducted from stock (if you’re using inventory tracking)
Testing & Verification
Section titled “Testing & Verification”Before moving to QC, test the repair:
- Create a Testing Log entry:
- Power test — Device turns on
- Display test — Screen shows images, no dead pixels
- Touch test — Screen responds correctly
- Everything working?
- If issues found, log them and continue repairs
Complete Repair
Section titled “Complete Repair”When the repair is done:
- Click “Send to QC”
- Optionally add a note: e.g., “Ready for QC verification. All tests passed.”
- Status changes to QC_REVIEW
- QC specialist is notified
Stage 7: QC_REVIEW (QC Specialist)
Section titled “Stage 7: QC_REVIEW (QC Specialist)”Purpose: Verify the repair meets quality standards before handoff to customer.
QC Specialist’s Role
Section titled “QC Specialist’s Role”- QC specialist sees the ticket in the QC_REVIEW column
- Clicks the ticket to open it
- Reviews:
- Repair logs (what was done)
- Parts used
- Testing results
- Before/after photos
Run QC Checklist
Section titled “Run QC Checklist”- Click “Start QC Review”
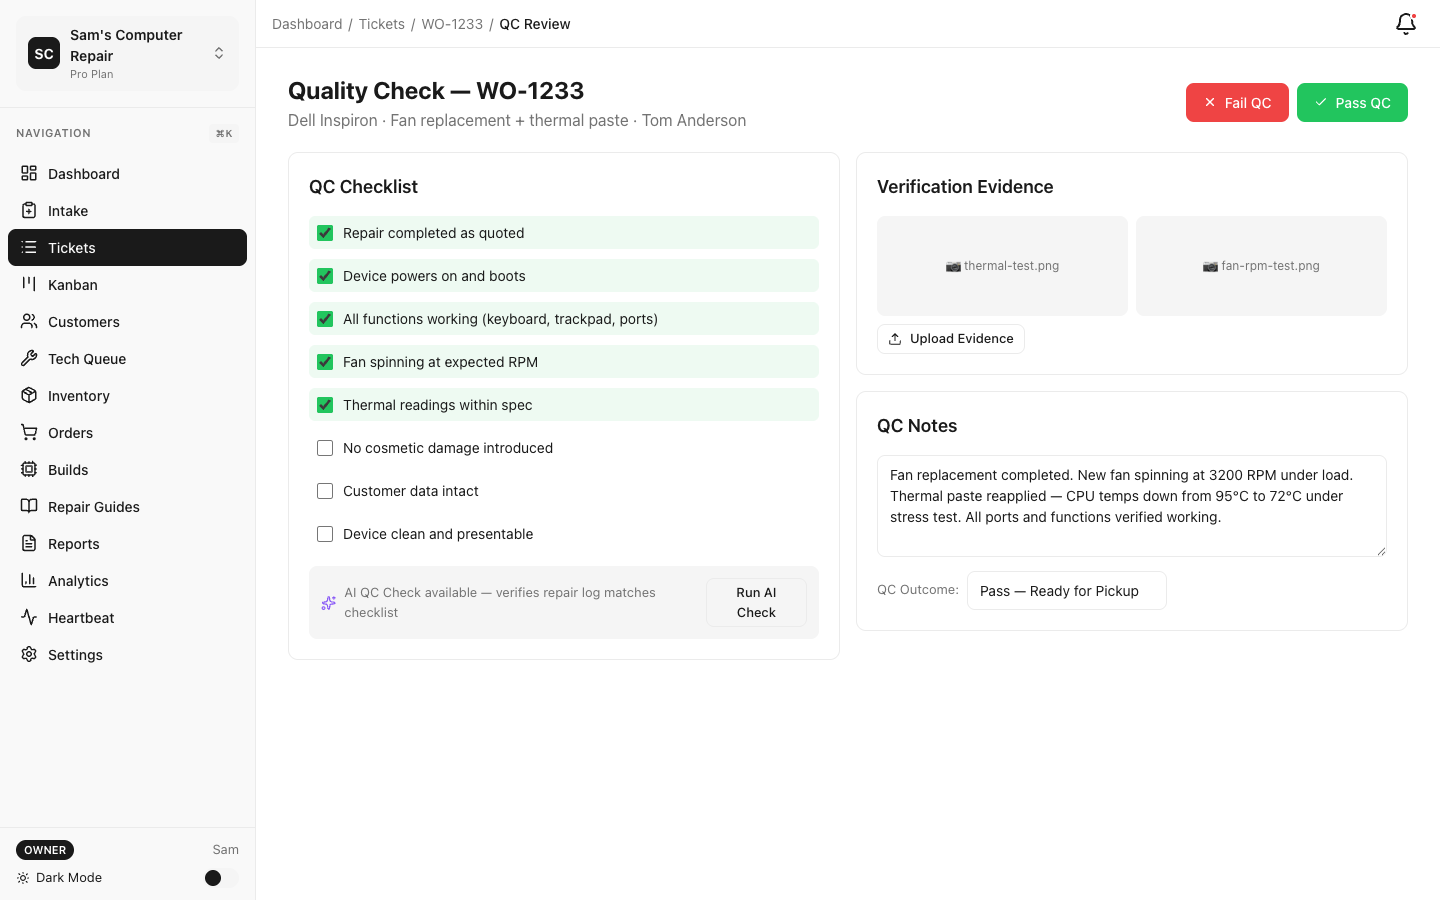
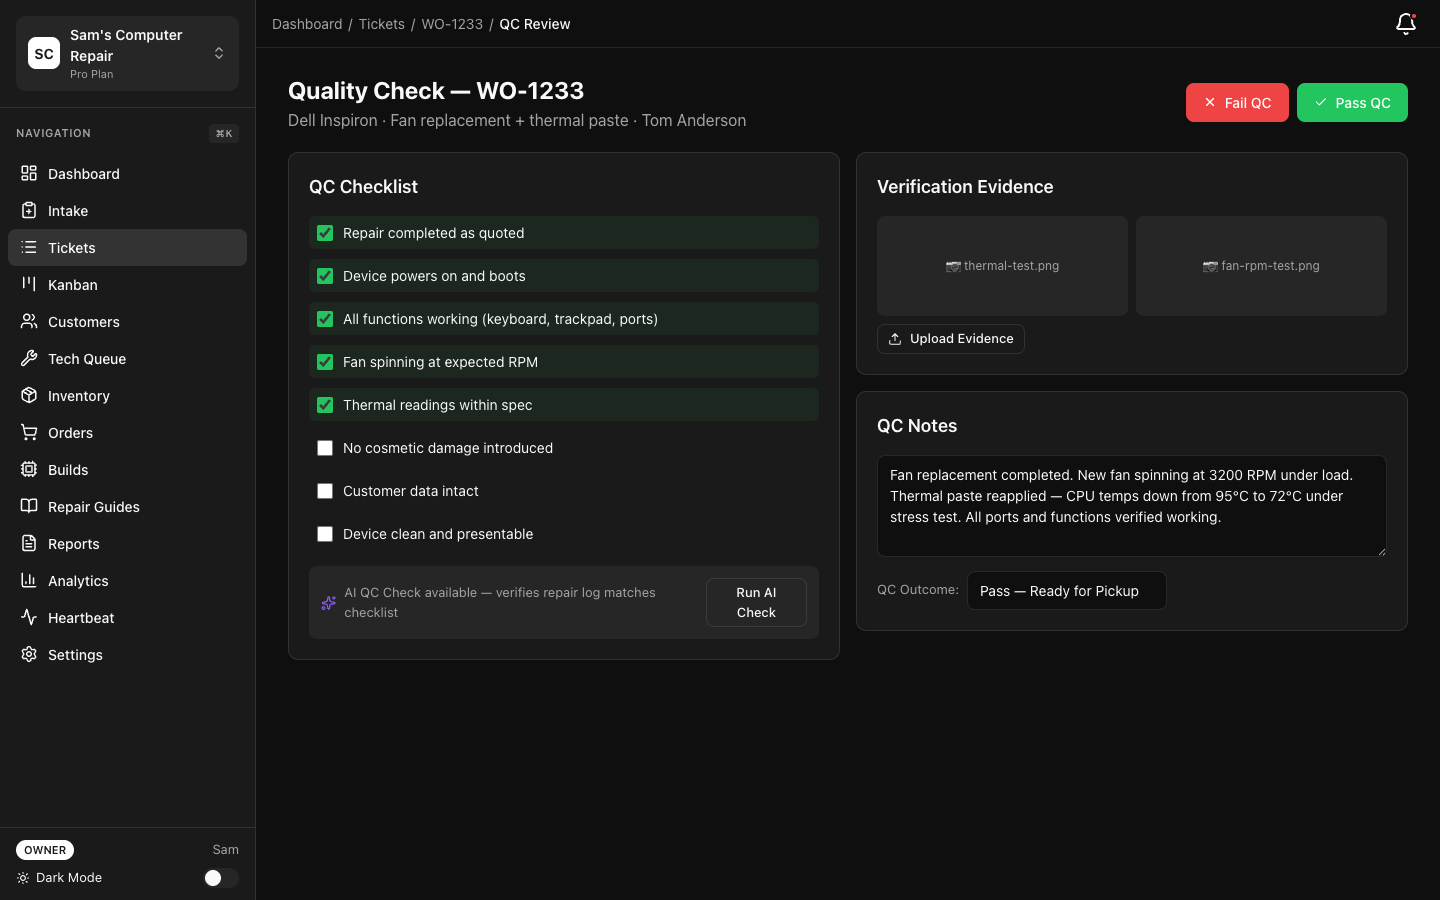 2. RepairOps presents the QC checklist (role-specific):
- **Power Test** — Does it turn on reliably?
- **Screen Test** — Full display, no dead pixels or discoloration?
- **Touch Test** — Accurate and responsive?
- **Audio Test** — All speakers and mics work?
- **Connectivity** — WiFi, Bluetooth, cellular?
- **Physical Inspection** — Clean, properly assembled, no stickers/adhesive?
- **Cosmetic** — No scratches, fingerprints, or damage introduced during repair?
2. RepairOps presents the QC checklist (role-specific):
- **Power Test** — Does it turn on reliably?
- **Screen Test** — Full display, no dead pixels or discoloration?
- **Touch Test** — Accurate and responsive?
- **Audio Test** — All speakers and mics work?
- **Connectivity** — WiFi, Bluetooth, cellular?
- **Physical Inspection** — Clean, properly assembled, no stickers/adhesive?
- **Cosmetic** — No scratches, fingerprints, or damage introduced during repair?
- Check off each item as you verify
- Take QC evidence photos showing the device in working state
QC Decision
Section titled “QC Decision”Option 1: Pass (All checks OK)
- Click “QC Pass”
- Status changes to READY_FOR_PICKUP
- Device is ready for customer handoff
Option 2: Fail (Issues found)
- Click “QC Fail”
- Add details: e.g., “Screen has dead pixel in top-right corner. Recommend replacement.”
- Status returns to IN_REPAIR
- Tech is notified and reworks the repair
- Once done, tech sends back to QC
- Repeat until QC passes
Gate requirement: QC cannot pass without completing the QC checklist, adding evidence photos, and documenting the outcome.
Stage 8: READY_FOR_PICKUP (Customer Collection)
Section titled “Stage 8: READY_FOR_PICKUP (Customer Collection)”Purpose: Prepare for customer to collect the device.
What Happens Automatically
Section titled “What Happens Automatically”- Device is marked READY_FOR_PICKUP
- Customer is notified (email): “Your [device] is ready! Pick it up at [shop address].”
- Ticket appears in the READY_FOR_PICKUP column
- Invoice is generated (can be printed or emailed)
When Customer Arrives
Section titled “When Customer Arrives”- Front desk or manager clicks on the ticket
- Click “Process Pickup”
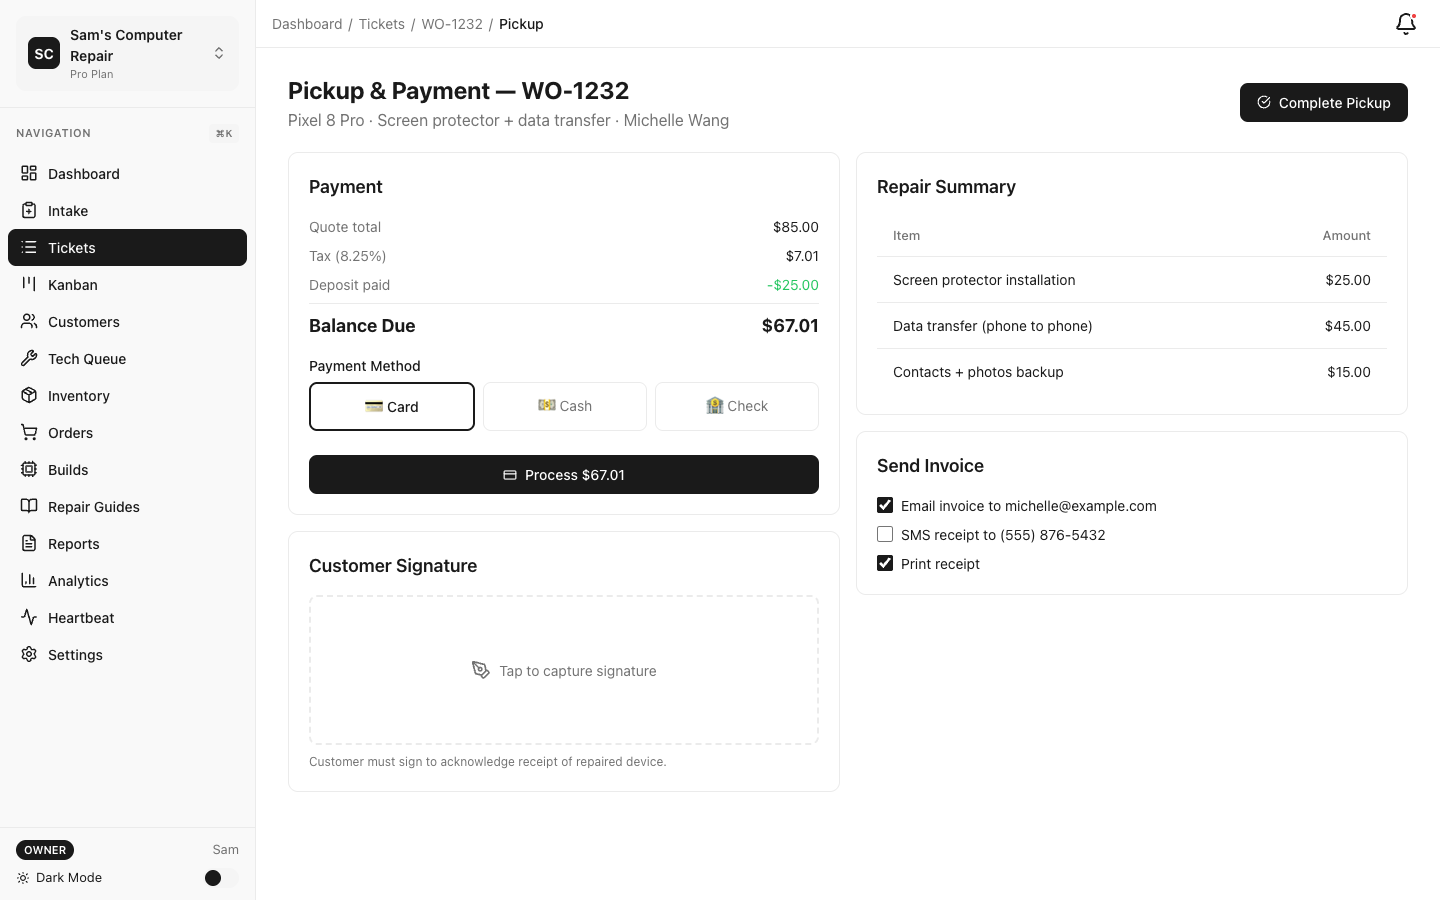
 3. Fill in:
- **Payment Method** — Cash, card, check, or invoice link
- **Amount Received** — Confirm total paid
- **Signature** — If using a tablet, customer signs on screen. If paper, you can upload a photo of their signature.
3. Fill in:
- **Payment Method** — Cash, card, check, or invoice link
- **Amount Received** — Confirm total paid
- **Signature** — If using a tablet, customer signs on screen. If paper, you can upload a photo of their signature.
Capture Signature
Section titled “Capture Signature”- Click “Capture Signature”
- If on tablet/iPad: customer signs directly
- If on desktop: you can print the receipt and have them sign, then upload a photo
- Once signature is captured, click “Confirm Pickup”
Issue Invoice & Receipt
Section titled “Issue Invoice & Receipt”-
RepairOps auto-generates the invoice with:
- All line items (parts, labor)
- Total cost
- Payment method (what was used)
- Signature proof
-
Offer options:
- Email Invoice — Sends to customer email
- Print Receipt — For cash/check customers
- Both
-
Click “Complete Pickup”
- Status changes to PICKED_UP
- Payment is recorded
- Ticket is marked complete
Stage 9: CLOSED (Final)
Section titled “Stage 9: CLOSED (Final)”Purpose: Archive and complete the ticket.
Auto-Close or Manual
Section titled “Auto-Close or Manual”Option 1: Auto-Close (Recommended)
- After pickup, RepairOps automatically moves to PICKED_UP
- Ticket is archived after 30 days (or configurable retention period)
Option 2: Manual Close
- Click “Close Ticket” after pickup is processed
- Status changes to CLOSED
- Ticket is archived immediately
What’s Recorded
Section titled “What’s Recorded”The closed ticket includes:
- Intake details — Customer, device, issue
- All work logs — What was repaired, parts used, time
- QC results — Verification checklist and evidence
- Invoice — Cost breakdown and payment proof
- Signature — Customer acceptance
- Timeline — When each stage started/ended
This history is kept for:
- Warranty claims — “Did we repair the screen on 3/5?”
- Disputes — Proof of what was done and paid
- Analytics — Turnaround time, technician performance, revenue
- Compliance — Audit trail for regulations
Common Scenarios
Section titled “Common Scenarios”Scenario 1: Customer Changes Mind
Section titled “Scenario 1: Customer Changes Mind”Device in WAITING_APPROVAL, customer decides not to repair:
- Click “Void Ticket”
- Reason: “Customer declined”
- Status: VOIDED
- No payment required
- Ticket archived; device returned to customer
Scenario 2: Additional Issues Found
Section titled “Scenario 2: Additional Issues Found”Tech starts repair, finds other damage (not in original quote):
- Tech adds a note in the work log: “Found water damage to battery connector; recommend replacement”
- Tech clicks “Request Price Approval”
- Manager or tech creates a revised quote for the additional work
- Send new quote to customer (same approval process)
- Customer approves or declines the added work
- Continue repair if approved
Scenario 3: Parts Take Longer
Section titled “Scenario 3: Parts Take Longer”Parts were supposed to arrive in 3 days, but delayed 2 weeks:
- Ticket is in WAITING_ON_PARTS
- Click “Update ETA” — Push the expected date forward
- Or click “Cancel Order” — Find alternative supplier or cancel repair (refund customer)
Scenario 4: Device Left Uncollected
Section titled “Scenario 4: Device Left Uncollected”30 days pass, customer hasn’t picked up:
- RepairOps alerts you at 25 days: “Device ready for 25 days. Consider contacting customer.”
- Send reminder: “Your device is ready at [shop]. Please pick it up by [date].”
- After 45 days (configurable), mark device as “Abandoned”
- Charge storage fee (if applicable)
- Document in ticket
- Per your shop’s policy, donate, recycle, or sell device
Tips for Smooth Workflow
Section titled “Tips for Smooth Workflow”✓ Take photos at every stage — Protects you in disputes
✓ Document thoroughly in diagnostics — Prevents “Why did you charge that?” questions
✓ Use pre-built quotes — Set up common repairs (screen = $150 + labor) to speed quotes
✓ Communicate early — If you find unexpected damage, tell customer immediately. Don’t surprise them at pickup.
✓ Test before QC — Have the tech do full testing before handing to QC to reduce rework
✓ Capture signatures — Digital signature on tablet or photo of paper signature protects your shop
✓ Archive notes — Close tickets promptly so your Kanban board stays clear and fast
Next Steps
Section titled “Next Steps”- Team Setup — Assign roles so each person knows their stage
- Plans and Billing — Explore features like SMS reminders, appointment booking, etc.
- User Guide by Role — Deep dive into workflows for your specific role
Questions? Check Frequently Asked Questions or email support@repairops.app.