Team Setup & Roles
Learn how to invite team members, assign roles, and organize your shop.
Understanding Roles
Section titled “Understanding Roles”RepairOps has 7 core roles. Each has specific permissions for the workflow stages. Here’s what each role can do:
You — Full control of the organization.
Permissions:
- Create and manage shops (Starter: 1 shop, Pro: unlimited, Enterprise: unlimited)
- Invite, remove, and manage all team members
- Assign and change roles
- Access billing and subscription settings
- View all organization reports and analytics
- Approve all tickets and quotes
- Can perform any action (triage, repair, QC, etc.)
Who: Shop owner or head manager. Usually 1–2 people per organization.
MANAGER
Section titled “MANAGER”Oversight and coordination. TRIAGE decisions.
Permissions:
- Triage tickets (assign technicians, set priority)
- Approve all quotes and estimates
- Oversee technicians’ work (view their tickets, progress)
- Manage shop settings (addresses, hours, services)
- Create and manage staff schedules
- View shop-level reports (team productivity, revenue)
- Can void any ticket
- Can make all ticket status changes except tech-specific ones (repair, diagnostics)
Who: A lead technician or operations manager. Usually 1 person per shop.
Cannot do: Tech-specific repair work, QC testing, accounting/payments.
FRONT_DESK
Section titled “FRONT_DESK”Customer-facing intake and communication.
Permissions:
- Create new tickets (check-in)
- Collect customer information and device photos
- Move tickets to INTAKE → TRIAGE
- Process pickups (capture payment, signature, issue receipt)
- Send quotes to customers
- Move tickets to READY_FOR_PICKUP and PICKED_UP
- Answer status check calls: “Is my phone ready?”
- Can void any ticket
Who: Receptionist, office manager, or customer service person. Usually 1–2 per shop.
Cannot do: Technical diagnostics, repair work, quality checks, create quotes (managers/techs do that).
TECHNICIAN
Section titled “TECHNICIAN”Repair work and diagnostics. The core workflow.
Permissions:
- Receive tickets assigned by manager
- Run diagnostics and document findings
- Create quotes (but manager approves before sending)
- Perform repairs and log work
- Manage parts inventory (what’s used)
- Move tickets through DIAGNOSTICS → IN_REPAIR → QC_REVIEW
- View their own work and productivity
Who: All repair technicians. Can have many per shop.
Cannot do: Triage (manager does), final QC approval, void tickets, change other people’s work, access billing.
Quality verification. Final check before customer gets device.
Permissions:
- Review work in QC_REVIEW status
- Run verification checklists
- Pass or fail repairs
- Return tickets to IN_REPAIR if issues found
- Move to READY_FOR_PICKUP once passing
- View QC history and pass rates
Who: Dedicated QC specialist or experienced technician. Usually 1–2 per shop.
Cannot do: Perform repairs, triage, void tickets, access billing.
DISPATCHER
Section titled “DISPATCHER”Work scheduling and team coordination.
Permissions:
- View all open tickets and work queue
- Assign technicians to appointments (if booking enabled)
- View technician availability and schedules
- Manage appointment slots (Pro feature)
- Send notifications to team about pending work
- View team schedules and coordination tools
Who: Operations coordinator or manager’s assistant. Optional; manager can do this.
Cannot do: Create or modify tickets, perform work, access billing.
ACCOUNTING
Section titled “ACCOUNTING”Payments, invoices, and financial records.
Permissions:
- View all closed tickets with payment info
- Record payments (cash, check, card)
- Generate invoices and receipts
- View financial reports (revenue, payment methods)
- Export transaction data
- Record refunds and adjustments
Who: Finance person or shop manager handling money. Usually 1 person.
Cannot do: Create or move tickets, repair work, void tickets.
Recommended Team Structure
Section titled “Recommended Team Structure”Solo Shop (You + 1 Technician)
Section titled “Solo Shop (You + 1 Technician)”| Name | Role | Responsibilities |
|---|---|---|
| You | OWNER + MANAGER | Triage, quotes, oversight, billing |
| Tech | TECHNICIAN | Diagnostics, repair, QC |
In this setup:
- You do intake (FRONT_DESK duties) or have customer do it online
- You handle all quotes and approvals
- Technician does all repair and testing work
- You both could do QC or bring in a part-timer
Medium Shop (4–6 People)
Section titled “Medium Shop (4–6 People)”| Name | Role |
|---|---|
| You | OWNER |
| Manager | MANAGER |
| Front Desk | FRONT_DESK |
| Tech 1 | TECHNICIAN |
| Tech 2 | TECHNICIAN |
| QC Specialist | QC |
In this setup:
- You oversee strategy; manager runs day-to-day
- Front desk handles all customer intake and pickups
- Each tech handles repair work independently
- QC specialist verifies all work before pickup
- Manager triages and approves quotes
Multi-Shop Enterprise (10+ People)
Section titled “Multi-Shop Enterprise (10+ People)”| Name | Role | Shop |
|---|---|---|
| You | OWNER | Organization-wide |
| Shop Manager 1 | MANAGER | Main Location |
| Shop Manager 2 | MANAGER | Downtown Location |
| Tech 1, 2, 3 | TECHNICIAN | Main Location |
| Tech 4, 5 | TECHNICIAN | Downtown Location |
| QC 1 | QC | Main Location |
| QC 2 | QC | Downtown Location |
| Front Desk 1, 2 | FRONT_DESK | Main Location |
| Front Desk 3 | FRONT_DESK | Downtown Location |
| Dispatcher | DISPATCHER | Organization-wide |
| Accountant | ACCOUNTING | Organization-wide |
In this setup:
- Each shop has its own manager, techs, and QC
- Dispatcher coordinates across both shops
- Accountant handles all billing for both locations
- Organization-level analytics show combined performance
Inviting Team Members
Section titled “Inviting Team Members”Step 1: Go to Team Settings
Section titled “Step 1: Go to Team Settings”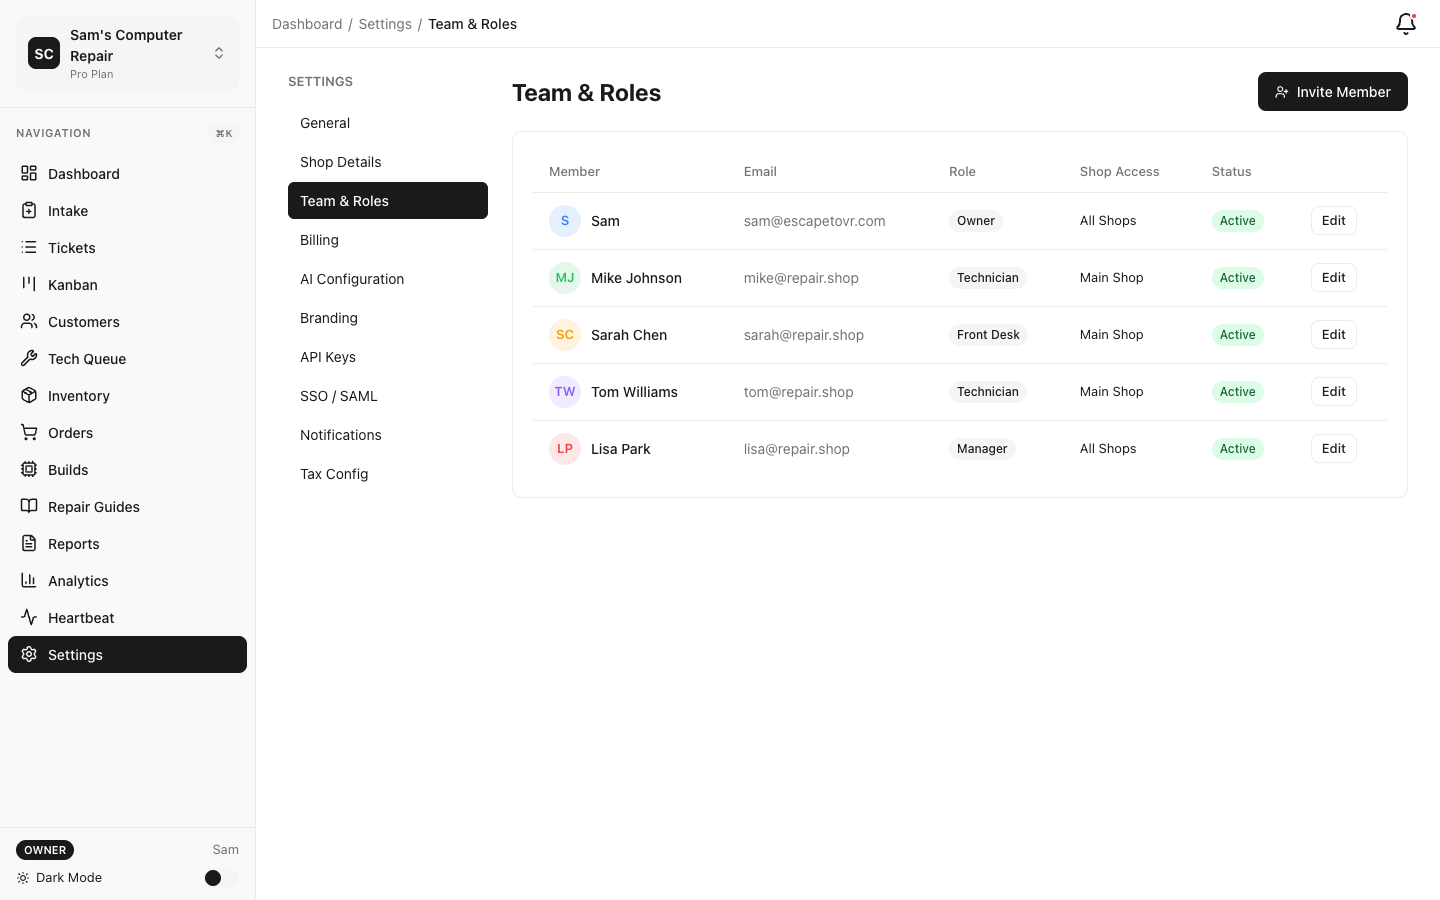
- Click Settings (gear icon, top right)
- Click Team in the left sidebar
- Click “Invite Team Member” button
Step 2: Enter Their Email
Section titled “Step 2: Enter Their Email”- Email Address — Their work email (e.g., “john@shop.com”)
- This is how they’ll receive the invite link
Step 3: Assign Role
Section titled “Step 3: Assign Role”- Click the Role dropdown
- Select their role (see role descriptions above)
- If you’re unsure, TECHNICIAN is the safest default — you can change it anytime
Step 4: (Optional) Add to Specific Shops
Section titled “Step 4: (Optional) Add to Specific Shops”If you have multiple shops (Pro or Enterprise tier):
- Check which shops they should access
- Uncheck shops they shouldn’t see (e.g., don’t give Downtown Front Desk access to Main Location inventory)
- By default, all shops are selected
Step 5: Send Invite
Section titled “Step 5: Send Invite”Click “Send Invite”.
- Email is sent to their address with a magic-link login
- They have 7 days to accept
- Once they accept, they can start working immediately
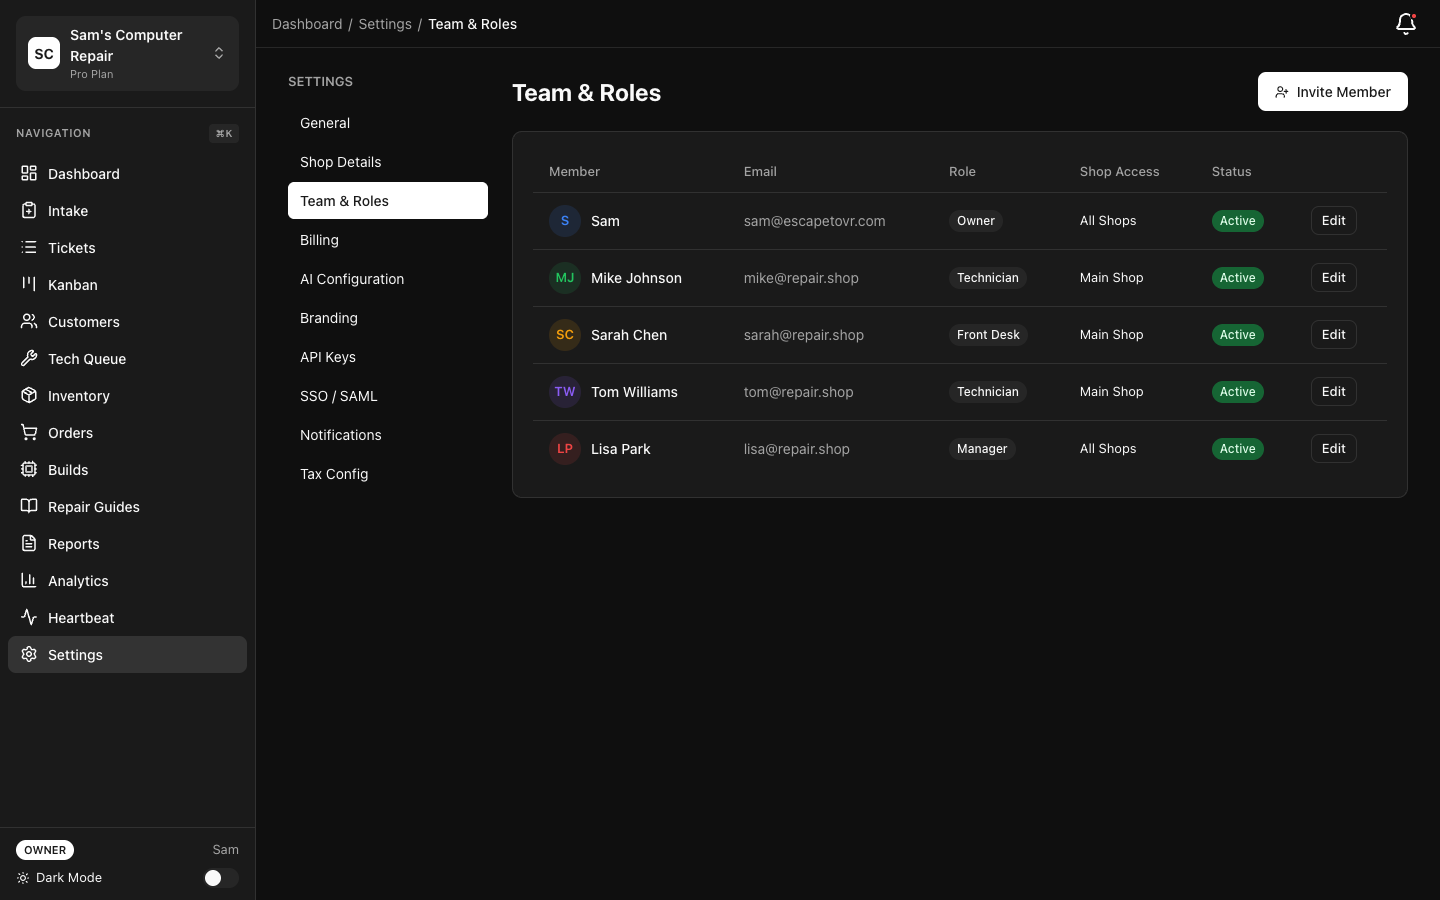
Managing Team Members
Section titled “Managing Team Members”View All Team Members
Section titled “View All Team Members”Settings → Team
You’ll see a list showing:
- Name
- Role(s)
- Shops they can access
- Date invited / joined
- Status (active, pending invite, suspended)
Change Someone’s Role
Section titled “Change Someone’s Role”- Click on their name in the team list
- Click “Edit Role”
- Select new role
- Click “Save”
Changes take effect immediately. They’ll see new permissions next time they log in.
Add Someone to Additional Shops
Section titled “Add Someone to Additional Shops”- Click on their name
- Click “Edit Shops”
- Check boxes for shops to add them to
- Click “Save”
Remove a Team Member
Section titled “Remove a Team Member”- Click on their name
- Click “Remove from Team”
- Confirm
Once removed:
- They can no longer log in
- Their past work remains (for history)
- Outstanding tickets reassigned to another tech (if applicable)
- They get a notification that access has ended
Note: You can’t remove yourself. If you need to leave, transfer OWNER role to another manager first, then ask them to remove you.
Suspend & Reactivate
Section titled “Suspend & Reactivate”If someone goes on leave:
- Click on their name
- Click “Suspend”
- They can’t log in during suspension
- Click “Reactivate” when they return
Permission Matrix (Quick Reference)
Section titled “Permission Matrix (Quick Reference)”| Action | OWNER | MANAGER | FRONT_DESK | TECH | QC | ACCOUNTING | DISPATCHER |
|---|---|---|---|---|---|---|---|
| Create Ticket (INTAKE) | ✓ | ✓ | ✓ | ✓ | |||
| Triage (assign tech) | ✓ | ✓ | |||||
| Diagnostics | ✓ | ✓ | ✓ | ||||
| Create Quote | ✓ | ✓ | ✓ | ✓ | |||
| Approve Quote | ✓ | ✓ | ✓ | ||||
| Repair Work | ✓ | ✓ | ✓ | ||||
| QC Review | ✓ | ✓ | ✓ | ||||
| Process Pickup | ✓ | ✓ | ✓ | ||||
| Record Payment | ✓ | ✓ | ✓ | ||||
| View Reports | ✓ | ✓ | ✓ | ✓ | |||
| Manage Billing | ✓ | ||||||
| Manage Team | ✓ | ||||||
| Void Ticket | ✓ | ✓ | ✓ |
Multi-Shop Organization
Section titled “Multi-Shop Organization”If you have multiple shops (requires Pro tier or above):
Create a New Shop
Section titled “Create a New Shop”- Settings → Shops
- Click “Add Location”
- Enter:
- Shop name (e.g., “Downtown Location”)
- Address
- Phone
- Hours
- Service categories
- Click “Create Shop”
Assign Staff to Shops
Section titled “Assign Staff to Shops”- Settings → Team
- Click on team member
- Click “Edit Shops”
- Check/uncheck which shops they work at
- Save
Example:
- Main Location: John (TECH), Sarah (FRONT_DESK), Lisa (QC)
- Downtown: Mike (TECH), Lisa (QC), Tom (MANAGER)
Lisa works both locations and can see/work tickets at both.
View Stats by Shop
Section titled “View Stats by Shop”- Reports → By Shop
- See revenue, turnaround time, technician productivity per location
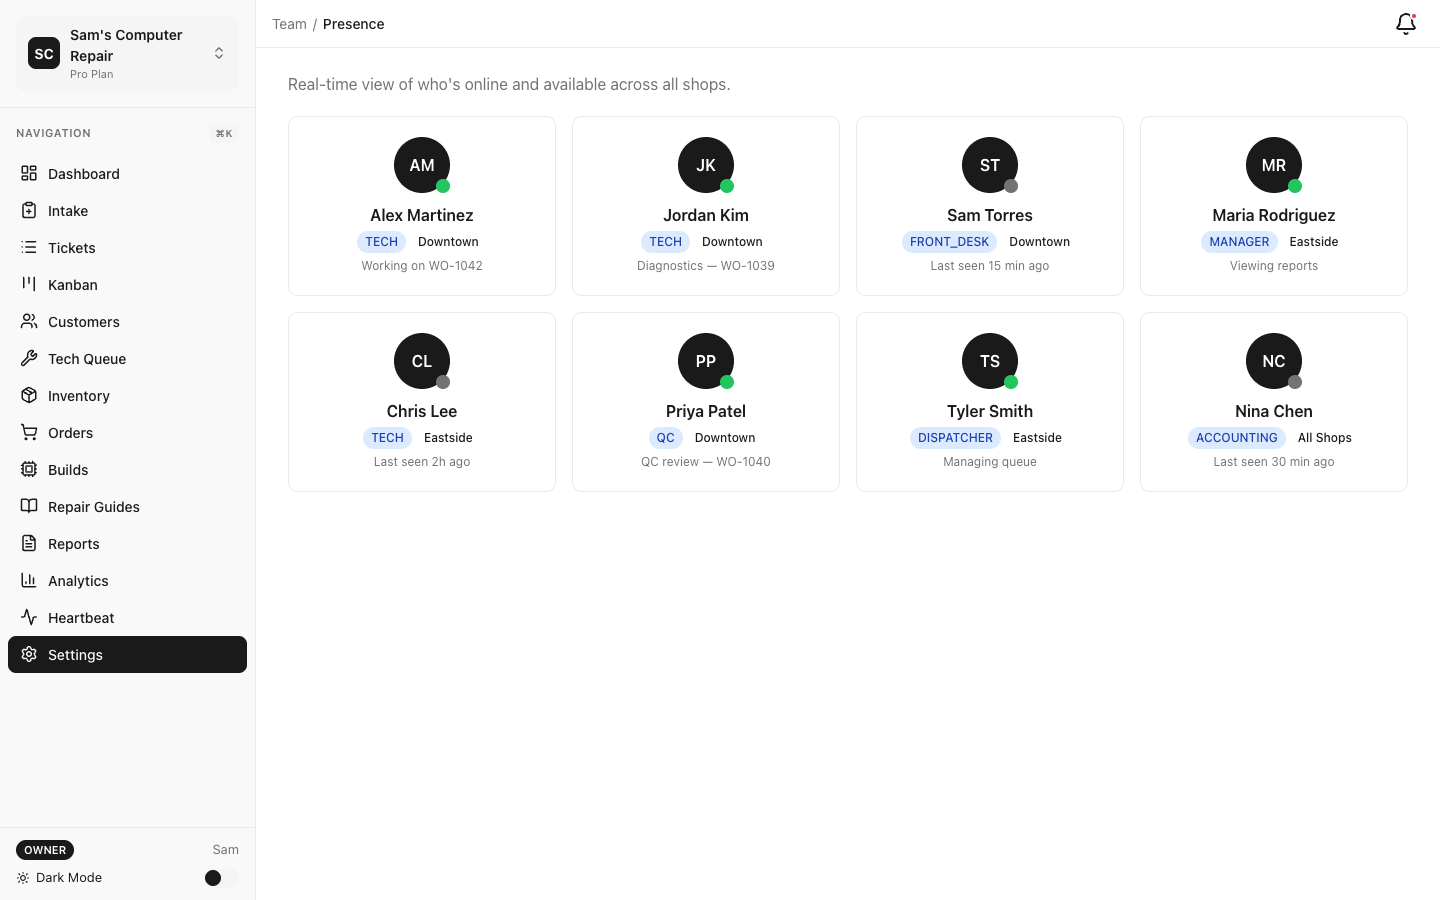
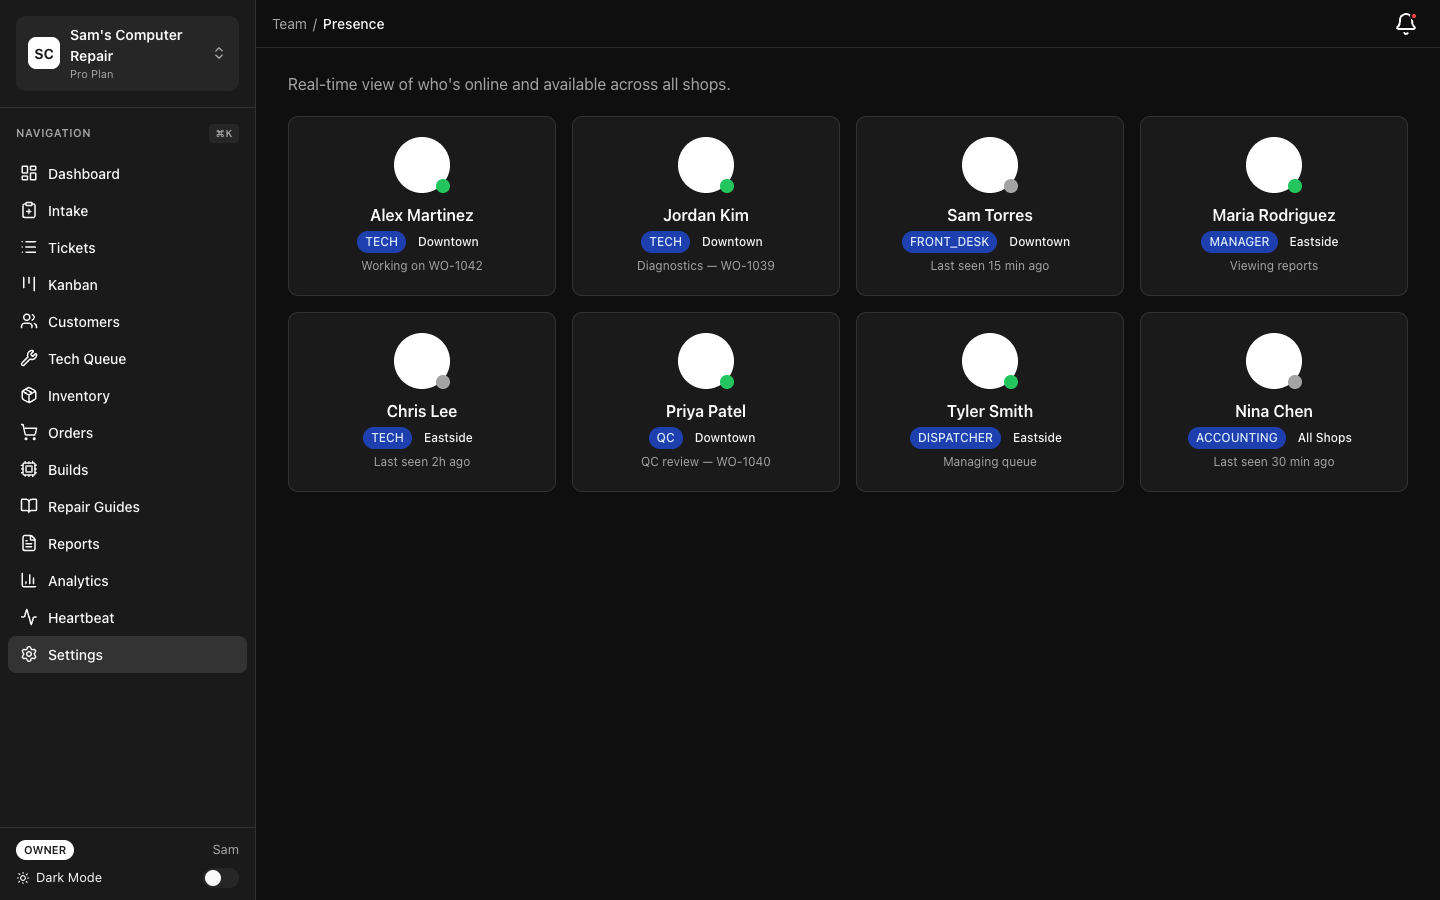
Role-Specific Dashboards
Section titled “Role-Specific Dashboards”Once you’ve set up your team, each person sees a dashboard tailored to their role:
MANAGER Dashboard
Section titled “MANAGER Dashboard”- Triage queue (new tickets waiting for tech assignment)
- Team productivity (who’s got capacity?)
- Quote approvals pending
- QC pass rate
- Revenue this month
TECHNICIAN Dashboard
Section titled “TECHNICIAN Dashboard”- My Work (tickets assigned to me)
- Upcoming appointments
- Inventory (parts in stock)
- My productivity (tickets completed, hours worked)
FRONT_DESK Dashboard
Section titled “FRONT_DESK Dashboard”- New tickets (check-ins to process)
- Pickup queue (ready for customer collection)
- Customer communications (messages, status checks)
- Receipt/invoice printing
QC Dashboard
Section titled “QC Dashboard”- QC Review queue (ready for testing)
- QC history (passes and failures this week)
- Rework rate (how often you fail work?)
DISPATCHER Dashboard
Section titled “DISPATCHER Dashboard”- All open tickets (high-level view)
- Team availability
- Appointment schedule
- Coordination notes
ACCOUNTING Dashboard
Section titled “ACCOUNTING Dashboard”- Closed tickets (with payment status)
- Revenue summary
- Payment methods breakdown
- Refunds and adjustments
Best Practices for Team Setup
Section titled “Best Practices for Team Setup”1. Principle of Least Privilege
- Give each person the minimum role they need
- Avoid giving everyone MANAGER or OWNER role
- If unsure, start with basic role; upgrade if needed
2. Clear Role Ownership
- One person should be the MANAGER (clear chain of command)
- Each stage should have clear ownership:
- FRONT_DESK: intake & pickup
- TECH: repair & diagnostics
- QC: verification
- MANAGER: oversight & approval
3. Cross-Training
- Train 2 people in each critical role (TECH, FRONT_DESK)
- Prevents bottlenecks when someone’s sick or on vacation
4. Monitor Role Creep
- Periodically review who has what permissions
- Remove permissions when someone changes roles
- Document your team structure in a shared spreadsheet
5. Communication
- When you change someone’s role, tell them what changed
- Example: “I’ve added QC permission so you can verify work. No other changes.”
- Some may not notice permission changes
Troubleshooting
Section titled “Troubleshooting”Q: A technician can’t see their assigned ticket.
- Check: Are they assigned to the ticket? (Manager must assign in triage)
- Check: Do they have TECHNICIAN role? (Settings → Team → Role)
- Check: Are they assigned to this shop? (Settings → Team → Shops)
Q: I changed someone’s role, but they still see old permissions.
- They need to log out and log back in for new permissions to take effect
- Or ask them to refresh the page (Cmd+R or Ctrl+R)
Q: Can I have multiple managers?
- Yes! Have multiple MANAGER roles for different shops or responsibilities
- Be clear about who decides what to avoid conflicts
Q: Can I have multiple owners?
- Yes, but be careful. Owners can change billing, remove people, and access all data
- Use if you have a co-founder or trusted partner
Q: What if someone shouldn’t see certain shops?
- Edit their shops: Settings → Team → click their name → uncheck shops
- They’ll see only their assigned shops in the Kanban, reports, etc.
Next Steps
Section titled “Next Steps”- Your First Ticket — Now that your team is set up, create a ticket together
- User Guide by Role — Share role-specific guides with your team
- Plans and Billing — Check how many users each plan includes
Ready to invite your team? Go to Settings → Team and click “Invite Team Member”.