Quick Start Guide
Get your RepairOps account up and running in 15 minutes.
Step 1: Create Your Account
Section titled “Step 1: Create Your Account”- Go to repairops.app and click “Sign Up”
- Enter your email address
- Check your inbox for the magic link (valid for 24 hours)
- Click the link — you’re logged in, no password needed
- Optional: Create a password on the next screen if you prefer password login
Note: RepairOps uses magic-link authentication by default. You’ll receive a new login link each time you sign in, or you can opt into password authentication in your settings.
Step 2: Onboarding Wizard
Section titled “Step 2: Onboarding Wizard”After login, you’ll see the Onboarding Wizard. This takes about 10 minutes:

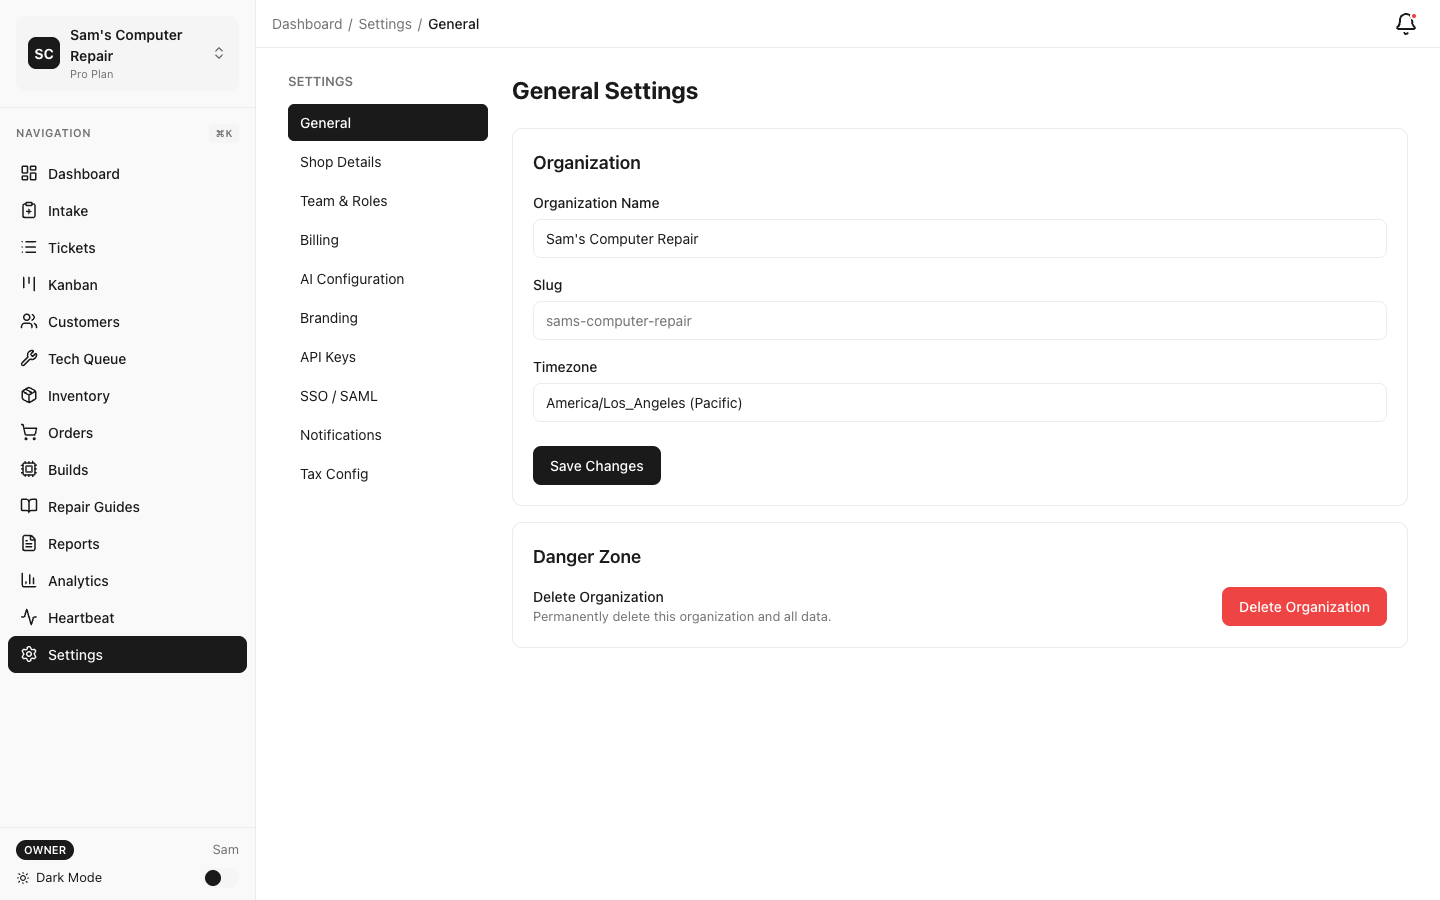
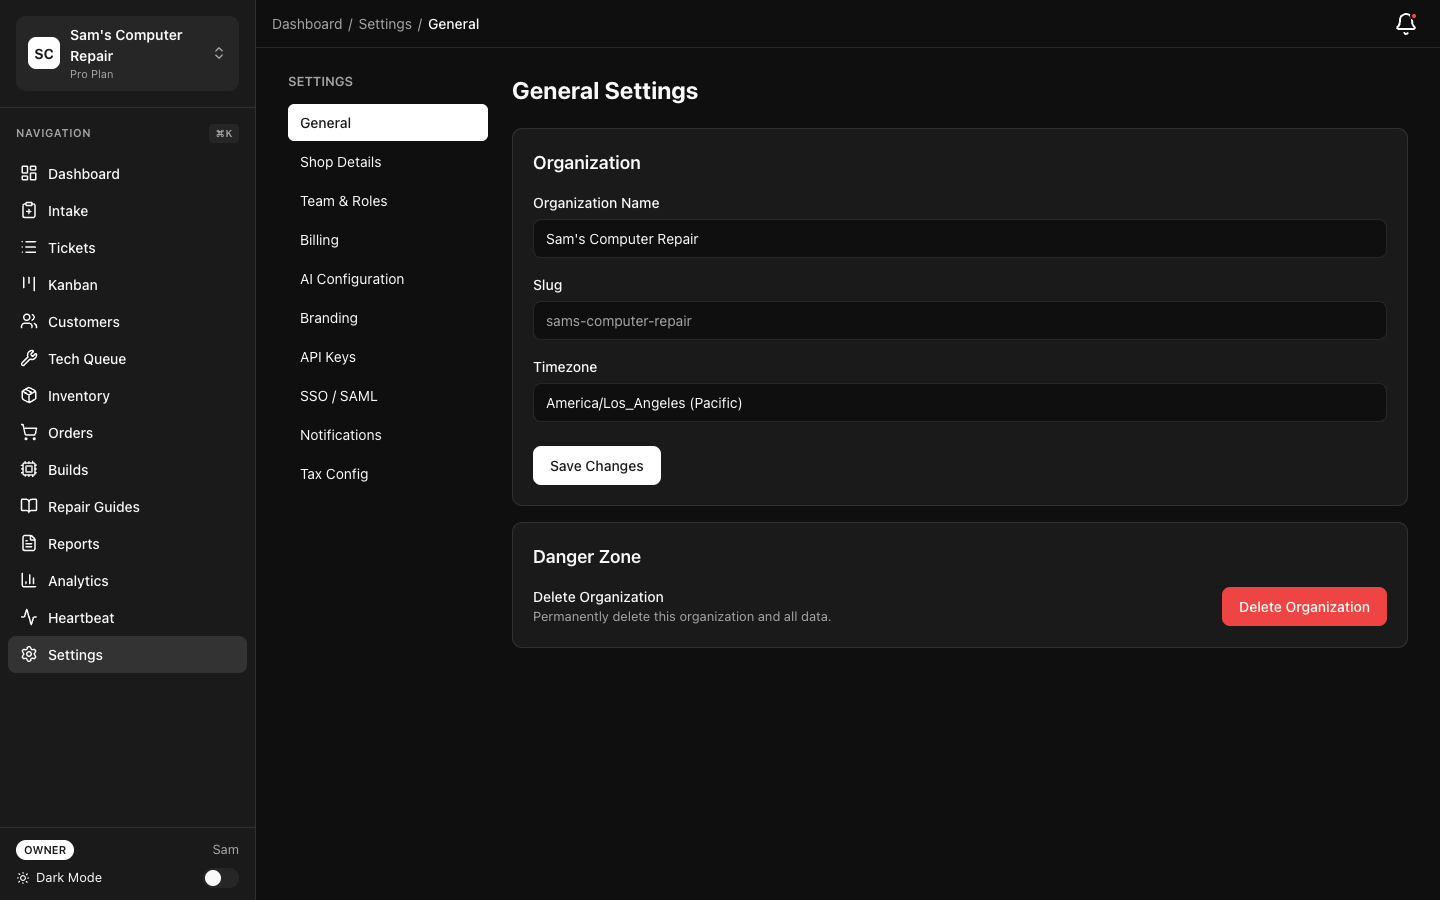
2a. Organization Details
Section titled “2a. Organization Details”- Organization Name — Your repair shop name (e.g., “Tech Repair Pro”)
- Industry — Select “Electronics Repair”
- Timezone — Defaults to your browser timezone; adjust if needed
2b. Shop Location
Section titled “2b. Shop Location”- Shop Name — Name of this location (e.g., “Main Shop” or “Downtown Location”)
- Address — Street, city, state, zip
- Phone — Shop phone number for customer communication
- Hours — Operating hours (used for appointment availability)
2c. Service Categories
Section titled “2c. Service Categories”Add the main services your shop offers. Examples:
- Phone Repair
- Laptop Repair
- Gaming Console Repair
- Water Damage Recovery
- Screen Replacement
You can add more services later — this is just to get started.
2d. Notification Preferences
Section titled “2d. Notification Preferences”- Email notifications — Alerts for ticket updates (you can customize this per user)
- SMS notifications — Text reminders (requires SMS credits; see Plans and Billing)
2e. Review & Confirm
Section titled “2e. Review & Confirm”Review your setup and click “Complete Setup”. You’re now in the RepairOps dashboard.
Step 3: Invite Your Team
Section titled “Step 3: Invite Your Team”Your first ticket goes much smoother with team members. Invite them now:
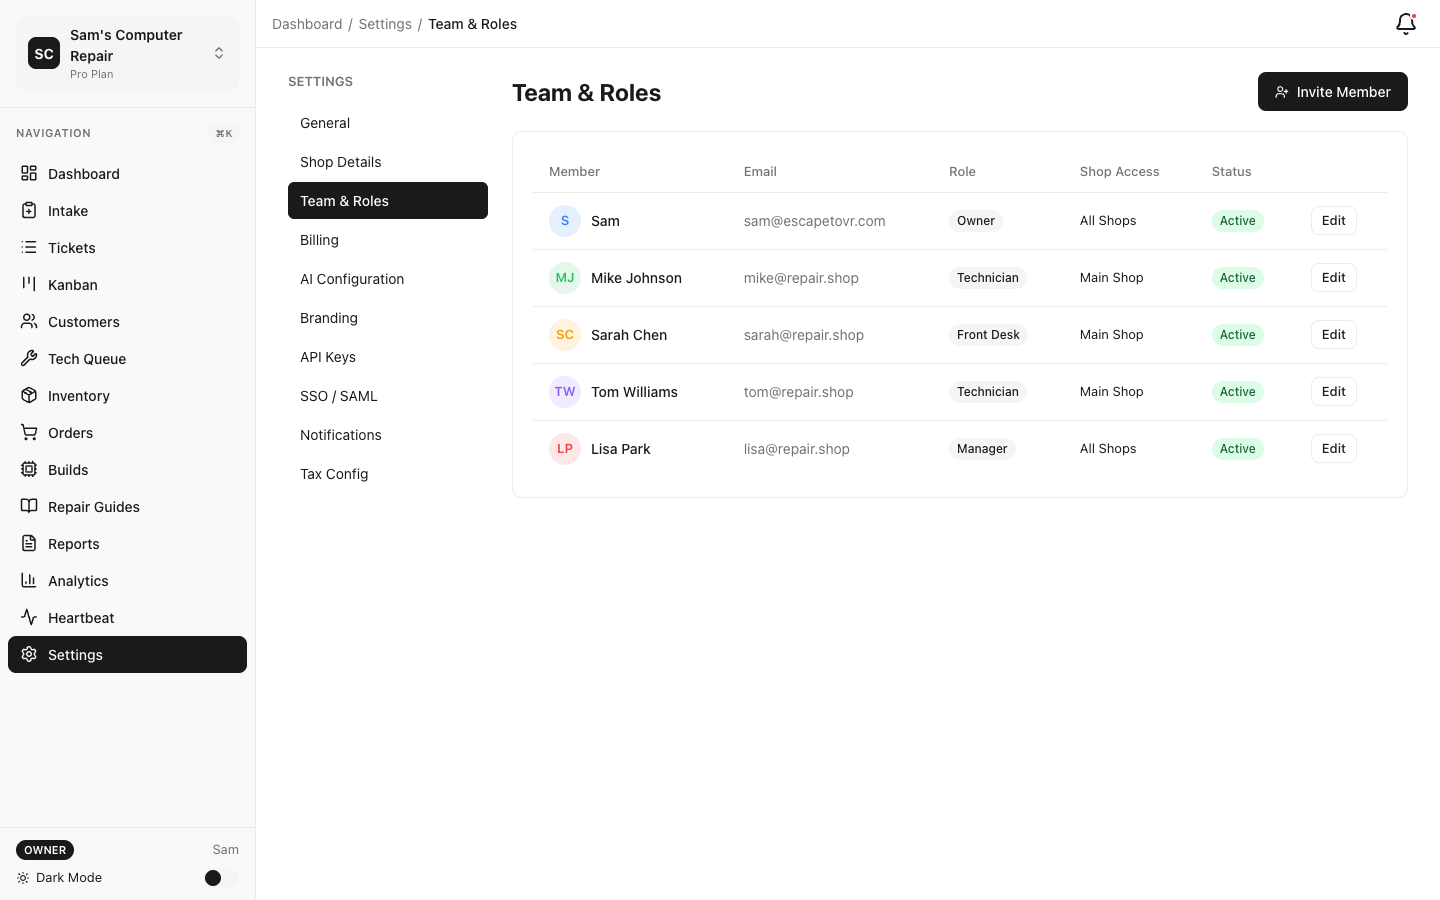
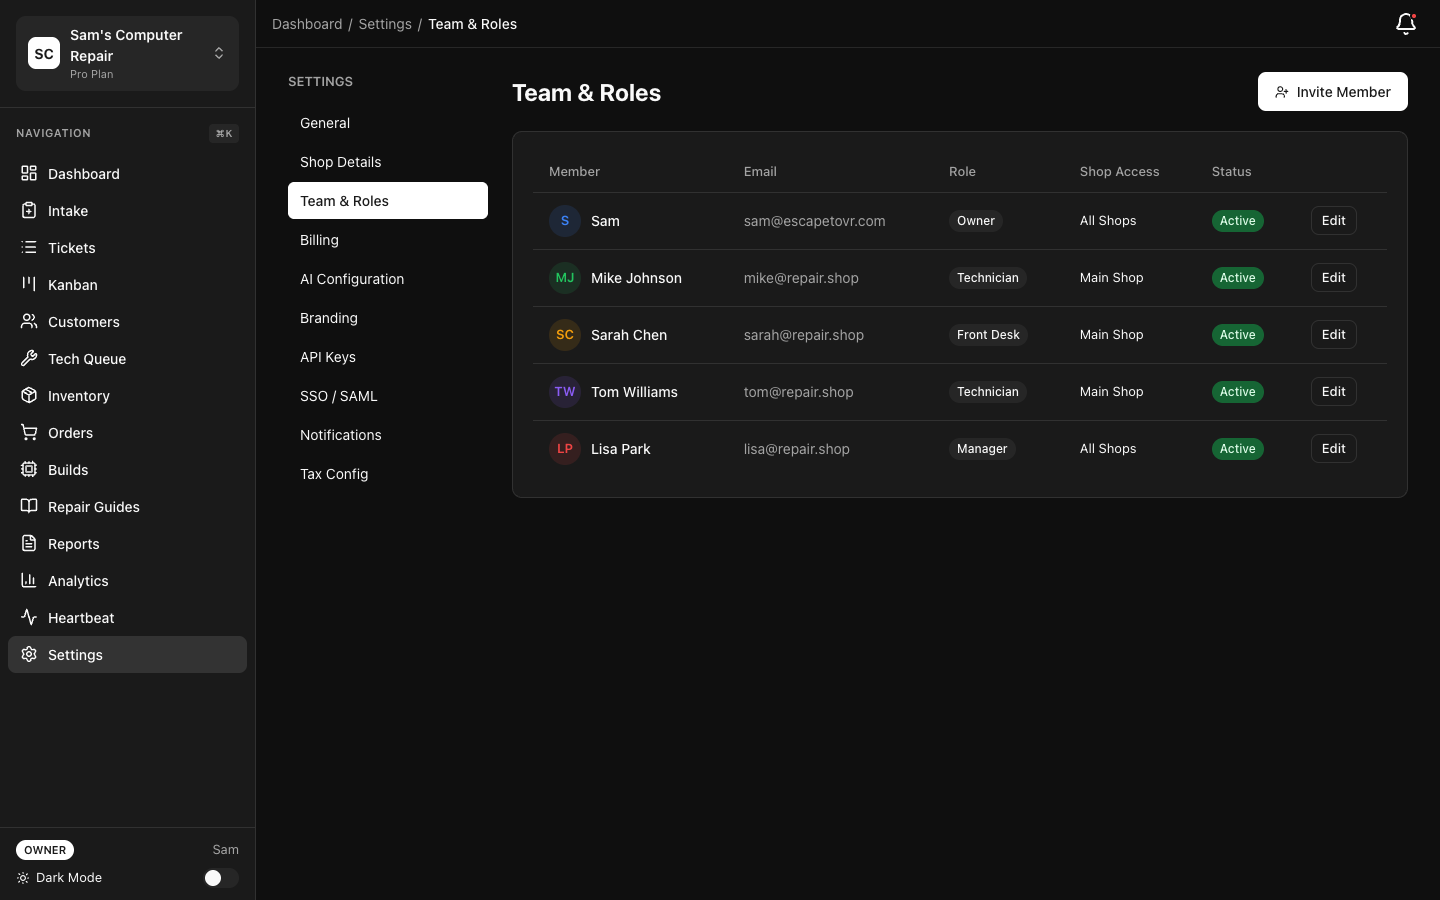
- Click Settings → Team in the top navigation
- Click “Invite Team Member”
- Enter their email address
- Select their role (see Team Setup for role explanations)
- Click “Send Invite”
- They’ll receive an email with a link. Once they accept, they can log in
Recommended first team:
- Manager — You (or another owner/manager)
- Technician — At least one person to process repairs
- Front Desk — If you have someone handling customer intake
- QC Specialist — If you do quality checks before pickup
Note: You can change roles anytime. Start simple and adjust as your workflow develops.
Step 4: Configure Service Catalog (Optional)
Section titled “Step 4: Configure Service Catalog (Optional)”Your shop likely has pricing and standard services. Add them:
- Go to Settings → Services
- Click “Add Service”
- Enter:
- Service name (e.g., “Screen Replacement - iPhone 14”)
- Category (from your onboarding)
- Base labor cost
- Typical turnaround time
- Whether it requires parts ordering
- Click “Save”
Repeat for 5–10 common services. You can customize pricing per ticket later.
Tip: You don’t need to add every possible service. Technicians can create custom line items in quotes. These are just templates for speed.
Step 5: Configure Notifications
Section titled “Step 5: Configure Notifications”Keep your team informed without overwhelming them:
- Go to Settings → Notifications
- Enable notifications you want:
- Ticket status changes (e.g., “Alert me when a ticket enters QC”)
- New assignments (tech gets notified of new work)
- Approval requests (customer portal link sent)
- Messages (team chat in tickets)
- Shift reminders (optional; prompts team to clock in)
- Set Quiet Hours to avoid late-night alerts
- Select notification channels:
- In-app (always on)
- Email (recommended for urgent items)
- SMS (uses SMS credits; see billing)
- Slack (if you use Slack; optional integration)
Each team member can customize their own notification preferences in their profile.
Step 6: Create Your First Ticket
Section titled “Step 6: Create Your First Ticket”Ready to test the system? Create a sample ticket:
- Click “New Ticket” (blue button in the top-right corner)
- Fill in:
- Customer Name — Use a test name (e.g., “John Smith”)
- Phone/Email — Your own contact info (you’ll approve the quote)
- Device Type — e.g., “iPhone 14”
- Issue — e.g., “Cracked screen”
- Photos — Optional; you can take photos or upload
- Consent — Check the box (customer agrees to terms)
- Click “Create Ticket”
You now have a ticket with a unique ID (e.g., #REP-001). It’s in the INTAKE status.
Step 7: Move Through the Workflow
Section titled “Step 7: Move Through the Workflow”Now move this test ticket through the entire flow to see how it works:
Triage (Manager assigns tech)
Section titled “Triage (Manager assigns tech)”- Find your ticket on the Kanban board (click the ticket card)
- Click “Move to Triage”
- Select a technician to assign
- Click “Confirm”
Diagnostics (Tech investigates)
Section titled “Diagnostics (Tech investigates)”- Click the ticket card again
- Click “Start Diagnostics”
- Add diagnostic findings (notes or checklist)
- Upload evidence (photos of the damage, test results, etc.)
- Click “Complete Diagnostics” → ticket moves to WAITING_APPROVAL
Create Quote (Tech or Manager)
Section titled “Create Quote (Tech or Manager)”- Click “Add Line Items”
- Add parts and labor:
- Parts: e.g., “iPhone 14 Screen - $80”
- Labor: e.g., “2 hours @ $50/hr = $100”
- Click “Send Quote to Customer”
- Customer gets an email with a link to the customer portal
- They can approve or request changes
Approval (You, as customer)
Section titled “Approval (You, as customer)”- Check your email for the approval link
- Click it (opens customer portal)
- Review the quote
- Click “I Approve”
- Ticket moves to APPROVED status
- Your team is notified
Repair (Tech logs work)
Section titled “Repair (Tech logs work)”- Technician clicks “Start Repair”
- Logs parts used (tracks inventory)
- Logs hours worked (tracks labor)
- Adds notes about the repair
- When done, clicks “Send to QC” → QC_REVIEW status
QC (Verification)
Section titled “QC (Verification)”- QC specialist reviews the repair
- Runs verification checklist (e.g., “Screen responds”, “No water damage”)
- If OK: clicks “QC Pass” → READY_FOR_PICKUP
- If issues: clicks “QC Fail” → returns to IN_REPAIR for rework
Pickup (Payment & Completion)
Section titled “Pickup (Payment & Completion)”- Customer arrives to pick up device
- Click “Process Pickup”
- Enter payment method (cash, card, customer portal payment link)
- Capture signature (use tablet or print receipt)
- Click “Complete”
- Ticket moves to PICKED_UP
- Invoice is generated and emailed
- Ticket can now be archived
Step 8: Explore the Dashboard
Section titled “Step 8: Explore the Dashboard”Now that you’ve seen the workflow, explore the dashboard:

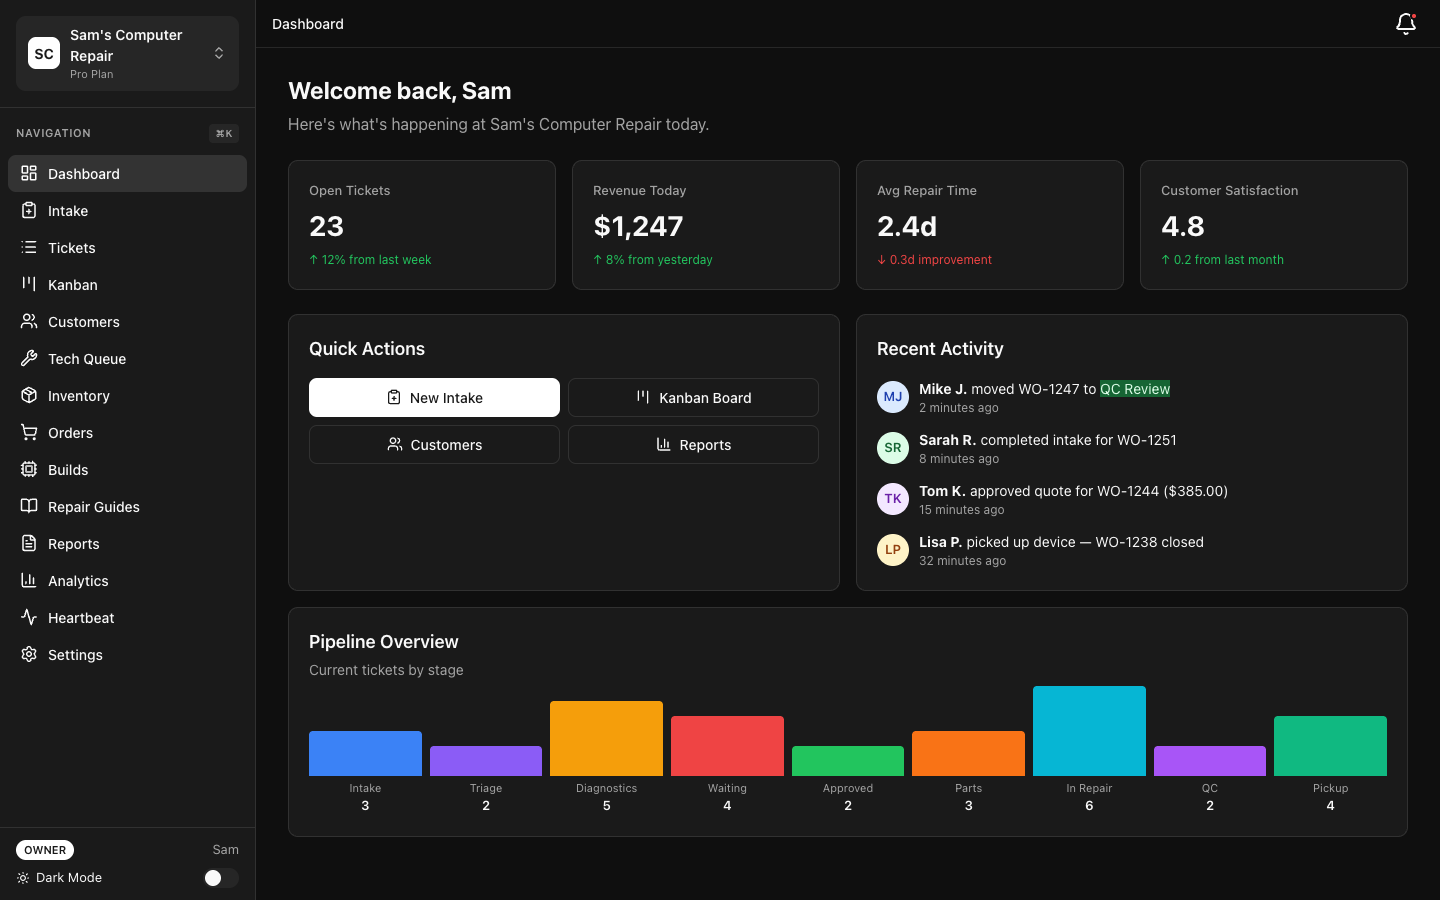
- Kanban Board — See all tickets by status at a glance
- My Work — Tasks assigned to the logged-in user
- Calendar — Appointment availability (if using booking)
- Reports — Revenue, turnaround time, technician productivity
- Settings — Organization, shop, team, integrations
Next Steps
Section titled “Next Steps”- Your First Ticket — Deep dive into each workflow stage
- Team Setup — Understand roles and permissions
- Plans and Billing — Explore paid features and credits
- User Guide by Role — Detailed workflows for each position
- Features — AI chat, booking, POS, analytics, and more
Troubleshooting
Section titled “Troubleshooting”Q: I didn’t receive the magic link email.
- Check spam folder
- Ask support to resend at support@repairops.app
Q: Can I add more shops later?
- Yes! Go to Settings → Shops → “Add Location” (Pro tier and up)
Q: What if I want to use password login?
- Go to Settings → Security → “Enable Password Login”
- Then you can sign in with email + password instead of magic links
Q: How do I delete a test ticket?
- Go to the ticket, click “Options” → “Void Ticket”
- Voided tickets are marked void but kept for audit purposes
Q: What’s included in my plan?
- See Plans and Billing for a full comparison
You’re ready! Your RepairOps shop is live. The next section (Your First Ticket) walks you through the complete flow in detail.