Plugins & Marketplace
Extend RepairOps with plugins that integrate label printers, booking systems, review management, POS systems, and custom integrations. Free plugins come with all tiers; Pro unlocks advanced capabilities.

What Are Plugins?
Section titled “What Are Plugins?”Plugins are modular extensions that:
- Add new workflows (e.g., appointment booking)
- Connect external services (e.g., label printer, SMS provider)
- Add capabilities (e.g., voice recognition, parts sourcing)
- Extend the UI (e.g., custom dashboard widgets)
Plugins are managed at the organization level, meaning they apply shop-wide and are shared across all team members.
Free Plugins Starter
Section titled “Free Plugins ”Label Printer
Section titled “Label Printer”Automatically print work orders and tickets on thermal label printers (Zebra, Brother, Dymo, etc.).
Setup:
- Navigate to Shop → Plugins → Label Printer
- Select printer model and connect via USB or network
- Choose label format (4x6, 4x8, custom)
- Select data to print: ticket number, barcode, customer name, device, issue summary
- Save and test
Usage:
- When transitioning a ticket to “In Repair”, click Print Label
- Auto-print on ticket creation (if enabled)
- Bulk print historical tickets
Supported printers:
- Zebra ZP450, ZP600, Z6M
- Brother QL-1100 (4x6)
- Dymo LabelWriter Pro
- Epson ColorWorks
Status Check Widget
Section titled “Status Check Widget”Embed a public status widget on your website showing current wait times and shop status.
Setup:
- Shop → Plugins → Status Check Widget
- Generate an embed code
- Paste into your website’s HTML
- Customize colors to match your branding
What customers see:
- “Currently accepting [device type] repairs”
- “Average turnaround: [X days]”
- “Estimated quote time: [X hours]”
- Queue position (if appointment booking enabled)
Widget updates every 15 minutes.
PCRT Migration Tool
Section titled “PCRT Migration Tool”Migrate historical repair data from PCRT legacy system.
Setup:
- Shop → Plugins → PCRT Migration
- Export your PCRT database as CSV
- Upload CSV file
- RepairOps maps fields and validates data
- Review mapping, adjust if needed
- Click Migrate (creates tickets, customers, parts, work history)
What’s imported:
- Repair tickets (with dates and status)
- Customer information
- Device history
- Parts used
- Technician assignments
See Migration Guide for detailed instructions.
Pro Plugins Pro
Section titled “Pro Plugins ”Pro tier customers can install additional plugins:
Google Reviews
Section titled “Google Reviews”
Manage and display customer reviews from Google Maps and Google Business.
Setup:
- Shop → Plugins → Google Reviews
- Authorize RepairOps to access your Google Business account
- Configure:
- Auto-post repair completion notification encouraging review
- Email template for review request
- Review display settings (allow/hide negative reviews)
Features:
- Monitor new reviews in RepairOps dashboard
- Respond to reviews from RepairOps (reply posted to Google)
- Track review trends and sentiment
- Integrate review rating into Analytics dashboard
Time Clock
Section titled “Time Clock”
Track employee work hours with a simple clock-in/clock-out system.
Setup:
- Shop → Plugins → Time Clock
- Enable for specific roles (TECH, FRONT_DESK, etc.)
- Set break times and overtime rules
- Configure overtime pay rules (if tracking)
Usage:
- Employees clock in/out from dashboard or mobile
- Auto-clock-in when assigned a ticket (optional)
- Auto-clock-out when ticket completed (optional)
- Punch-in/out directly from Kanban (one-click)
Features:
- Shift history and corrections (admin override)
- Timesheet export to payroll software (ADP, Workday, etc.)
- Hours-worked integration with KPI dashboard
- Overtime alerts
POS Terminal
Section titled “POS Terminal”
Covered in detail in POS Terminal documentation. Free sample of POS for Pro tier; full version included.
Appointment Booking
Section titled “Appointment Booking”
Allow customers to book repair appointments online.
Setup:
- Shop → Plugins → Appointment Booking
- Set availability:
- Shop hours and days
- Break times
- Appointment duration (15/30/60 min slots)
- Max concurrent appointments
- Configure notifications:
- Confirmation email to customer
- Reminder SMS 24 hours before
- Alert to shop when new booking created
Features:
- Public booking calendar on your website
- Device-type specific appointment types (laptop repair, phone, etc.)
- Estimated cost/duration by device type
- Automatic check-in workflow (customer arrives, triggers intake form)
- Cancellation/rescheduling by customer or shop
- Integration with Analytics (book → check-in → repair pipeline)
Customer Export
Section titled “Customer Export”Export customer contact data for external CRM or marketing.
Setup:
- Shop → Plugins → Customer Export
- Configure export fields:
- Name, phone, email, address
- Repair history (count, date range)
- Device types serviced
- Lifetime spend
- Last service date
- Set export frequency (manual, weekly, monthly)
- Select destination:
- CSV download
- MailChimp / Klaviyo (email marketing)
- Salesforce / HubSpot (CRM)
Use cases:
- Email campaigns (“We haven’t seen you in 6 months…”)
- Target high-value customers for new services
- VIP program enrollment
- Market research
Privacy: Only customers who opted into marketing receive emails. GDPR/CCPA compliant.
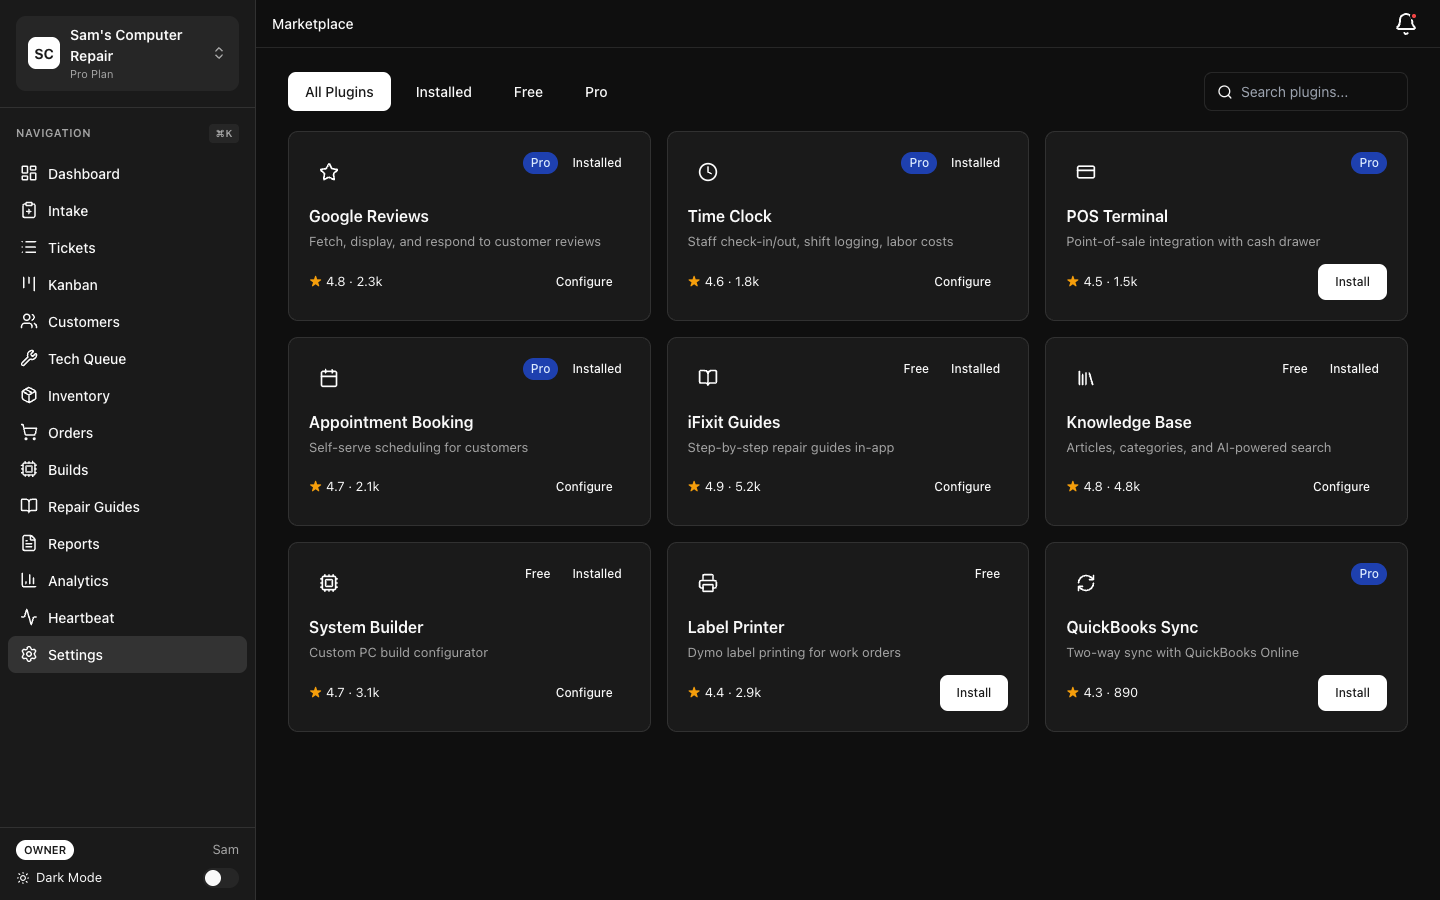
Plugin Marketplace Pro
Section titled “Plugin Marketplace ”Browse, install, and review plugins from the Marketplace:
- Navigate to Shop → Plugin Marketplace
- Browse by category:
- Communication (SMS, email, messaging)
- Integrations (CRM, accounting, scheduling)
- Parts sourcing (supplier APIs)
- Payments (Stripe, Square, PayPal)
- Reporting (custom dashboards)
- Automation (workflow triggers, AI tasks)
- Click a plugin to view:
- Description and screenshots
- Installation instructions
- Pricing (free or Pro/Enterprise only)
- Customer reviews (rating 1-5 stars)
- Required permissions (data access, shop features)
Installing Plugins
Section titled “Installing Plugins”- Click Install on the plugin card
- Review required permissions
- Click Confirm
- Plugin appears in Active Plugins
- Configure (see setup instructions above)
Plugin Reviews
Section titled “Plugin Reviews”Customers can review and rate plugins:
- Open plugin details
- Click Write Review
- Rate 1-5 stars and write feedback
- Submit
Reviews are moderated and appear publicly (helps other shops decide).
Capability-Based Routing
Section titled “Capability-Based Routing”RepairOps uses capabilities to automatically route tasks to the right plugin:
14 Capability Types
Section titled “14 Capability Types”| Capability | Examples | Use For |
|---|---|---|
sms_provider | Twilio, AWS SNS | Send SMS notifications |
email_provider | SendGrid, Mailgun | Send transactional email |
label_printer | Zebra, Brother | Print work order labels |
payments_provider | Stripe, Square, PayPal | Process payment transactions |
parts_provider | Anixter, Tech Data | Auto-source parts from catalog |
rmm_provider | ConnectWise, Kaseya | Remote device management |
review_provider | Google, Yelp, Trustpilot | Manage online reviews |
crmSync | Salesforce, HubSpot | Sync customer records |
accounting_provider | QuickBooks, Xero | Post transactions to accounting |
appointment_provider | Calendly, Acuity, Setmore | Booking and scheduling |
shipping_provider | FedEx, UPS, USPS | Label and track shipments |
voice_provider | Twilio, Vonage | Voice call recording/transcription |
parts_sourcing | BuildCores, iFixit, Newegg | Component databases |
backup_provider | AWS, Google Cloud, Backblaze | Automated backups |
When RepairOps needs to send SMS, it automatically uses the active SMS provider. If multiple are installed, you select the default.
Fallback Chains Enterprise
Section titled “Fallback Chains ”Configure fallback providers for reliability:
- Shop → Plugin Settings → Capability Routing
- Set primary and fallback for each capability:
- Primary: Twilio (SMS)
- Fallback 1: AWS SNS
- Fallback 2: Manual (alert shop if both fail)
- RepairOps auto-fails over if primary is down
This ensures critical workflows (sending customer notifications) continue even if a provider has an outage.
Third-Party Plugin SDK Enterprise
Section titled “Third-Party Plugin SDK ”Develop your own plugins and submit to the marketplace.
SDK includes:
- Plugin manifest specification (capabilities, metadata, UI components)
- Event hooks (ticket created, status changed, payment processed)
- UI component library (buttons, forms, modals)
- Data access APIs (read customer, ticket, inventory data)
- Testing framework and sandbox
See Plugin SDK Documentation for full details.
Plugin Management UI
Section titled “Plugin Management UI”Active Plugins
Section titled “Active Plugins”- Navigate to Shop → Active Plugins
- View installed plugins with status:
- Enabled
- Needs configuration (e.g., API key missing)
- Error (e.g., provider unreachable)
- Click Configure to update settings
- Click Disable to temporarily turn off (data preserved)
- Click Uninstall to remove (data may be preserved or deleted per plugin)
Plugin Logs
Section titled “Plugin Logs”Debug plugin issues:
- Shop → Plugin Logs
- Filter by plugin name and date range
- View:
- API calls made by plugin
- Success/error status
- Response time
- Error messages and stack traces
Useful for:
- Troubleshooting failed integrations
- Auditing data sent to external services
- Performance monitoring
Tier Availability
Section titled “Tier Availability”| Feature | Starter | Pro | Enterprise |
|---|---|---|---|
| Label printer plugin | ✓ | ✓ | ✓ |
| Status check widget | ✓ | ✓ | ✓ |
| PCRT migration | ✓ | ✓ | ✓ |
| Google Reviews | — | ✓ | ✓ |
| Time Clock | — | ✓ | ✓ |
| POS Terminal | — | ✓ | ✓ |
| Appointment Booking | — | ✓ | ✓ |
| Customer Export | — | ✓ | ✓ |
| Plugin marketplace | ✓ | ✓ | ✓ |
| Capability routing | ✓ | ✓ | ✓ |
| Fallback chains | — | — | ✓ |
| Third-party SDK | — | — | ✓ |
| Plugin logs | ✓ | ✓ | ✓ |
Best Practices
Section titled “Best Practices”Start with one plugin — Don’t install 10 plugins at once. Master each one before adding more.
Keep API keys secure — Store API keys in RepairOps, not in shared documents or hardcoded.
Monitor plugin logs — If a plugin stops working, check logs for clues.
Test before deploying — Enable plugins during quiet hours and test workflows end-to-end.
Review permissions — Before installing a plugin, review what data access it requests. Be cautious with plugins requesting full customer or payment data.
Related Features
Section titled “Related Features”- Plugin SDK — Build your own plugins
- POS Terminal — Integrated payment processing
- AI Gateway — AI capabilities extend plugins